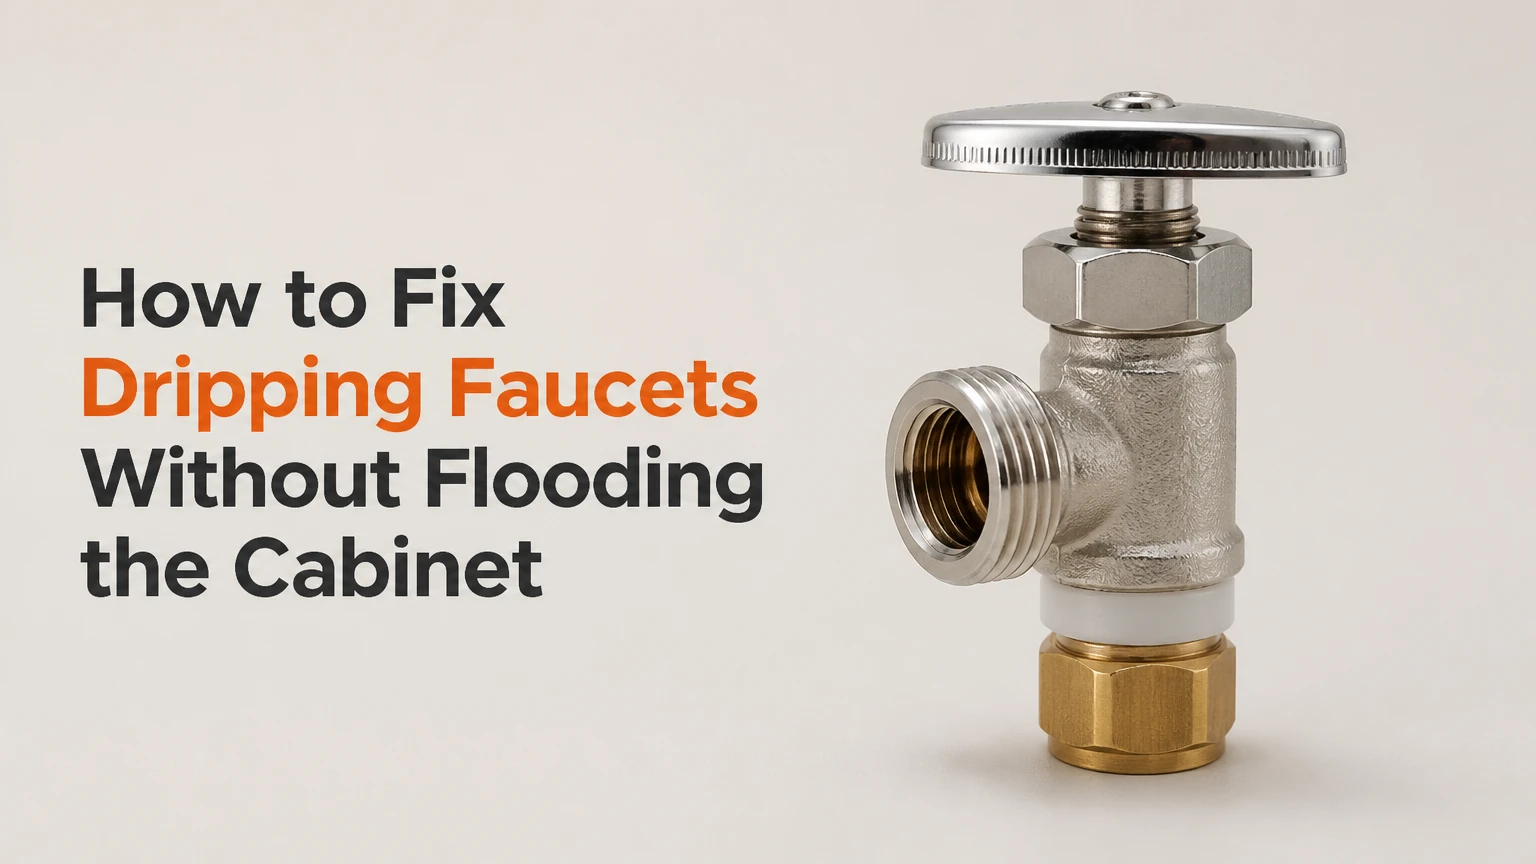
To fix dripping faucets, shut off the water, identify the valve mechanism, replace the worn washer, O-ring, seal, or cartridge, then flush and test the fixture. Most sink-faucet repairs take 30-60 minutes and cost $2-$35 in parts, but the correct replacement component and gentle disassembly determine whether the repair succeeds.
Key Facts at a Glance
A drip from the spout usually indicates a failed internal seal, washer, cartridge, ball seat, or ceramic-disc seal.
Water around the handle usually points to a packing nut, stem O-ring, cartridge O-ring, or damaged valve body.
A compression faucet uses a rubber washer; a cartridge, ball, or ceramic-disc faucet requires a mechanism-specific repair kit.
Typical DIY repair cost is $2-$35, while professional faucet repair commonly costs $150-$350.
Shut off both hot and cold supply valves before removing a handle or retaining nut.
If a valve will not close, a fitting is badly corroded, or water enters the cabinet wall, stop and call a plumber.
Why Faucets Drip
A dripping faucet leaks because pressurized water is bypassing a closed sealing surface. The failed component may be a rubber washer, O-ring, cartridge, ball seal, ceramic-disc seal, valve seat, or faucet body, depending on the fixture design.
A spout drip occurs downstream of the shutoff mechanism. A leak around the handle often occurs above that mechanism, where a stem seal or cartridge O-ring contains water during operation. Water at the base of a kitchen faucet can instead come from the swivel-spout O-rings or the supply connections beneath the counter.
Mineral deposits complicate diagnosis. Calcium carbonate can prevent a cartridge or ceramic disc from closing fully, while grit introduced after plumbing work can score polished sealing surfaces. Cleaning may restore movement, but a cracked cartridge, pitted valve seat, or damaged ceramic disc requires replacement.
The U.S. Environmental Protection Agency states that household leaks can waste “more than 3,000 gallons of water per year.” Actual waste depends on drip rate, pressure, and whether the faucet leaks continuously. A slow leak can also stain the basin, corrode the drain assembly, and create cabinet damage.
Where Is the Water Coming From?
Use the leak location before disassembling anything. Dry the faucet completely, wrap a tissue around suspected joints, and observe the first wet point while the handle is both closed and open.
| Leak location | Likely cause | First inspection |
|---|---|---|
| Spout tip with handle closed | Washer, cartridge, ball seal, ceramic seal, valve seat | Internal valve mechanism |
| Around handle while faucet runs | Packing nut, stem O-ring, cartridge O-ring | Stem or cartridge seal |
| Faucet base on countertop | Swivel O-rings, loose mounting, body gasket | Base and spout joint |
| Supply tube or shutoff valve | Loose compression nut, failed supply line | Under-sink connections |
| Sprayer hose or pull-down head | Hose seal, quick-connect O-ring, diverter | Hose and connection points |
Identify the Faucet Valve
Faucet type determines both the replacement part and the disassembly method. Two handles do not always mean a compression faucet, because two-handle cartridge and ceramic-disc faucets are also common.
| Faucet type | Visible clue | Replacement component | Typical difficulty |
|---|---|---|---|
| Compression | Two handles turn several rotations | Rubber washer, stem O-ring, valve seat | Low |
| Cartridge | Handle lifts or rotates smoothly | Brand-specific cartridge or O-rings | Low to moderate |
| Ball | One lever and rounded dome cap | Seats, springs, ball, cam, seals | Moderate |
| Ceramic disc | One lever or two quarter-turn handles | Disc cartridge or bottom seals | Moderate |
A compression valve has a threaded stem that moves inward and presses a washer against a seat. A cartridge aligns ports inside a removable sleeve. A ball faucet rotates a slotted ball over spring-loaded rubber seats. A ceramic-disc valve uses two hard, polished discs with precisely aligned openings.
The safest way to identify a cartridge is to photograph the faucet, locate the brand marking, and remove the old part only after the water is off. Take the old cartridge to a plumbing supplier. Small differences in stem length, spline count, port position, and body diameter can make visually similar cartridges incompatible.
Which Replacement Part Should You Buy?
Buy the exact model-specific cartridge when the faucet uses a cartridge or ceramic-disc mechanism. Buy a same-diameter washer and matching O-rings for a compression faucet, and use a seat-and-spring kit designed for the ball-faucet model.
Do not select a replacement solely by color or general shape. Measure the old washer, count cartridge splines, photograph the retaining clip, and record whether the handle is hot-side, cold-side, or universal. Manufacturer support pages often identify parts by faucet family and production date.
Before You Start
A dripping faucet repair typically takes 30-60 minutes, costs $2-$35 in parts, and requires basic hand tools. The main prerequisite is a working shutoff valve, because removing a pressurized faucet component can release water faster than the drain can handle it.
Materials and Tools
Prepare an adjustable wrench, Phillips screwdriver, flat screwdriver, Allen-key set, needle-nose pliers, flashlight, rag, sink stopper, silicone plumber’s grease, white vinegar, and the suspected replacement part. Use silicone grease on compatible O-rings, not petroleum jelly, which can degrade some rubber compounds.
| Item | Quantity | Typical price | Purpose |
|---|---|---|---|
| Adjustable wrench | 1 | $10-$25 | Nuts and supply connections |
| Allen-key set | 1 | $5-$15 | Single-handle set screws |
| Washer or O-ring kit | 1 kit | $2-$10 | Compression or stem repair |
| Replacement cartridge | 1 | $15-$35 | Cartridge or disc repair |
| Silicone plumber’s grease | 1 tube | $5-$10 | O-ring lubrication |
| Rag and sink stopper | 1 each | $1-$5 | Water control and parts retention |
Use penetrating oil only on exposed threaded hardware, and keep it away from drinking-water passages unless the product label permits that use. A basin wrench is useful for under-counter connections, but it is not normally needed for an internal washer or cartridge repair.
How to Fix Dripping Faucets: The Safe Sequence
The reliable sequence is to isolate the water, protect the drain, document the assembly, replace the failed sealing component, and test under pressure. The factor that most determines success is correct identification of the valve and replacement part, not the amount of force used.
Step 1: Shut Off Hot and Cold Water
Turn the hot and cold shutoff valves clockwise until they stop, then open the faucet to confirm that flow has stopped. Most under-sink valves sit on the wall-facing ends of flexible supply tubes, although some fixtures use a single integrated shutoff.
Do not force a corroded valve. If the valve spins without closing, leaks around its stem, or will not move with moderate hand pressure, close the home’s main shutoff and arrange repair.
Success checkpoint: The open faucet produces no continuous stream, and pressure falls within several seconds.
Common mistake: Closing only the cold valve. A two-handle faucet can still receive hot water through the open hot supply.
Step 2: Drain the Lines and Protect the Sink
Open the faucet fully and allow residual water to drain. Place the stopper in the drain or cover it with a folded rag, because a retaining screw or spring can disappear into the trap.
Put a towel in the cabinet beneath the supply connections. Keep a shallow container nearby for trapped water. Photograph the handle, cap, clip, and cartridge orientation before removing each part.
Success checkpoint: The faucet is open, the lines are depressurized, and small components cannot enter the drain.
Common mistake: Skipping depressurization. Residual pressure can spray water when the retaining nut or cartridge clip is removed.
Step 3: Remove the Handle
Pry off a decorative cap with a thin flat screwdriver, protecting the finish with a cloth. Remove the exposed Phillips screw, or loosen the small set screw under or behind a single lever with the correctly sized Allen key.
Pull the handle straight upward when possible. Rock it gently from side to side if mineral deposits have bonded it to the stem. Avoid twisting hard against a cartridge stem, since a broken stem can turn a simple seal replacement into a full cartridge repair.
Success checkpoint: The handle comes off without bending the stem or damaging the finish.
Common mistake: Using an oversized Allen key. It rounds the set screw and makes later removal harder.
Step 4: Replace the Failed Valve Component
The internal repair depends on the faucet type. Keep removed components in order, and do not mix hot-side and cold-side cartridges unless the manufacturer identifies them as interchangeable.
Compression faucet
Remove the packing nut with an adjustable wrench and lift out the stem. Remove the small screw and washer at the stem tip, then inspect the washer for flattening, cracking, hardening, or an uneven wear ring.
Install a same-size washer with its flat sealing face oriented toward the valve seat. Replace the stem O-ring if it is brittle or cut, and apply a thin film of silicone grease before reinstalling the stem.
A persistent spout drip after a new washer usually indicates a pitted or rough valve seat. A seat wrench can remove a replaceable seat, while a seat-dressing tool can smooth minor damage. Do not aggressively ream a thin or badly damaged seat.
Cartridge faucet
Remove the decorative sleeve, retaining clip, or retaining nut according to the faucet design. Pull the cartridge straight upward with pliers or a cartridge puller, keeping the tool aligned with the stem.
Compare the old and new cartridges before installation. Match the stem orientation, port locations, retaining-clip groove, and body length. Lubricate replacement O-rings lightly, press the cartridge fully into the valve body, and reinstall the clip or nut.
A cartridge that refuses to move may be held by scale. A dedicated cartridge puller is safer than prying against the faucet body, especially on plastic valve housings.
Ball faucet
Remove the dome cap and lift out the cam, plastic cam washer, and ball. Record the ball slot orientation before removal.
Use a small screwdriver or needle-nose pliers to remove the rubber inlet seats and springs. Replace the seat-and-spring kit, inspect the ball for grooves, and replace the ball if its polished surface is scored. Reinstall the cam and cap in their original orientation.
Ball-faucet repairs often fail because the springs are installed upside down or the cam is misaligned. The spring normally sits beneath the rubber seat, but confirm the kit instructions for the specific model.
Ceramic-disc faucet
Remove the retaining screws or cylinder nut and lift out the disc cartridge. Inspect the bottom seals, cartridge body, and valve housing for grit or mineral scale.
Rinse removable parts and clean light mineral deposits with white vinegar on a cloth. Do not scrape ceramic discs with a screwdriver or abrasive pad. Replace the entire cartridge if either disc is cracked, chipped, or scratched.
Ceramic-disc valves tolerate normal use well but respond poorly to debris. Flush the supply lines after plumbing work before reinstalling a new cartridge.
Success checkpoint: The replacement part seats completely, retaining hardware fits without force, and the handle moves through its normal range.
Common mistake: Crushing an O-ring during installation. A twisted or dry O-ring can leak immediately even when the new cartridge is correct.
Step 5: Reassemble, Flush, and Test
Reinstall the handle and trim in reverse order, leaving the faucet handle open. Slowly open the hot and cold shutoff valves so trapped air and loose debris can exit through the open spout.
Remove and rinse the aerator if flow contains particles. Close the faucet, wait one minute, and inspect the spout, handle, base, supply connections, and cabinet floor with a dry tissue.
Success checkpoint: No tissue becomes wet after the faucet is closed and after it runs for two minutes at both temperature settings.
Common mistake: Opening the supply valves abruptly with the handle closed. A slow opening reduces pressure shock and gives debris a path out of the fixture.
Repair or Replace the Faucet?
Repairing the internal seal is usually the better choice when the faucet body is sound and the part costs less than one-third of a comparable replacement fixture. Replacement becomes more practical when corrosion, repeated cartridge failure, damaged threads, or a leaking body makes the repair uncertain.
| Situation | Repair option | Typical cost | Better decision |
|---|---|---|---|
| Compression faucet, sound body | Washer and O-ring kit | $2-$10 | Repair |
| Cartridge faucet, available part | Model-specific cartridge | $15-$35 | Repair |
| Ball faucet with scored ball | Ball and seat kit | $10-$30 | Repair if body is sound |
| Faucet body cracked or corroded | Complete faucet | $60-$300 | Replace |
| Faucet older than 15 years, repeated leaks | New ceramic-disc fixture | $100-$500 | Compare replacement |
| Loose base with damaged mounting hardware | Mounting repair or new fixture | $20-$300 | Inspect before choosing |
A modern ceramic-disc faucet is not automatically the best replacement. It can reduce routine washer replacement, but its cartridge may cost more, and contaminated water can still damage the sealing surfaces. Preserve a repairable faucet when the finish, mounting, and supply connections remain sound.
Common Failures After a Repair
A faucet that still drips after repair usually has a wrong part, damaged mating surface, trapped debris, incorrect orientation, or a second failed seal. Repeating the same washer or cartridge replacement without inspecting the valve body rarely solves the underlying problem.
| Symptom after repair | Probable cause | Corrective action |
|---|---|---|
| Spout still drips | Wrong cartridge, damaged seat, debris | Verify part, clean ports, inspect seat |
| Handle leaks when open | Torn O-ring, loose packing nut | Replace O-ring, tighten gradually |
| Handle is stiff | Dry seal, misaligned cartridge, scale | Re-seat, lubricate, clean deposits |
| Base leaks during swivel | Worn spout O-rings | Replace and grease O-rings |
| Low flow after repair | Clogged aerator or inlet screen | Remove, rinse, and flush |
| Water leaks under sink | Loose supply or mounting connection | Dry, identify first wet joint, retighten |
Overtightening is a frequent DIY error. Hand-tighten parts first, then add a small wrench adjustment, usually about one-quarter turn, while checking the seal. Excess torque can strip threads, distort washers, crack plastic retaining nuts, and damage flexible supply lines.
If the faucet drips only when the handle is open, the problem is not the closed valve seal alone. Water may be escaping through the stem, spout O-rings, diverter, or body joint, so isolate the first wet point rather than replacing the cartridge blindly.
When Should You Stop and Call a Plumber?
Call a plumber when the main shutoff is inaccessible, a shutoff valve will not close, a copper or plastic line twists inside the wall, or water appears beneath the cabinet or behind the wall. A licensed plumber is also appropriate when the faucet is part of a shared building system or the repair may affect another unit.
Renters should report the leak to the landlord or property manager before disassembly. Lease terms, local maintenance rules, and security-deposit conditions may assign fixture repairs to the property owner.
Stop immediately if a wrench begins turning the pipe rather than the nut. Support the connection, close the main water valve, and avoid converting a small faucet leak into a concealed supply-line failure.
How Much Does Faucet Repair Cost?
Typical DIY faucet repair costs $2-$35 for washers, O-rings, or a replacement cartridge. Professional service commonly totals $150-$350, depending on travel charges, regional labor rates, access, fixture age, and whether the plumber replaces the entire faucet.
| Repair scenario | DIY parts | Typical professional total | Typical time |
|---|---|---|---|
| Compression washer | $2-$10 | $150-$250 | 30-45 minutes |
| Cartridge replacement | $15-$35 | $175-$350 | 30-90 minutes |
| Ball seat-and-spring kit | $10-$30 | $175-$325 | 45-90 minutes |
| Ceramic-disc cartridge | $20-$60 | $200-$400 | 45-90 minutes |
| Complete faucet replacement | $60-$300 | $250-$700 | 1-3 hours |
These are typical planning ranges, not guaranteed quotes. A seized cartridge, inaccessible shutoff, corroded supply line, or wall repair can increase the total substantially.
Variations for Common Faucet Situations
How Do You Fix a Single-Handle Kitchen Faucet?
For a single-handle kitchen faucet, first determine whether the lever controls a cartridge, ball, or ceramic-disc valve. A leak at the spout usually requires an internal seal repair, while water around the swivel base usually requires replacement of the spout O-rings.
Pull-down and pull-out faucets add a hose and quick-connect fitting. Do not confuse a hose connection leak with a valve leak. Dry each connection separately while operating the spray head, then replace the relevant O-ring or hose assembly.
How Do You Fix a Two-Handle Bathroom Faucet?
A two-handle bathroom faucet may use compression stems, cartridges, or ceramic discs. Shut off both supplies, but test one side at a time if only hot or cold water drips, because the leaking side often identifies the failed valve.
If both handles must be turned several rotations, start with a compression washer inspection. If each handle turns only 90 or 180 degrees, identify the cartridge or disc model before buying parts.
How Do You Fix a Bathtub Faucet That Drips?
A bathtub faucet may use a cartridge or compression stem located behind a trim plate, and its supply shutoff may be at the fixture, in an access panel, or at the home’s main valve. Remove the handle and trim carefully because concealed wall fittings are easier to damage than sink hardware.
A tub spout drip can waste water and stain the tub, but a wall-side leak is more urgent. If water appears behind the trim plate or enters the wall cavity, stop using the fixture until the valve and surrounding waterproofing are inspected.
FAQ
Can I stop a dripping faucet without replacing parts?
Temporary tightening may slow a loose handle or packing nut, but it rarely repairs a worn sealing surface. Do not use tape, glue, or sealant inside the valve. Those materials can break loose, restrict flow, and make the correct repair more difficult.
Why does a faucet drip only at night?
A faucet may appear to drip at night because household noise is lower, but pressure changes can also expose a marginal seal. Thermal contraction in hot-water components may alter the leak rate. Check the faucet after several hours with the basin dry and the supply pressure unchanged.
Should I replace the washer or the whole cartridge?
Replace the washer when a compression stem has a sound seat and accessible parts. Replace the entire cartridge when its body is cracked, its ports are worn, its stem is damaged, or the manufacturer specifies a cartridge assembly rather than individual seals.
Is plumber’s tape needed to fix a dripping faucet?
Plumber’s tape is generally unnecessary for internal faucet seals and should not be placed on compression threads or cartridge retaining nuts. Use tape only on compatible tapered pipe threads, following the fitting and faucet manufacturer’s instructions.
How can I prevent another faucet leak?
Install a sediment-free aerator, avoid forcing the handle past its stop, clean mineral deposits before they harden, and repair supply-line debris after plumbing work. Do not overtighten handles, because excessive force accelerates washer and cartridge wear.
The Bottom Line
To fix dripping faucets, diagnose the leak location, shut off both water supplies, identify the internal valve, and replace the matching washer, O-ring, seal, or cartridge. Most repairs take 30-60 minutes and cost $2-$35 when the faucet body and shutoff valves are sound. If corrosion, hidden water, or a seized valve appears, stop before the small drip becomes a larger plumbing failure.