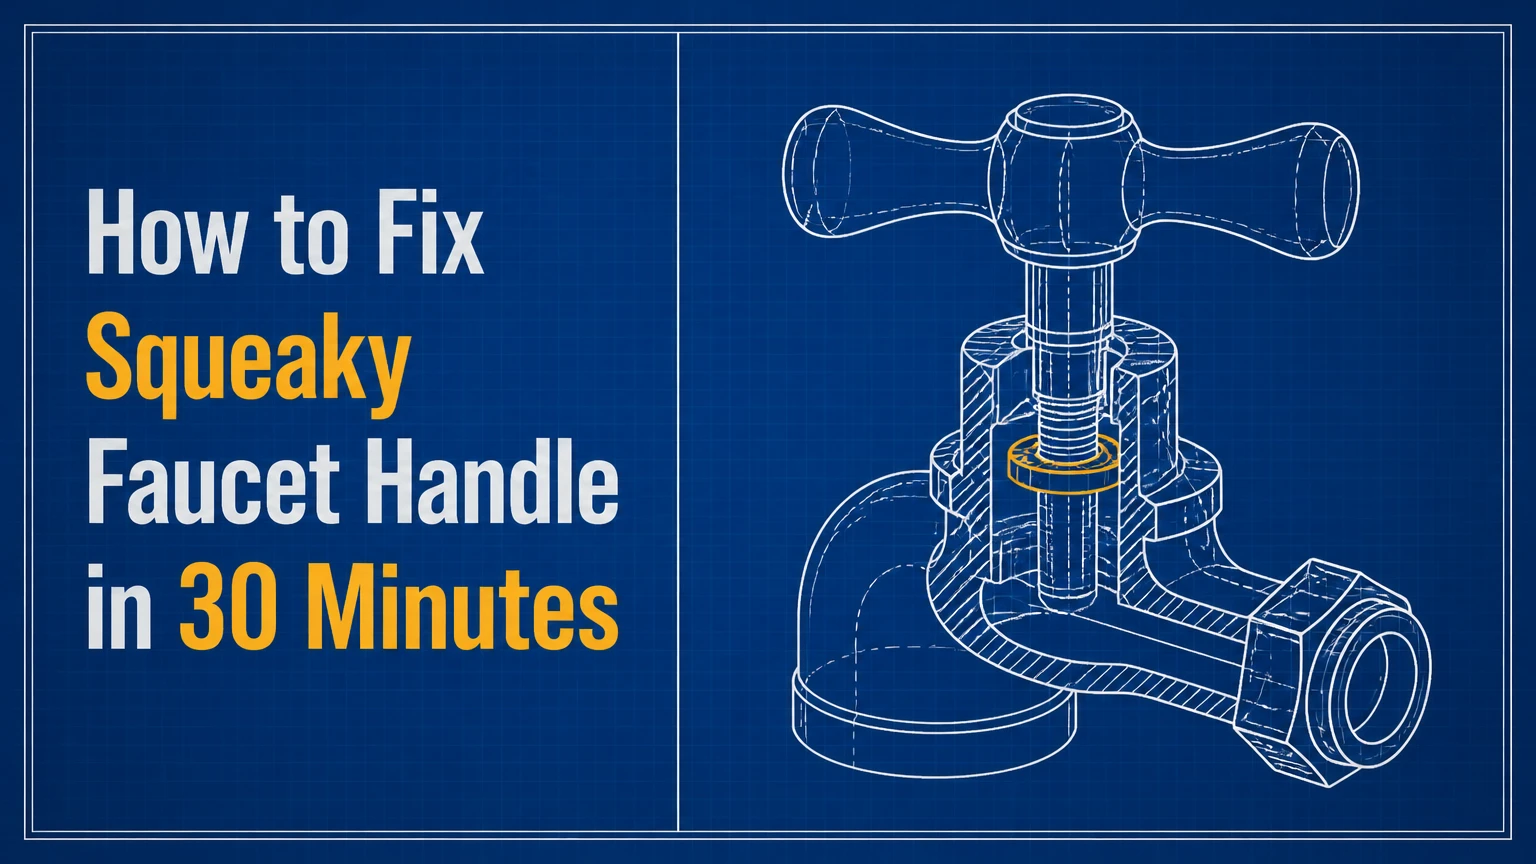
To fix a squeaky faucet handle, shut off the water, remove the handle, clean mineral buildup, and apply a thin layer of faucet-safe silicone plumber’s grease to the moving stem, cartridge seals, or O-rings. If the handle still squeaks, feels gritty, leaks, or binds after lubrication, replace the worn cartridge or valve stem instead.
Key facts at a glance
A handle squeak usually comes from dry friction between a stem, cartridge, O-ring, seal, or retaining component.
The correct lubricant is NSF-rated silicone faucet grease, not WD-40, penetrating oil, or petroleum jelly.
A typical repair takes 15-45 minutes and costs $3-$8 for grease, excluding replacement parts.
Single-lever faucets usually contain cartridges or ball valves; two-handle faucets may use compression, cartridge, or ceramic-disc valves.
A squeak accompanied by a leak, grinding, severe stiffness, or visible corrosion usually indicates a worn valve component.
Vinegar can remove mineral scale from removable metal parts, but prolonged soaking can damage finishes, rubber, and some cartridge materials.
How to Fix Squeaky Faucet Handle: Diagnose It First
A squeaky faucet handle makes noise only while the handle moves, so the sound usually originates in the handle or valve assembly rather than the water supply pipe. Confirming the noise location prevents an unnecessary cartridge replacement when the actual problem is a loose decorative cap, dry handle socket, or rubbing escutcheon.
Move the handle slowly through its full range while listening closely. Place a fingertip on the handle base, retaining nut, and faucet body. Vibration at the base points toward mechanical friction; a sound from the spout during water flow points toward aerator restriction or pressure turbulence instead.
| Symptom | Most likely source | First action |
|---|---|---|
| Squeaks only while lever moves | Cartridge stem, O-ring, handle socket | Remove handle and inspect contact points |
| Squeaks while turning one knob | Compression stem or packing nut | Lubricate exposed stem and inspect packing |
| Squeaks with a gritty sensation | Scale or damaged cartridge | Remove, clean, and test the valve component |
| Squeaks while water runs, not while moving handle | Aerator, supply restriction, pressure turbulence | Clean the aerator before opening the valve |
| Banging after closing the tap | Water hammer in supply piping | Inspect pipe support and hammer arrestor needs |
| Squeak plus water around handle | Failed cartridge seal or packing | Replace the seal, cartridge, or stem assembly |
A water hammer is a banging or knocking event caused by rapidly changing water velocity. A faucet whistle is generally an airflow or pressure-related sound at the spout or aerator. Neither problem is fixed by greasing the handle.
What faucet valve do you have?
A single-lever mixer most often uses a cartridge, ceramic-disc cartridge, or ball assembly, while a two-handle faucet can use compression stems, cartridges, or ceramic-disc valves. Faucet appearance alone is not conclusive, because many modern two-handle fixtures conceal cartridge valves beneath decorative caps.
Use the handle behavior as a preliminary clue:
- A handle that rotates several turns and rises as it opens usually uses a compression stem.
- A single lever that moves through an arc usually uses a cartridge or ball valve.
- A two-handle faucet that turns only a quarter or half turn commonly uses a cartridge or ceramic-disc valve.
- A handle that rocks forward and backward with a rounded cap may use a ball assembly.
- A manufacturer logo, model number, or replacement-parts diagram provides the reliable identification.
Photograph the faucet before disassembly. The brand, handle orientation, retaining hardware, and cartridge alignment are valuable evidence when parts look similar.
What tools and materials do you need?
A basic repair requires an adjustable wrench, the correct hex key or screwdriver, a small pick, a towel, and NSF-rated silicone plumber’s grease. Typical material cost is $3-$8 for grease, while a compatible cartridge or stem generally costs $10-$100.
Before you start
| Requirement | Typical specification | Why it matters |
|---|---|---|
| Repair time | 15-45 minutes | Includes removal, cleaning, lubrication, and testing |
| Difficulty | Beginner to intermediate | Seized hardware can increase difficulty |
| Silicone grease | 2-5 grams applied | A thin film is sufficient for most valves |
| Adjustable wrench | 6-8 inches | Fits common retaining nuts and supply fittings |
| Hex keys | 1.5-3 millimeters typical | Fits many lever set screws |
| White vinegar | 120-240 milliliters | Enough for a small parts container |
| Replacement part | $10-$100 typical | Required when seals or cartridges are damaged |
| Protection | Towel, drain stopper, soft cloth | Prevents lost screws and finish damage |
Use eye protection when removing corroded hardware. Do not force a wrench against a thin decorative sleeve, because polished brass, chrome, brushed nickel, and painted finishes can deform or scratch.
Step 1: Shut off water and release pressure
Turn off both under-sink supply valves by rotating each handle clockwise until it stops, then open the faucet to release residual pressure. If either shutoff valve does not close fully, close the home’s main water valve before removing a cartridge or stem.
Place a stopper or folded towel over the drain. Small handle screws and retaining clips can fall directly into the drain opening. Keep a shallow container below the supply connections if the cabinet contains residual water.
Success checkpoint: Water flow should stop within several seconds, with only a brief dribble from trapped water.
Common mistake: Many people close only the cold-water valve on a single-lever faucet. Both hot and cold supplies must be isolated because the cartridge connects to both inlets.
Step 2: Remove the handle without damaging the finish
Locate the handle fastener, which may be hidden beneath a plastic index cap, a rubber plug, or a rear access opening. Remove the cap with a small flat screwdriver protected by a cloth, then loosen the set screw with the correctly sized hex key or screwdriver.
Pull the handle straight upward or outward according to its design. Do not twist aggressively against the faucet body. If the handle is seized by scale, apply a small amount of penetrating oil only to the metal joint, wait 10-15 minutes, and keep the product away from rubber seals and the water passage.
Success checkpoint: The handle should separate while the faucet body remains stationary.
Common mistake: A slightly undersized hex key rounds the set screw. Try metric and imperial sizes carefully, and press the key fully into the fastener before turning.
Step 3: Remove the cartridge, stem, or ball assembly
Remove the decorative sleeve, retaining clip, bonnet nut, or packing nut in the order shown by your faucet’s service diagram. Use an adjustable wrench with a soft cloth between the jaws and finished metal. Turn the retaining nut counterclockwise while holding the faucet body steady.
Pull the valve component straight out. A cartridge puller may be necessary when mineral deposits lock the cartridge into the faucet body. Photograph the alignment tabs, hot-cold orientation, and clip position before extraction.
Success checkpoint: The valve assembly comes out without fragments remaining inside the faucet body.
Common mistake: Prying sideways against a plastic cartridge can break the faucet housing. Use a cartridge puller or controlled rocking motion instead.
What if the handle or cartridge is stuck?
A stuck faucet handle usually results from mineral scale, corrosion, or a distorted set screw. Remove visible scale with a cloth dampened in vinegar, use a handle puller for stubborn handles, and replace severely corroded hardware rather than applying excessive force.
A stuck cartridge requires greater caution. Some manufacturers provide a cartridge-extraction tool, and the correct tool is safer than channel-lock pliers because it applies pulling force along the valve axis. If the faucet body begins turning in the countertop, stop and secure the faucet from below.
Step 4: Clean scale and inspect the moving parts
Wipe the faucet-body cavity with a clean cloth or cotton swab to remove grit. Soak removable metal stems or retaining hardware in white vinegar for 15-30 minutes, then brush away softened mineral scale and rinse the parts thoroughly.
Do not automatically soak an entire cartridge. Ceramic discs, plastic bodies, rubber seals, plated finishes, and manufacturer-specific lubricants can react poorly to extended acid exposure. For a cartridge, clean the exterior with a damp cloth and replace it if the stem is pitted, cracked, distorted, or rough after cleaning.
Inspect the following areas:
- O-rings that appear flattened, swollen, cut, brittle, or discolored.
- Stem surfaces with rust, scoring, pitting, or a rough wear track.
- Cartridge tabs and body ears that are cracked or deformed.
- Compression-stem threads with scale or cross-threading.
- Packing material that is dry, compressed, or leaking.
- Faucet-body walls with deep corrosion or damaged sealing surfaces.
Success checkpoint: The valve component should move smoothly by hand before lubricant is applied.
Common mistake: Scraping scale with a steel screwdriver can score the sealing surface. Use a nylon brush, plastic pick, or wooden stick on brass and plastic parts.
Step 5: Apply silicone faucet grease
Apply a thin, even film of NSF-rated silicone plumber’s grease to the cartridge O-rings, stem sealing surfaces, handle socket, and appropriate valve threads. Silicone grease reduces friction and resists water exposure without attacking common faucet elastomers.
Use approximately a pea-sized amount for a single cartridge and less for a small compression stem. Excess grease does not improve lubrication; it can collect grit and make reassembly messy. Keep grease away from ceramic-disc faces, faucet aerators, and water outlets unless the manufacturer specifically instructs otherwise.
Manufacturers such as Moen, Delta, and Kohler commonly specify silicone-based lubricant for faucet O-rings and seals in service instructions. The material compatibility matters more than brand name: petroleum grease can swell some rubber compounds, while general-purpose oils can migrate into areas where drinking water passes.
Success checkpoint: The O-rings look wet with a fine film, not covered in lumps or excess grease.
Common mistake: WD-40 is a water-displacing penetrant and solvent, not a durable faucet-seal lubricant. Petroleum jelly may soften or swell certain elastomers, so neither product is a reliable substitute for silicone faucet grease.
Step 6: Reassemble, restore water, and test
Reinsert the cartridge or stem in its original orientation, matching alignment tabs with the slots in the faucet body. Reinstall the retaining clip or nut, tighten it snugly, and stop when the component is secure. Excessive force can distort O-rings, crack plastic parts, or make the handle harder to move.
Replace the handle and set screw, then open each shutoff valve slowly. Run cold and hot water for several seconds, inspect the handle base and supply connections, and move the handle repeatedly through its normal range.
Success checkpoint: The handle moves quietly without binding, the faucet delivers water normally, and no water appears around the handle or retaining nut.
Common mistake: Reversing a cartridge can produce reversed hot and cold operation or prevent the handle from reaching its full range. The pre-removal photograph prevents this error.
Which repair fits your faucet type?
Cartridge, compression, ceramic-disc, and ball faucets need different repair decisions because their internal wear patterns are not interchangeable. Lubricating a compression stem can help exposed threads, but greasing cannot repair a damaged washer; lubricating a ceramic-disc cartridge cannot repair cracked discs.
| Faucet type | Identifying feature | Typical squeak source | Correct repair |
|---|---|---|---|
| Compression | Knob turns multiple revolutions | Dry stem threads or packing | Clean and grease stem; replace washer or packing if leaking |
| Cartridge | Lever moves through an arc | O-ring, stem, or mineral scale | Clean and grease exterior seals; replace cartridge if worn |
| Ceramic disc | Quarter-turn lever or two handles | Dry seals or damaged disc carrier | Use approved grease; replace cartridge for gritty movement |
| Ball valve | Rounded cap and single lever | Ball seals, springs, or cam friction | Clean and grease approved surfaces; replace worn seals |
| Pull-out sprayer valve | Single lever with flexible hose | Cartridge or handle socket | Repair valve; inspect hose only if sound occurs during movement |
How do you repair a compression faucet?
Remove the handle and packing nut, expose the threaded stem, clean scale from the threads, and apply silicone grease to the stem and packing surfaces. If the faucet drips when closed, replace the worn rubber washer or valve seat because grease alone cannot restore a sealing surface.
Compression stems are mechanically simple, but repeated force can damage the valve seat. Turn the stem by hand during testing before reinstalling the handle. A stem that feels rough after cleaning usually needs replacement rather than more lubricant.
How do you repair a cartridge faucet?
Remove the handle and retaining hardware, pull the cartridge, clean the cavity, lubricate compatible O-rings, and reinstall the cartridge in its original orientation. Replace the cartridge when the stem is scored, the handle remains stiff, the faucet leaks from the handle, or the squeak returns quickly.
A cartridge is a matched assembly. Replacing only one internal seal may be impractical because the ceramic or plastic valve surfaces can also be worn. Record the faucet brand and model before buying a replacement, since visually similar cartridges often differ in length, tab position, and hot-cold orientation.
Should you lubricate or replace the valve?
Lubrication is the better first repair when the faucet is under approximately five years old, has no leak, and the valve moves smoothly after scale removal. Replacement is the better choice when the faucet is corroded, the handle leaks, the valve remains gritty, or the squeak returns within weeks.
| Condition | Lubricate first | Replace component |
|---|---|---|
| Faucet age | Under 5 years | More than 10 years or unknown |
| Handle movement | Smooth but noisy | Gritty, binding, or increasingly stiff |
| Water leakage | None | Leak from handle or valve body |
| Surface condition | Light scale | Pitting, cracks, corrosion, or scoring |
| Squeak recurrence | Absent for months | Returns within days or weeks |
| Part availability | Model is identifiable | Cartridge is obsolete or unavailable |
Lubrication costs less than $10 and preserves the existing valve, but it cannot reverse metal pitting, cracked plastic, flattened seals, or damaged ceramic discs. A replacement cartridge commonly costs $10-$100, while professional labor for faucet repair typically ranges from $100-$350 depending on access, region, and fixture complexity.
What repair is best for renters and vintage-faucet owners?
Renters should choose a reversible cleaning and lubrication repair when the landlord permits minor maintenance, then report leaks or damaged shutoff valves. Vintage-faucet owners should prioritize model identification and finish protection because replacement stems may be harder to source than modern cartridges.
A renter should not replace a cartridge without confirming responsibility for the fixture. A vintage fixture may require a stem-specific rebuild kit, a seat wrench, or a specialty packing material rather than a universal cartridge. Use a strap wrench or padded wrench on polished metal, and avoid forcing a corroded fitting that could damage the sink deck.
How much does the repair cost and how long does it take?
A basic squeaky-handle repair typically takes 15-45 minutes and costs $3-$8 when cleaning and silicone grease solve the problem. A cartridge replacement usually takes 30-60 minutes and costs $10-$100 for the part, while a plumber commonly charges $100-$350 for labor and service.
| Repair path | Parts cost | Typical time | Best use |
|---|---|---|---|
| Clean and grease handle | $0-$8 | 15-30 minutes | Dry friction or light scale |
| Replace O-rings | $1-$5 | 30-45 minutes | Cut or flattened external seals |
| Replace compression washer | $1-$5 | 30-45 minutes | Dripping multi-turn faucet |
| Replace cartridge | $10-$100 | 30-60 minutes | Worn or leaking cartridge |
| Replace faucet | $50-$500+ | 1-3 hours | Corroded body or obsolete parts |
| Hire a plumber | $100-$350 labor | 1-2 hours | Seized parts or poor access |
Prices vary by brand, region, finish, and whether the faucet uses a proprietary part. A low-cost generic cartridge may fit poorly, leak, or produce different handle resistance; an OEM cartridge costs more but usually provides the correct geometry and seal material.
Common mistakes and recovery steps
Incorrect lubricant, excessive force, and incomplete testing account for many failed faucet-handle repairs. Each mistake has a practical recovery, but some errors require replacing damaged hardware rather than repeating the original procedure.
| Mistake | Result | Recovery |
|---|---|---|
| Using WD-40 inside the valve | Temporary quieting, later dryness | Clean accessible parts and apply silicone grease |
| Using petroleum jelly | Swollen or deteriorated seal | Replace affected O-rings or cartridge |
| Overtightening retaining nut | Binding handle or crushed seal | Loosen, realign, inspect, and retighten snugly |
| Soaking whole cartridge in vinegar | Damaged plastic or seals | Rinse immediately; replace if movement worsened |
| Losing set screw down drain | Missing hardware | Close stopper first; retrieve from trap if necessary |
| Reinstalling cartridge backward | Reversed temperature or poor range | Shut off water and reinstall in original orientation |
A practical rule of thumb is to tighten a retaining nut only until the cartridge is stable, then add roughly a quarter turn if needed. Exact torque varies by manufacturer, so a service manual takes priority over generic wrench force.
Another counterintuitive point is that a quieter handle is not proof of a successful repair. A damaged seal can become quiet while still leaking, so always test both handle movement and the dry condition of the faucet base after several minutes.
When should you stop and call a plumber?
Call a plumber when the shutoff valve will not isolate water, the faucet body twists in the countertop, the cartridge breaks inside the housing, or corrosion threatens the supply connection. Professional help is also appropriate when the repair requires opening a wall, replacing a seized valve, or working on a fixture connected to a shared commercial or multifamily water system.
Stop immediately if:
- Water continues flowing after both local shutoffs are closed.
- A supply-line fitting begins leaking or rotates inside the cabinet.
- The faucet body lifts or twists while removing the retaining nut.
- The cartridge fragments and cannot be extracted without force.
- The faucet body, countertop, or wall connection shows active corrosion.
- The handle remains difficult to move after a new cartridge is installed.
A faucet-body defect is not a lubrication problem. Repeatedly greasing a misaligned or cracked valve can postpone the leak without removing the cause.
What should you do if the squeak returns?
A squeak that returns within days or weeks usually indicates worn sealing surfaces, a damaged cartridge, persistent hard-water scale, or a handle component rubbing against the faucet body. Remove the handle again, check for fresh metal scoring and scale, and replace the valve component if the lubricated surfaces remain rough.
Hard water accelerates mineral deposition, but water hardness does not automatically justify replacing the entire faucet. A cartridge replacement is usually sufficient when the faucet body is sound and a compatible part remains available. If scale repeatedly returns, clean the aerator and inspect supply strainers, but do not add chemical descaler to drinking-water lines.
FAQ
Can I fix a squeaky faucet without shutting off the water?
You can sometimes quiet a dry handle socket without opening the valve, but shutoffs are required before removing a cartridge, stem, retaining nut, or seal. Water pressure can eject parts and flood the cabinet. Close both supply valves, open the faucet, and verify that flow has stopped before disassembly.
Is food-grade silicone grease safe for a faucet handle?
Food-grade silicone grease may be suitable when its label identifies compatibility with the faucet’s seals and potable-water applications, but ordinary food-safe grease is not automatically the correct plumbing lubricant. Use NSF-rated silicone faucet grease recommended for O-rings, and keep the product out of the water passage unless the manufacturer permits it.
Can hard water make a faucet handle squeak?
Hard-water scale can make a faucet handle squeak by roughening the stem, trapping mineral particles around O-rings, or restricting cartridge movement. Vinegar can soften removable mineral deposits, but a heavily scaled, pitted, or gritty cartridge normally needs replacement rather than repeated soaking.
Why does my faucet squeak only when the water is hot?
Heat can expand metal and elastomer components, changing the clearance between the handle, stem, and valve seals. Hot water can also expose a marginal cartridge seal that remains quiet when cold. Test the handle with the water off, then compare hot and cold operation to separate temperature-related valve friction from flow noise.
Will replacing the handle fix the squeak?
Replacing the handle fixes the squeak only when the handle socket, set screw, or decorative trim is rubbing against the faucet body. A squeak caused by the cartridge, compression stem, packing, or O-ring will remain after a new handle is installed. Identify the vibration location before buying parts.
How often should faucet valve grease be reapplied?
A correctly lubricated faucet does not have a universal reapplication interval. Reapply grease only when the valve is opened for service, because unnecessary disassembly can damage seals. If movement becomes noisy again within a short period, replace the worn cartridge or stem instead of repeatedly adding lubricant.
The Bottom Line
To fix a squeaky faucet handle, isolate the water, identify the valve type, remove the handle and retaining hardware, clean scale, and apply a thin film of NSF-rated silicone plumber’s grease to compatible moving seals and threads. Test for leaks and binding after reassembly. If the squeak returns quickly or the handle leaks, replace the cartridge, stem, or damaged seal rather than applying more lubricant.