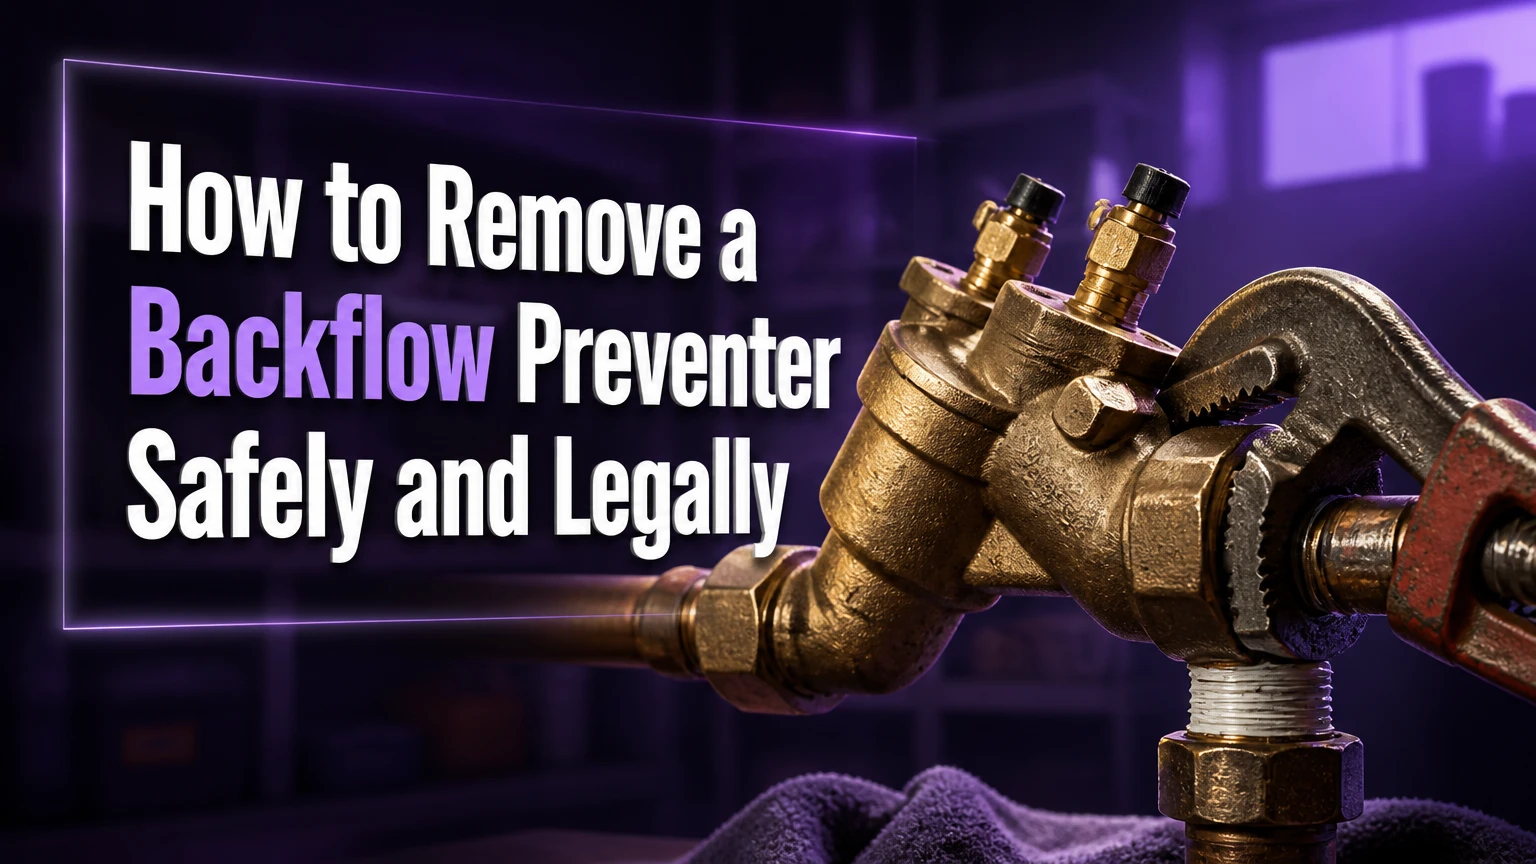
To remove a backflow preventer, first obtain approval if your water authority requires it, shut off and depressurize the line, disconnect the assembly without twisting connected piping, then replace it with an approved device or permanently cap the abandoned branch. A backflow preventer must not be removed and replaced with an unprotected open pipe.
Safety boundary: A licensed plumber or certified backflow professional should handle commercial RPZ units, fire-sprinkler lines, boiler connections, chemical systems, buried services, and any assembly required by the water supplier.
Key Facts at a Glance
- A backflow preventer protects potable water from backsiphonage and backpressure.
- Removing a device does not automatically remove the cross-connection or cancel a testing obligation.
- A replacement assembly must match the required protection level, flow capacity, orientation, and local approval.
- Typical residential removal or replacement takes 1-3 hours when unions or threaded connections are accessible.
- A permanently abandoned branch must be capped using plumbing methods accepted by the local authority.
- A new testable assembly generally requires commissioning by a certified backflow tester after installation.
What a Backflow Preventer Does
A backflow preventer is a plumbing assembly that permits water to flow toward the customer while blocking contaminated or non-potable water from returning to the potable supply. The device protects against backsiphonage, caused by reduced supply pressure, and backpressure, caused when downstream pressure exceeds supply pressure.
The U.S. Environmental Protection Agency describes backflow as “the undesirable reversal of flow of non-potable water or other substances through a cross-connection and into the public water system.” That definition explains why removal is a public-health and code issue, not merely a fitting-removal exercise.
A hose, irrigation pipe, boiler, chemical tank, swimming pool, or fire system can create a cross-connection. If supply pressure falls because of a water-main break, firefighting demand, or hydrant use, backsiphonage can draw that material backward. A booster pump, elevated tank, boiler, or pressurized irrigation system can create backpressure.
Why removing the device can create a hazard
A backflow preventer contains checks, springs, air inlets, or a relief chamber that interrupts reverse flow. A straight replacement pipe removes that protective function. The downstream system may still contain fertilizer, stagnant water, corrosion products, chemicals, or microorganisms even when the line appears inactive.
The American Society of Sanitary Engineering and local water suppliers classify assemblies by hazard and hydraulic condition. Local rules vary, but water suppliers commonly require registration, periodic testing, approved devices, and notice when a protected connection is altered or abandoned.
Which Device Are You Removing?
Identify the assembly before selecting tools or a replacement. The device type determines whether it protects against backsiphonage only, handles backpressure, discharges water during a fault, or requires annual certification.
| Device | Typical hazard protection | Common location | Removal implication |
|---|---|---|---|
| Atmospheric vacuum breaker, AVB | Backsiphonage; intermittent flow | Hose connection, irrigation zone | Cannot protect continuous pressure in many codes |
| Pressure vacuum breaker, PVB | Backsiphonage; continuous supply | Residential sprinkler manifold | Must remain upright and above downstream outlets |
| Double-check valve assembly, DCVA | Backsiphonage and backpressure | Low-hazard irrigation or fire service | Two checks require correct flow direction and testing |
| Reduced-pressure zone, RPZ | High-hazard backsiphonage and backpressure | Chemical, medical, commercial, irrigation | Relief discharge needs drainage clearance and certified testing |
Look for a flow arrow, manufacturer name, model number, test cocks, shutoff valves, air-inlet bonnet, or relief port. Photograph the complete assembly and measure pipe size before ordering anything. A 1-inch nominal pipe does not prove that every 1-inch device has the same pressure-loss or hazard rating.
Can a check valve replace a backflow preventer?
A generic check valve is not automatically an acceptable replacement for a listed backflow prevention assembly. A check valve may lack independent redundancy, test ports, pressure-zone monitoring, or the certification required for the connection’s hazard classification.
An air gap can be an approved alternative in some applications because it physically separates the potable outlet from the receiving vessel. A hose-bib vacuum breaker may protect a single hose connection, but it does not replace a PVB, DCVA, or RPZ on an irrigation, boiler, or chemical line unless the authority having jurisdiction specifically accepts that arrangement.
Before You Start
Do not begin by loosening the first union. Confirm the legal status, stored pressure, connection type, and replacement plan first.
Preparation checklist
| Item | Typical residential requirement | Commercial or special-system requirement |
|---|---|---|
| Work duration | 1-3 hours | 4-8 hours or scheduled shutdown |
| Parts budget | $50-$700 | $500-$3,000 or more |
| Water isolation | Main valve plus assembly valves | Site isolation plan and owner notification |
| Testing | Required for many testable replacements | Certified tester and authority submission |
| Tools | Two wrenches, bucket, cutter | Socket set, lifting method, calibrated test equipment |
| Main risk | Flooding or pipe damage | Contamination, fire impairment, service interruption |
Tools and materials
Prepare two correctly sized pipe wrenches or adjustable wrenches, a backup wrench, bucket, absorbent towels, flashlight, marker, replacement gaskets or unions, approved caps or fittings, and thread sealant compatible with the pipe material. Add a tubing cutter for copper, a plastic-rated cutter for approved plastic pipe, and a socket set for flanges.
Do not rely on the small test-cock screwdriver opening to control a pressurized system. Test cocks can discharge forcefully, break, or remain blocked by debris. The upstream isolation valve is the primary means of stopping flow.
Confirm permission and system ownership
Call the water supplier, municipal cross-connection office, property manager, or fire-protection authority before disassembly. Ask four specific questions:
- Is the assembly registered or tracked by serial number?
- Is a permit, abandonment form, or inspection required?
- Must a certified tester document the final condition?
- Which replacement models and installation orientations are approved?
A private irrigation branch may have simpler procedures than a commercial RPZ, but the distinction must come from the authority having jurisdiction. Never assume that a device on private property is outside the water supplier’s rules.
How to Remove a Backflow Preventer
The following sequence applies to an accessible residential or light-commercial assembly with a confirmed isolation point. Stop if the line cannot be positively isolated, if the pipe moves inside a wall, or if the device protects fire, medical, chemical, or boiler equipment.
Step 1: Photograph and identify the assembly
Record the manufacturer, model, pipe size, flow direction, valve positions, test-cock locations, and connection arrangement. Mark the inlet side and outlet side with a permanent marker before removing anything.
Success checkpoint: You have a replacement specification or a written abandonment plan, not merely a visual guess.
Common mistake: Ordering a device based only on pipe diameter and ignoring hazard rating, orientation, discharge requirements, or local listing.
Step 2: Shut off the upstream water supply
Close the main or branch isolation valve upstream of the backflow preventer. If the valve has no clear open or closed indicator, turn it fully clockwise without excessive force, then open a downstream faucet or irrigation zone.
Do not trust a valve handle position alone. A worn gate valve can appear closed while passing enough water to flood the work area.
Success checkpoint: Downstream flow stops after the trapped water drains.
Common mistake: Closing only the assembly’s outlet valve while the inlet remains pressurized. That leaves the device and upstream pipe under pressure.
Step 3: Relieve trapped pressure and drain water
Open a downstream faucet first, then use the assembly test cocks cautiously if the device has them. Place a bucket beneath each outlet and open the test cock slowly. On an RPZ, expect water from the relief area or intermediate zone.
Some assemblies have four test cocks, while smaller vacuum breakers may have none. Never remove a bonnet, check cover, flange, or union until pressure has been verified as zero.
Success checkpoint: No continuing flow occurs when a test cock is opened, and the gauge reads zero if a gauge is installed.
Common mistake: Opening a test cock toward a wall, electrical equipment, or an unprotected drain. Direct discharge into a bucket or approved receptor.
Step 4: Isolate connected equipment
Disable irrigation controls, booster pumps, boilers, chemical dosing pumps, and fire-system controls as applicable. For a sprinkler system, close the irrigation supply and confirm that automatic valves cannot reopen during the job.
Fire-sprinkler isolation requires the building’s impairment procedure and notification to the monitoring service, occupants, fire department, or insurer where applicable. Do not use a domestic plumbing shutdown sequence for a fire-protection assembly.
Success checkpoint: No pump can start and no automated valve can refill the work area.
Common mistake: Leaving a pump energized. A pump can recreate pressure after the main valve is closed.
Step 5: Disconnect unions or threaded connections
Support the fixed pipe with one wrench and turn the union nut or device connection with the second wrench. Apply force only to the fitting intended to turn. Keep the backup wrench close to the joint so torque does not travel into soldered, glued, or concealed piping.
For unions, loosen the large union nut and separate the assembly. For threaded ends, remove the device while protecting the pipe nipple. Penetrating oil may help on external metal threads, but do not contaminate potable-water sealing surfaces with unapproved products.
Success checkpoint: The pipe remains stationary while the union or device connection loosens.
Common mistake: Using one wrench. Twisting a copper stub-out inside a wall can split a solder joint or damage a concealed fitting.
Step 6: Cut sweat, glued, or damaged connections
Cut copper with a tubing cutter, leaving enough straight pipe for a new coupling or union. Cut PVC or other plastic pipe with a suitable cutter and remove burrs. Do not cut immediately against the device if the remaining pipe will not accept a coupling.
The exact clearance depends on fitting depth, manufacturer instructions, and the amount of sound pipe available. A typical planning allowance is 2-3 inches of straight pipe, but a plumber may need to expose more pipe to remove corrosion or install a repair section.
Success checkpoint: The cut ends are round, clean, dry, and long enough for the chosen fittings.
Common mistake: Cutting before confirming the replacement length. A short cut can force wall opening or a complete reroute.
Step 7: Remove and contain the assembly
Lift the device carefully because brass and cast assemblies can be heavy, especially on flanged commercial lines. Keep the open pipe ends covered temporarily with clean caps or tape that cannot shed material into the line.
Collect residual water and inspect the removed device for freeze cracks, corrosion, debris, failed seals, and reversed installation. Do not reuse damaged gaskets or assume a leaking device only needs tightening.
Success checkpoint: No open pipe points toward electrical equipment, finished walls, or a drain, and the potable line remains protected.
Common mistake: Dropping an RPZ or DCVA onto the remaining pipe. The impact can crack a solder joint or deform a flange.
Step 8: Replace, cap, or abandon the branch
Install the approved replacement in the marked flow direction and required orientation. Use new gaskets on flanges, compatible sealant on approved threaded joints, and proper support so the assembly does not hang from the pipe.
If the branch is permanently abandoned, cap it at the point required by local code. Some authorities require removal back to the tee, while others accept a nearby accessible cap, so the correct location is jurisdiction-specific.
Success checkpoint: The finished pipe has either an approved backflow assembly or a secure, code-accepted cap. No open cross-connection remains.
Common mistake: Leaving a bypass around the device. An unprotected bypass defeats the entire cross-connection control arrangement.
How Do Connections Change the Job?
Connection type controls the removal method, leak risk, and likelihood of needing new pipe.
| Connection | Removal method | Typical added parts | Main failure risk |
|---|---|---|---|
| Threaded brass | Two-wrench unscrewing | Nipples, approved sealant | Twisted concealed pipe |
| Union ends | Loosen union nuts | Gaskets, replacement unions | Damaged union faces |
| Flanged steel or iron | Remove bolts evenly | Gaskets, bolts, lifting support | Heavy assembly or flange distortion |
| Sweat copper | Cut with tubing cutter | Couplings, unions, solder | Insufficient straight pipe |
| Solvent-welded PVC | Cut pipe squarely | Couplings, pipe section | Cracked or contaminated socket |
A union-based assembly is usually the most serviceable because the device can be removed without cutting pipe. A soldered or glued installation often requires a repair coupling or conversion to unions, which increases labor and introduces additional joints.
Should You Repair, Replace, or Remove the Device?
Repair the internal parts when the housing is sound, the correct rebuild kit is available, and local rules permit field repair. Replace the full assembly when the body is cracked, corrosion has damaged the seats, the model is obsolete, the device repeatedly fails testing, or replacement cost is close to repair cost.
Remove and abandon the branch only when the connected system is permanently discontinued and the water authority accepts the abandonment method. Removal is not a shortcut around testing if the connection remains active.
| Option | Typical parts cost | Typical labor time | Best use case | Limitation |
|---|---|---|---|---|
| Rebuild kit | $20-$180 | 0.5-2 hours | Leaking residential PVB or DCVA | Does not fix cracked housing |
| Full replacement | $150-$700 residential | 1-3 hours | Failed or obsolete assembly | May require certification |
| Permanent cap | $10-$100 fittings | 1-3 hours | Abandoned irrigation branch | Ends use of the branch |
| Commercial RPZ replacement | $500-$3,000+ | 4-8 hours | High-hazard commercial service | Requires shutdown and testing |
A rebuild kit is not appropriate for every leak. Relief-valve discharge on an RPZ can indicate debris, a failed check, incorrect pressure differential, freezing, or installation damage. Rebuilding without identifying the cause can produce a repeated failure.
What Does Removal or Replacement Cost?
Typical residential labor costs range from $200-$600, excluding permits, difficult access, excavation, or emergency service. Commercial flanged assemblies commonly cost $1,000-$3,000 or more for labor and materials because shutdown coordination, lifting, pipe modification, certification, and reporting add time.
| Job condition | Typical duration | Typical total range | Main cost driver |
|---|---|---|---|
| Accessible 3/4-inch PVB | 1-2 hours | $200-$600 | Device and local labor |
| 1-inch RPZ replacement | 2-4 hours | $500-$1,200 | Certified testing and drainage |
| Buried irrigation assembly | 3-8 hours | $600-$2,000 | Excavation and pipe repair |
| 3-10-inch commercial flange | 4-8 hours | $1,500-$5,000+ | Lifting, shutdown, and fabrication |
| Fire-service assembly | Scheduled project | $1,000-$5,000+ | Impairment procedures and inspection |
Annual testing commonly costs $80-$200 for a residential-scale testable assembly, but frequency and price depend on the water supplier. Many jurisdictions require testing every 12 months; others use different intervals or trigger testing after repair, relocation, or failed certification.
What determines the final price?
Access, pipe material, corrosion, freeze damage, assembly size, required model, permit fees, drainage modifications, and test reporting affect the final invoice. A quote that excludes certification may appear cheaper but leave the owner responsible for a second visit.
Common Mistakes and How to Fix Them
Removing without confirming abandonment rules
Failure: The device is removed, but the registered irrigation or commercial connection remains on the supplier’s records.
Fix: Notify the authority, submit the required abandonment documentation, and retain photographs or an invoice showing where the branch was capped.
Cutting too close to the assembly
Failure: There is insufficient pipe for a coupling, union, or compression fitting.
Fix: Stop cutting after the first opening, measure fitting depth, and expose additional sound pipe if needed. A repair sleeve is not automatically approved for potable service.
Reopening valves too quickly
Failure: Water hammer, air movement, or a loose fitting causes a sudden leak.
Fix: Open the upstream valve gradually, allow air to escape through a downstream fixture, and inspect every joint while the system reaches normal pressure.
Installing the device backward or below the wrong elevation
Failure: The flow arrow points toward the supply, or a PVB air inlet sits below downstream outlets.
Fix: Follow the manufacturer’s installation diagram and local code. PVB and AVB performance depends on elevation and orientation, not appearance.
Ignoring winter conditions
Failure: Water freezes inside an exterior PVB, DCVA, or RPZ and cracks the body or check components.
Fix: Follow the manufacturer’s winterization procedure, which may require draining test cocks, closing valves, removing plugs, or using approved insulation. Insulation alone does not remove trapped water.
Variations by System
Residential lawn irrigation
For a residential sprinkler system, the usual decision is to rebuild or replace the PVB rather than remove it. If the irrigation branch is permanently retired, close the supply, drain the system, remove or bypass no protective device, and cap the branch according to local requirements.
A sprinkler controller can energize valves even after manual work appears complete. Disable the controller or disconnect its transformer before opening the pipe.
Boiler or hydronic heating connection
Do not treat a boiler backflow preventer as ordinary irrigation plumbing. A boiler may have pressure-reducing valves, expansion tanks, relief valves, chemicals, and heated water under pressure. A licensed hydronic plumber should isolate and drain the system, preserve required fill protection, and verify pressure after work.
Removing the assembly without another approved protection method can allow glycol, corrosion inhibitor, or boiler water to enter the potable supply.
Commercial, chemical, or medical service
Commercial RPZ assemblies and chemical connections require professional handling because the downstream hazard may be toxic, infectious, corrosive, or legally classified as high hazard. The contractor may need a written shutdown plan, spill controls, replacement certification, and immediate test submission.
Fire-sprinkler service
A fire-line backflow preventer is part of a life-safety system. Only an authorized fire-protection contractor or qualified plumbing professional should plan its removal, and the building’s impairment procedure must be followed before the valve is closed.
Post-Removal and Replacement Testing
A replacement is incomplete until the line is commissioned. Slowly restore supply, inspect all joints, operate the downstream fixtures, and confirm that pumps and automatic valves behave normally.
For a testable PVB, DCVA, or RPZ, a certified backflow tester typically measures check-valve performance, pressure differential, and relief-valve operation using a calibrated test kit. The exact test procedure varies by assembly and governing standard, including procedures based on ASSE, USC Foundation, AWWA, or local authority requirements.
Troubleshooting after reassembly
| Symptom | Likely cause | Safe first response |
|---|---|---|
| RPZ relief port discharges | Debris, failed check, freezing, pressure issue | Isolate, drain, inspect, arrange certified testing |
| Low whole-house pressure | Partly closed valve or blocked strainer | Confirm handles are fully open and inspect service components |
| Humming or vibration | Air, damaged spring, unstable flow | Bleed air safely and stop if vibration persists |
| Joint leaks immediately | Damaged gasket, poor thread seal, misalignment | Shut down, depressurize, remake the joint |
| No irrigation flow | Reversed device or closed downstream valve | Verify arrow, valve position, and controller status |
Do not repeatedly tighten a leaking union or relief valve while pressurized. Repeated tightening can deform sealing surfaces and turn a replaceable gasket problem into an assembly replacement.
Can a Homeowner Remove a Backflow Preventer?
A homeowner may be able to remove an accessible residential irrigation assembly when the water authority permits the work, the line can be isolated, the connection uses unions, and the branch will be correctly replaced or capped. DIY removal is unsuitable for RPZ, fire, boiler, chemical, medical, buried, or high-pressure systems.
A practical homeowner limit is simple: if the assembly is not clearly identified, the isolation valve does not stop flow, the pipe enters a wall, or the work affects a regulated system, stop and hire a qualified professional. The cost of a service call is lower than repairing a flooded wall or contaminating a potable line.
Frequently Asked Questions
How do I drain a backflow preventer before removal?
Close the upstream supply, open a downstream fixture, and then open the assembly’s test cocks slowly over a bucket if the device has test cocks. An AVB may have no test ports. Confirm zero pressure before loosening unions or covers, because trapped water can remain even after visible flow stops.
Can I bypass a backflow preventer temporarily?
A temporary bypass is acceptable only when the authority having jurisdiction and the system owner approve it, and the bypass has equivalent approved protection. A bare pipe around a PVB, DCVA, or RPZ creates an unprotected cross-connection. Fire and commercial systems generally require a documented impairment and restoration procedure.
How long does a backflow preventer last?
A brass housing can remain serviceable for 20 years or longer, while springs, elastomers, washers, and check components commonly require service sooner. Water quality, freezing, pressure surges, ultraviolet exposure, debris, and test results matter more than age alone. Replace the assembly when repair parts or certification are no longer practical.
Why is my backflow preventer leaking after winter?
Freezing can crack the body, distort check seats, split seals, or damage the relief mechanism. Debris introduced during reassembly can also hold a check valve open. Shut off the supply, drain the assembly, inspect for visible cracks, and arrange repair or certified testing rather than forcing the valves closed.
Who can certify a replacement backflow preventer?
Certification normally requires a tester recognized by the local water supplier or cross-connection control program. Requirements vary by jurisdiction, but the tester usually records the assembly make, model, serial number, location, test results, gauge information, and repair status before submitting the report.
The Bottom Line
To remove a backflow preventer safely, identify the assembly, confirm local permission, isolate and depressurize the line, disconnect it with supported piping, and either install an approved replacement or cap the abandoned branch. The correct answer to how to remove backflow preventer is never to leave a straight, unprotected connection in service. Use a certified professional for regulated, high-hazard, fire, boiler, commercial, and concealed-pipe work.