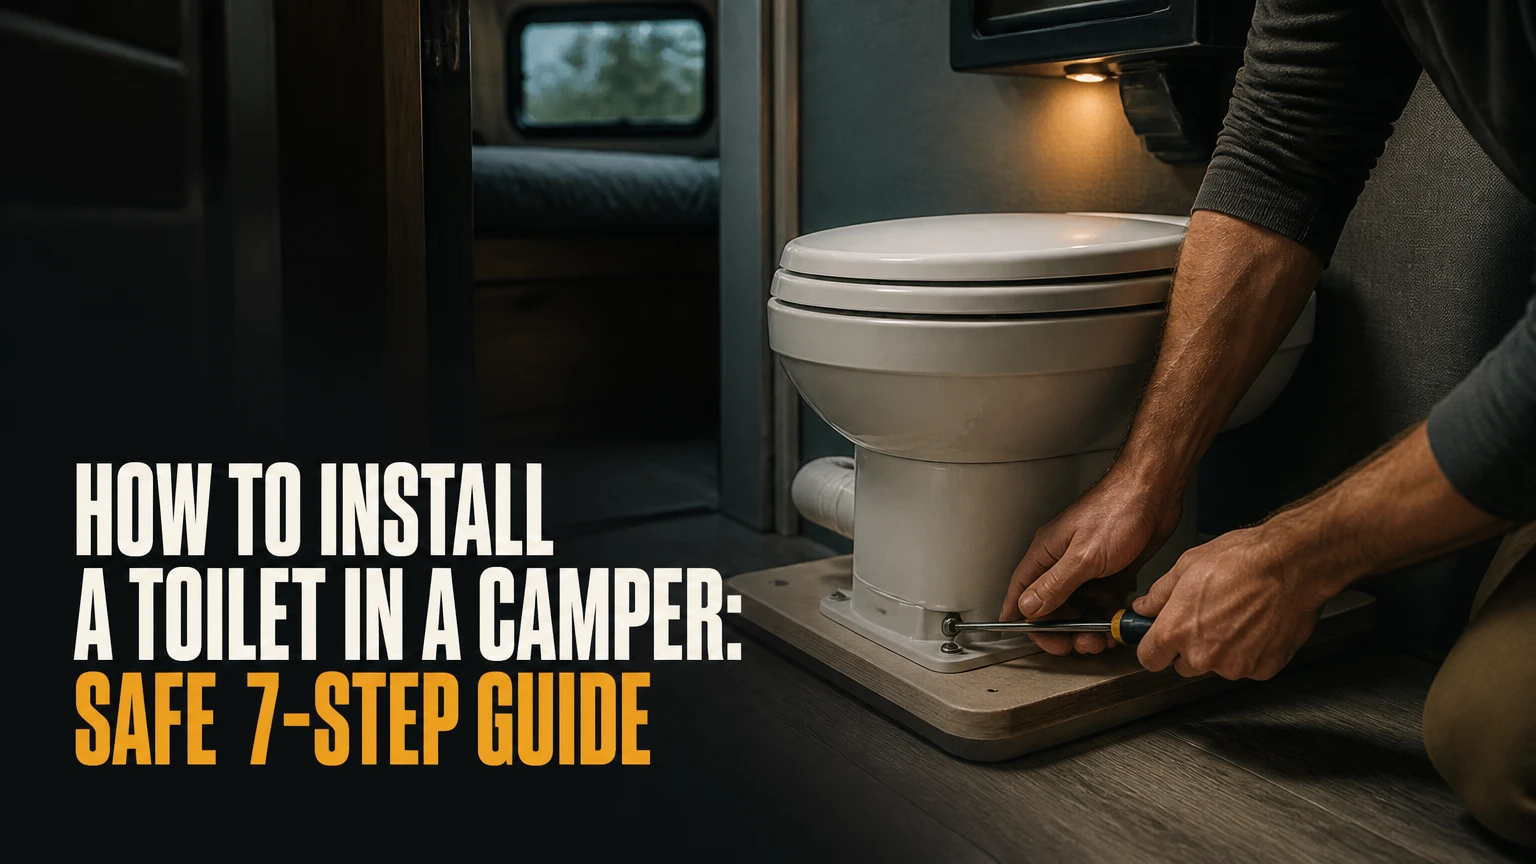
To install a toilet in a camper, choose a system that matches the vehicle’s waste infrastructure, create a supported and serviceable mounting location, connect the correct water, vent, electrical, or waste components, then test every seal before use. A basic gravity toilet typically takes 2-4 hours when a compatible black tank and floor flange already exist.
Key facts
A gravity-flush camper toilet requires a compatible black-water tank, waste opening, vent, and RV toilet flange.
A cassette toilet requires a manufacturer-sized exterior service hatch and a sealed cassette housing.
A composting toilet normally requires a level floor, a liquid container, solids chamber, and continuously powered 12-volt ventilation.
An RV-specific foam or rubber seal is appropriate for many camper toilets; a residential wax ring is not automatically suitable.
Typical installed cost ranges from $150 for a portable toilet setup to more than $5,000 for a professionally integrated incinerating toilet.
The manufacturer’s installation template controls clearances, fastener locations, vent size, and electrical requirements.
Which Camper Toilet Should You Install?
The correct camper toilet is determined first by waste disposal, then by available space and utilities. Install a gravity toilet only when the camper has, or can safely receive, a black-water tank; choose a cassette toilet for removable tank access, or a separating composting toilet when conserving water matters more than conventional flushing.
A portable cassette-style unit is the least invasive option because it needs no floor penetration or permanent plumbing. Its limitations are capacity, appearance, and the need to carry the waste tank to an approved disposal point. A permanent gravity system gives the most residential-like use, but it creates the most difficult installation because the tank, vent, floor flange, and dump plumbing must align.
Composting toilets do not eliminate waste handling. They change the handling method by separating liquid and solid waste, while incinerating toilets replace dumping with high-temperature treatment and a substantial power or fuel demand.
| Toilet type | Typical unit cost | Typical installation time | Required infrastructure |
|---|---|---|---|
| Portable cassette | $80-$250 | 15-45 minutes | Level floor and storage restraint |
| Gravity flush | $150-$400 | 2-4 hours | Black tank, vent, flange, freshwater line |
| Built-in cassette | $450-$1,200 | 4-8 hours | Exterior hatch, cassette housing, vent |
| Composting or separating | $900-$1,500 | 2-5 hours | 12V fan, vent, liquid container, floor mount |
| Incinerating | $2,500-$4,500 | 3-8 hours | 120V or 240V circuit, exhaust, or propane system |
Does the Camper Need a Black Tank?
A camper does not need a black tank for every toilet type. A gravity-flush toilet needs a sealed black tank below or near the toilet, while portable, cassette, separating, and many dry-flush systems store waste in removable containers or cartridges.
Do not connect a gravity toilet to a gray-water tank. Gray tanks are designed for sinks and showers, and their plumbing, venting, capacity, and disposal arrangements may not be approved for toilet waste. A black tank also needs a dump outlet and a vent that prevents pressure and sewer-gas problems.
Measure the tank’s inlet location before purchasing the toilet. A toilet mounted several inches away from the tank may need a large-diameter sloped waste pipe, and that pipe must remain supported while the camper flexes in motion. The toilet manufacturer’s outlet diameter and tank manufacturer’s inlet specification must agree.
What to Check Before Installation
Before installing a camper toilet, confirm the floor structure, waste route, service access, and local requirements. The toilet location must allow a person to sit comfortably, permit removal of the cassette or waste container, and leave enough room to shut off water or disconnect power.
Before You Start
| Requirement | Typical specification | Verification |
|---|---|---|
| Installation duration | 2-8 hours | Add 1-2 hours for new exterior openings |
| DIY difficulty | Moderate to advanced | Advanced if adding a black tank or 120V circuit |
| Toilet footprint | 16-20 inches deep | Use the selected model’s template |
| Front clearance | 18-24 inches typical | Confirm manufacturer and local code |
| Side service clearance | 2-6 inches typical | Increase space for valves and wiring |
| Freshwater line | 1/2-inch PEX common | Confirm the toilet inlet fitting |
| Electrical supply | 12V, 120V, or 240V | Match the model’s manual and circuit rating |
Tools and materials: tape measure, cardboard layout template, pencil, drill, hole saw or jigsaw, screwdriver, socket set, torque-controlled hand tools, deburring tool, 1/2-inch PEX and fittings where required, shut-off valve, RV toilet seal, stainless fasteners, butyl tape or manufacturer-approved sealant, wire loom, fuse, and a leak-test towel.
Disconnect shore power and turn off the water pump before cutting or drilling. Inspect both sides of every panel. A floor can conceal chassis rails, brake lines, fuel lines, propane tubing, wiring, or a tank that drilling could puncture.
How Much Space and Support Does a Camper Toilet Need?
A camper toilet commonly needs 18-24 inches of usable space in front, 2-6 inches beside the bowl, and a floor strong enough to resist movement under the combined toilet and user load. The model’s template is more authoritative than a generic clearance number because bowl shape and service parts vary.
A plastic RV toilet often weighs about 9-16 pounds, while a porcelain model may weigh 25-45 pounds before a user sits on it. Reinforce a thin conversion-van floor with a framed backing plate or blocking that distributes the fastener load; do not rely on thin wall paneling or unsupported plywood.
Leave access to the water valve, blade seal, fan fuse, liquid bottle, solids hatch, and waste cassette. A toilet that looks neatly boxed in can become difficult to repair, and service access is more valuable than saving a few inches of cabinet space.
How to Install a Toilet in a Camper
The following seven steps apply primarily to a gravity-flush toilet installed over an existing or newly prepared black-water system. Cassette and composting variations appear afterward because their waste routes differ substantially.
Step 1: Choose and Test the Toilet Location
Position the toilet over the planned waste inlet, then mark the centerline, front edge, seat height, and service area. Place a cardboard cutout on the floor and sit on it before drilling, checking knee room, door swing, shower access, and cassette or container removal.
The bowl should sit level when the camper is parked normally. Avoid placing the toilet over a floor joint, unsupported panel, water tank, or structural member that prevents the flange from sitting flat.
You’ll know it worked when: the seat clears the door, the user can sit without contacting a wall, and every service component can be removed without dismantling cabinetry.
Common mistake: choosing the prettiest location before tracing the waste pipe. Waste routing determines the practical location.
Step 2: Inspect the Floor and Mark the Openings
Use the toilet manufacturer’s paper template to mark the flange holes and waste opening. Drill a small pilot hole first, then inspect underneath through an existing access point or with a borescope before enlarging it.
A gravity toilet normally needs a larger waste opening than its mounting bolt holes. The exact diameter varies by flange and model, so measure the supplied component instead of copying a household toilet dimension.
Seal exposed plywood edges with an appropriate coating or sealant. Protect any nearby wiring with loom and keep plumbing penetrations away from fastener paths.
You’ll know it worked when: the flange sits fully on solid flooring, the waste opening is centered, and no chassis or vehicle system occupies the cut path.
Common mistake: drilling through the roof of a tank, fuel line, or brake line because the underside was not inspected.
Step 3: Install the Black Tank, Flange, and Vent
Fit the black tank so its inlet aligns with the toilet outlet and its dump outlet remains reachable for a hose connection. Support the tank according to its manufacturer’s instructions, because a full tank can weigh several hundred pounds and unsupported fittings can crack.
Install an RV-specific floor flange and connect the waste pipe with the correct flexible or rigid fitting. Route the tank vent upward with a continuous path that avoids sags where liquid can collect. Terminate the vent according to the tank and vehicle manufacturer’s instructions.
Thetford’s Aqua-Magic care guidance includes the direct warning, “Do not use household cleaners.” RV toilet seals and tank components can be damaged by incompatible chemicals, so use products listed for the specific sanitation system.
You’ll know it worked when: the flange is level, the tank is independently supported, the vent has no low trap, and the dump outlet is accessible.
Common mistake: treating the toilet flange as the tank support. The flange should locate and seal the toilet, not carry a suspended full tank.
Step 4: Add the Freshwater Shut-Off Valve
Install a dedicated shut-off valve in the freshwater line near the toilet. A 1/2-inch PEX line is common in RV plumbing, but the toilet’s inlet may use a different adapter, so confirm the fitting before cutting the line.
Use a PEX cutter for a square end, secure the tubing fully in each fitting, and support the line so vibration cannot work the connection loose. Keep the valve accessible after cabinetry is installed.
Do not pressurize the system until every fitting is tightened and the toilet’s water valve is connected. The pump can expose a slow leak quickly, but hidden water under flooring can cause rot before the leak becomes visible.
You’ll know it worked when: the shut-off handle is reachable, the PEX has no sharp bend, and the line does not move when lightly pulled.
Common mistake: burying the shut-off behind a sealed wall. A valve is useful only if a user can reach it during a leak.
Step 5: Fit the Seal and Mount the Toilet
Place the RV-specific rubber or foam seal on the flange as directed by the toilet manufacturer. Insert the mounting bolts into the flange slots, lower the toilet straight down, and align the base without sliding the seal across the opening.
Tighten the nuts evenly from side to side. Use the specified torque if the manual provides one; otherwise, hand-tighten and add only small wrench turns until the base is secure. Porcelain and plastic bases can crack from overtightening.
Residential wax rings are not a universal substitute. Vehicle heat, vibration, flange geometry, and manufacturer warranty requirements make the supplied RV seal the safer choice.
You’ll know it worked when: the toilet does not rock, the base contacts the floor evenly, and the seal remains centered.
Common mistake: using the mounting bolts to force a rocking toilet flat. Correct the floor or add approved shimming rather than stressing the bowl.
Step 6: Connect Water, Power, and Controls
Connect the freshwater line to the toilet inlet using the supplied washer or fitting. Apply thread sealant or tape only where the manual specifies threaded sealing; tape on compression or flare threads can cause poor seating.
Connect a 12V supply for an electric flush or macerator toilet through the manufacturer’s fuse and wire-size requirements. Incinerating models can require roughly 1,500-2,000 watts during a burn cycle, which is not an ordinary 12V accessory circuit and may require a dedicated AC circuit or approved propane installation.
Secure wires away from the blade mechanism, hinges, heat, and moving seat hardware. Label the toilet circuit and water shut-off in the service compartment.
You’ll know it worked when: the flush control operates without dimming unrelated lights, wires remain cool under load, and the water connection stays dry.
Common mistake: powering a high-load toilet through a small existing accessory circuit. Voltage drop can cause failed starts, overheated wiring, or nuisance fuse operation.
Step 7: Pressurize, Flush, and Leak-Test
Turn on the water pump or connect regulated campground water, then open the dedicated shut-off valve slowly. Inspect the inlet, valve body, seal area, tank connection, vent connection, and dump plumbing with a dry paper towel.
Perform at least five flush cycles using clean water. Check that the blade or seal opens fully, the bowl empties without backup, and the tank vent does not release strong odor into the cabin. Add water to the bowl only as directed, since some seals require a small water barrier while others use a dry separation system.
Drive the camper a short distance, park again, and repeat the inspection. Vibration can reveal a leak that a stationary test misses.
You’ll know it worked when: five flushes produce no seepage, the bowl retains the intended water level, the tank drains correctly, and no odor enters the living space.
Common mistake: testing only the toilet base. Most installation leaks occur at supply fittings, tank joints, or unsealed exterior penetrations.
How Do Cassette and Composting Installations Differ?
Cassette toilets require a sealed exterior hatch and a removable tank path, while composting toilets require liquid separation, a solids chamber, and continuous ventilation. Neither design should be connected to a conventional black tank unless the manufacturer specifically provides that configuration.
Cassette Toilet Installation
Mark the exterior hatch from the cassette manufacturer’s template, not from the toilet bowl alone. Before cutting, confirm that the hatch opens fully, the cassette slides out horizontally, and the exterior wall has enough flat area for its frame.
Build a rigid, waterproof housing that supports the toilet and keeps the cassette aligned with its seals. Apply the specified butyl tape or sealant beneath the hatch frame, fasten it evenly, and remove excess sealant without blocking drainage channels.
A cassette tank often holds roughly 17-20 liters, although capacity varies by model. At four liters of combined liquid and flush use per person per day, two users can fill a small tank in approximately two days, before allowing for capacity reserve.
Composting Toilet Installation
Level the composting toilet and secure it to a reinforced floor. Route the liquid separator to its bottle or external container, then install the 12V exhaust fan and vent hose with the shortest practical path and no crushed sections.
The fan should run continuously when the toilet is in service. Separate liquids from solids by following the seating and cleaning instructions, because liquid entering the solids chamber creates anaerobic odor and prevents the intended drying process.
A typical small ventilation fan may draw only a fraction of an amp, but the exact current depends on the fan and controller. Add an inline fuse sized for the manufacturer’s circuit and provide a service loop so the fan can be replaced.
What Does Camper Toilet Installation Cost?
A camper toilet installation typically costs $150-$500 for a portable or replacement gravity unit, $700-$2,000 for a built-in cassette or composting installation, and $3,000-$6,000 or more for an incinerating system with professional electrical or propane work. New tank plumbing, cabinetry, and exterior cutting create most cost variation.
| Installation scope | Parts range | Labor range | Typical total |
|---|---|---|---|
| Portable cassette setup | $80-$250 | $0-$150 | $80-$400 |
| Existing gravity rough-in | $150-$500 | $150-$500 | $300-$1,000 |
| New black tank and plumbing | $400-$1,200 | $600-$2,000 | $1,000-$3,200 |
| Built-in cassette hatch | $500-$1,300 | $400-$1,200 | $900-$2,500 |
| Composting with vent and wiring | $900-$1,600 | $250-$900 | $1,150-$2,500 |
| Incinerating with dedicated utilities | $2,500-$4,500 | $800-$2,500 | $3,300-$7,000 |
Check local building, electrical, sanitation, and self-containment requirements before installation. Disposal rules differ by jurisdiction, and a cassette or separating toilet may not meet a certification rule simply because the product is sold for camping.
Which Toilet Works Best for Each Camping Situation?
Gravity toilets suit serviced campgrounds, composting toilets suit water-limited travel, cassette toilets suit compact vehicles with approved disposal access, and portable toilets suit occasional use. Incinerating toilets fit specialized builds with adequate power or fuel, ventilation, budget, and professional installation.
| Camping situation | Best-fit system | Reason | Main limitation |
|---|---|---|---|
| Weekend campground trips | Gravity or portable cassette | Simple use and accessible dump facilities | Dumping remains necessary |
| Long boondocking trips | Composting or separating | Little or no flush water | Liquid and solids require separate handling |
| Small campervan conversion | Portable or built-in cassette | No under-floor black tank required | Small tank fills quickly |
| Winter camping | Heated cassette or insulated interior system | Reduces exposed freeze risk | Interior space and disposal access matter |
| Full-time RV with hookups | Gravity flush | Familiar operation and larger capacity | Black-tank maintenance |
| High-power custom build | Incinerating | Produces ash rather than liquid waste | High energy demand and heat management |
A composting toilet is not automatically the best off-grid choice. It reduces freshwater use, but users must manage liquid containers, substrate, ventilation, and disposal. A large black tank can be simpler for a full-time camper that visits dump stations regularly.
Common Mistakes and How to Fix Them
Using a Residential Toilet Seal
A household toilet and an RV toilet can have different flange geometry and movement conditions. Remove the residential wax ring, clean the flange, and install the seal specified for the RV toilet model.
Blocking the Tank Vent
A blocked or low-sagging vent can cause slow drainage, bubbling, and odor. Inspect the full route, clear obstructions, and ensure the vent termination remains above the tank’s liquid level.
Cutting an Exterior Hatch Without a Drainage Plan
An unsealed cassette hatch can admit rainwater into wall insulation. Remove the hatch, dry the opening, replace damaged material, and reseal the frame with the manufacturer-approved product.
Hiding Service Components
A toilet that cannot be removed, a valve that cannot be reached, or a fan that cannot be replaced will turn routine maintenance into cabinetry demolition. Add a removable access panel before finalizing the interior.
Overloading the Floor
A loose base often indicates inadequate blocking rather than loose nuts. Add structural reinforcement below the floor, then remount the toilet with the correct seal and controlled fastener tension.
Ignoring Winterization
Water trapped in the toilet valve, supply line, pump, or black-tank plumbing can freeze and split components. Drain the freshwater system, follow the toilet manufacturer’s antifreeze instructions, and do not pour antifreeze into a composting solids chamber.
How Do You Fix Leaks, Odors, and Poor Flushing?
Camper toilet failures usually come from a misaligned seal, contaminated blade valve, blocked vent, loose water fitting, or incorrect waste routing. Diagnose the failure by separating the water supply, bowl seal, tank connection, vent, and disposal container rather than replacing the entire toilet.
| Symptom | Likely cause | First repair |
|---|---|---|
| Water runs continuously | Debris in inlet valve or worn cartridge | Shut off water, clean or replace valve |
| Water leaks at base | Damaged or displaced RV seal | Remove toilet and install a new seal |
| Sewer odor indoors | Dry blade seal or blocked vent | Clean seal and inspect vent route |
| Bowl drains slowly | Tank vent obstruction or waste pipe sag | Clear vent and correct pipe slope |
| Composting odor | Fan failure or liquid mixing | Check fuse, fan, separator, and bottle |
| Cassette leaks | Misaligned cassette seal | Remove, clean, lubricate, and reseat tank |
| Flush pump fails | Low voltage or overloaded circuit | Check battery voltage, fuse, and wire size |
Do not use petroleum jelly unless the toilet manufacturer permits it. Some rubber compounds swell or deteriorate with petroleum products; a silicone-based RV seal lubricant is often safer when the manual allows it.
Frequently Asked Questions
Can You Install a Camper Toilet Without Plumbing?
Yes, a portable cassette toilet can be installed without permanent plumbing. A built-in cassette toilet still needs an exterior hatch and sealed housing, while a composting toilet needs ventilation and liquid management. A gravity-flush toilet cannot operate correctly without compatible freshwater, waste piping, tank capacity, and venting.
Can You Put a Camper Toilet Anywhere?
No. A camper toilet needs a structurally supported floor, user clearance, service access, and a practical waste route. Gravity toilets need alignment with a black tank or sloped waste pipe; cassette toilets need a removable tank path to an exterior hatch; composting toilets need room for ventilation and liquid storage.
How Often Do You Empty a Camper Toilet?
Emptying frequency depends on tank capacity, user count, flush volume, and trip length. A 17-20-liter cassette may require emptying every one to three days for two users, while a portable cassette varies widely. Composting systems often require liquid management every one to three days, while solids intervals depend on chamber size and use.
Are Camper Toilets Safe in Freezing Weather?
Camper toilets are safe in freezing weather only when the exposed water, tank, vent, and plumbing components are protected. Heated interior cassette systems reduce risk, but external tanks and water valves can still freeze. Gravity systems require complete winterization when parked below freezing without heat.
Where Can You Empty a Cassette or Portable Toilet?
Empty cassette and portable toilet waste only at an approved dump station, campground sanitation point, or other facility that explicitly accepts the waste. Do not use storm drains, trails, ordinary public toilets, or septic systems without permission. Local rules may also control chemical additives and disposal of separating-toilet contents.
Should You Hire a Professional to Install a Camper Toilet?
Hire a qualified RV technician or licensed electrician when the installation adds a black tank, modifies propane, requires a new 120V or 240V circuit, cuts structural areas, or changes certified self-containment equipment. A portable replacement or like-for-like gravity toilet is often suitable for careful DIY work when the existing flange and plumbing are sound.
The Bottom Line
To install a toilet in a camper successfully, select the waste system before selecting the bowl, verify floor support and clearances, protect hidden vehicle systems, use the correct RV seal, preserve service access, and test the installation under pressure and vibration. The exact toilet model, tank layout, vent path, and local disposal rules determine whether the finished system is reliable. Include the phrase how to install a toilet in a camper in your planning checklist only as a reminder of the process, not as a substitute for the manufacturer’s installation manual.