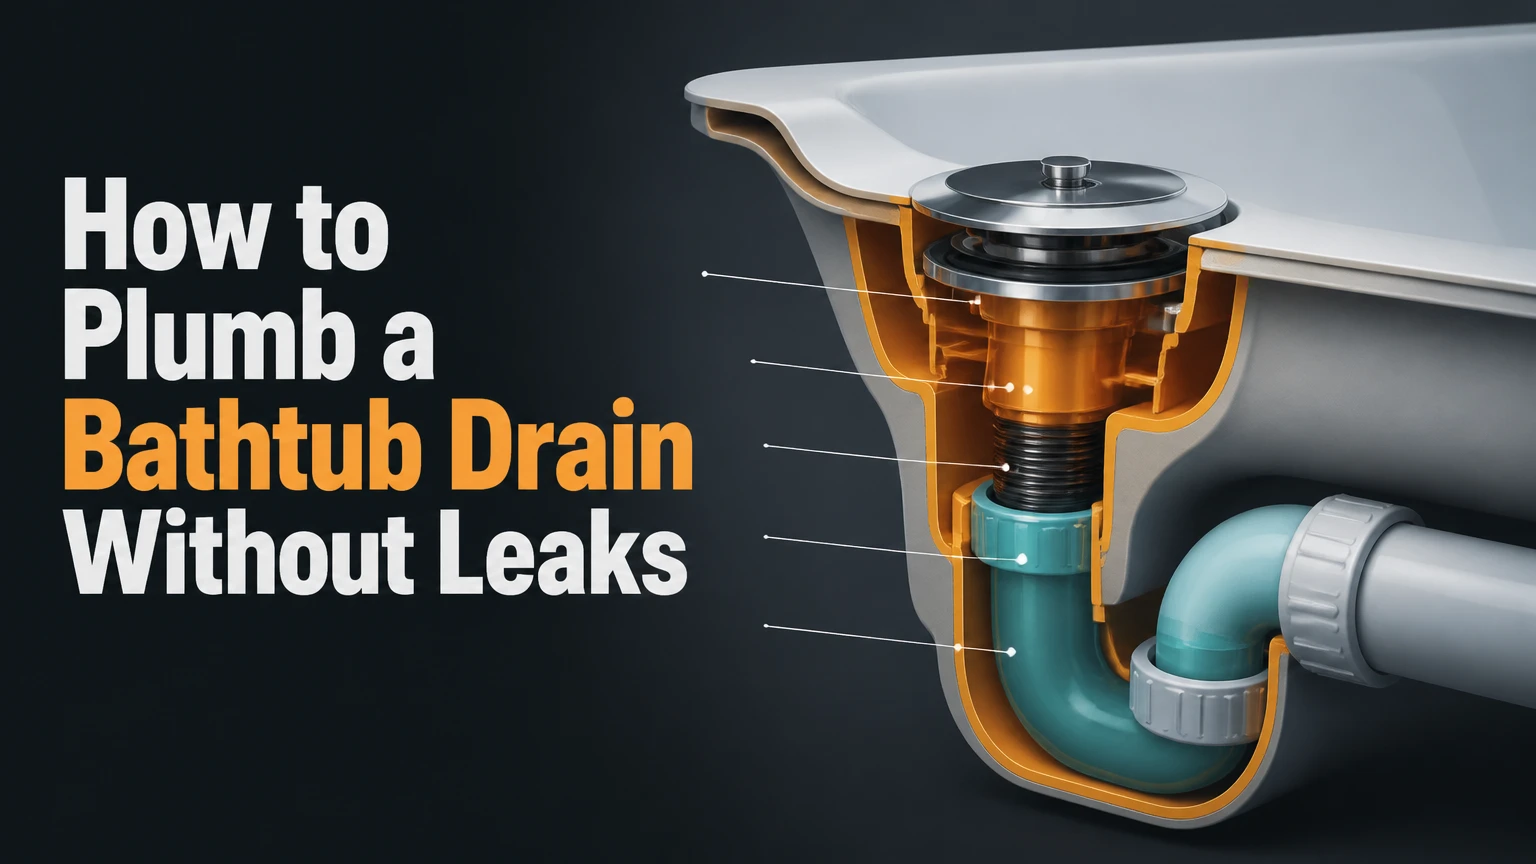
To plumb a bathtub drain, install a compatible waste and overflow assembly, connect its drain shoe and overflow elbow to a tee, route the tee through a P-trap to the vented drainage system, and test every joint before closing the wall or floor. Most accessible installations take 2-4 hours, with alignment determining success.
Key facts at a glance
A bathtub waste and overflow normally uses a 1 1/2-inch drain connection in North American residential work.
The drain shoe seals the tub’s bottom opening, while the overflow gasket seals the upper opening.
A P-trap must remain accessible enough for installation and retain a water seal that blocks sewer gas.
Tubular slip-joint kits suit accessible repairs; solvent-welded PVC, ABS, or brass assemblies suit permanent installations.
A typical 1/4-inch-per-foot fall applies to horizontal drainage pipe, subject to local plumbing code.
Fill-and-drain testing must happen before drywall, an access panel, or the tub surround hides the connections.
How a Bathtub Waste and Overflow Works
A bathtub waste and overflow assembly joins the tub’s lower drain opening and upper overflow opening into one drainage path. Water leaves through the drain shoe, enters the waste tee, passes through the P-trap, and continues into the building drain, while overflow water enters through the overflow elbow.
The overflow is a secondary inlet, not a vent. Its purpose is to reduce flooding if water rises above the overflow opening, although it cannot prevent flooding when the faucet flow exceeds the overflow capacity. A trip-lever assembly may also contain a plunger inside the overflow tube, while a lift-and-turn or toe-touch design usually operates at the drain opening.
The P-trap retains water after drainage stops. That water blocks sewer gases from traveling through the drain, but the trap does not correct poor venting, excessive pipe length, or an incorrectly installed drain arm. The drain system still needs an approved vent arrangement under the plumbing code used in your location.
What connects to what?
| Component | Typical location | Connection or function |
|---|---|---|
| Drain flange and shoe | Tub floor opening | Threaded flange clamps a gasket or sealant against the tub |
| Overflow faceplate and elbow | Upper tub wall | Faceplate compresses a beveled gasket against the tub |
| Waste tee | Behind or beneath tub | Combines drain-shoe and overflow flows |
| P-trap | Below the tee outlet | Retains water and connects to the drain arm |
| Vented building drain | Downstream from trap | Carries wastewater while admitting air to the drainage system |
The exact tee geometry varies by manufacturer. Follow the waste-kit diagram rather than assuming every elbow, tee, and gasket can be substituted with generic fittings.
What Size Pipe and Slope Are Required?
A typical bathtub drain uses 1 1/2-inch Schedule 40 PVC, ABS, or metal piping, while a shower drain commonly uses 2-inch piping. The required diameter, trap configuration, vent distance, and slope are controlled by local code, so the local authority having jurisdiction takes precedence over a kit instruction or online diagram.
For a typical horizontal tub drain arm, plan on approximately 1/4 inch of fall per linear foot toward the building drain. The pipe should not be installed perfectly level, and it should not be given an extreme fall that allows water to outrun air or leaves fittings poorly supported. Measure the finished tub position first, then set the trap and drain arm from the actual outlet location.
Common North American reference values include a 2-4-inch trap-seal range in many plumbing codes, but code editions and jurisdictions differ. A trap that is too shallow can lose its seal; a trap that is too deep can restrict flow and create installation problems.
Typical rough-in values
| Item | Typical value | Verification point |
|---|---|---|
| Tub waste connection | 1 1/2 inches | Waste-kit specification and local code |
| Shower branch connection | 2 inches | Local code, not a tub-kit assumption |
| Horizontal drain fall | 1/4 inch per foot | Measure with a level or laser |
| Trap seal depth | 2-4 inches | Applicable plumbing code |
| Solvent-cement cure | 15-30 minutes or longer | Cement label, temperature, pipe size |
| Water test duration | 15-30 minutes | Local inspection requirement where applicable |
A bathtub drain is not normally vented through the overflow opening. The drainage vent connects through the approved branch or stack arrangement, often upstream or downstream according to the governing code. If the new tub changes fixture locations or drain-arm length, confirm the vent layout before covering the work.
Which Drain Material and Stopper Should You Use?
Choose a tubular slip-joint kit when all connections will remain accessible and future adjustment matters most. Choose solvent-welded PVC or ABS when the installation will be concealed and the pipe material can be matched correctly; choose brass when durability, threaded serviceability, or a difficult access condition justifies its higher cost.
| Assembly type | Joint method | Typical cost | Best installation condition |
|---|---|---|---|
| Tubular polypropylene | Compression nuts and washers | $25-$70 | Access panel or exposed repair |
| Schedule 40 PVC | Primer and PVC cement | $30-$90 | New construction with PVC drainage |
| ABS waste kit | ABS cement, usually without PVC primer | $35-$100 | Existing ABS drainage system |
| Brass waste and overflow | Threaded or soldered connections | $80-$250 | Durable remodel with careful alignment |
Do not glue ABS with ordinary PVC cement. Use a product specifically labeled for the materials being joined and accepted by local code. Many systems require transition cement for ABS-to-PVC connections, while some jurisdictions restrict or specify the permitted method.
Stopper choice affects maintenance more than drainage capacity. A cable-operated stopper keeps the linkage inside a flexible cable, whereas a trip-lever plunger places a moving part inside the overflow tube where hair and soap residue can accumulate.
| Stopper type | Mechanism | Typical service issue | Suitable user |
|---|---|---|---|
| Lift-and-turn | Threaded stopper body | Worn set screw or gasket | Simple manual operation |
| Toe-touch | Spring-loaded cap | Weak spring or damaged seal | Frequent foot operation |
| Trip lever | Rod and plunger | Misadjusted linkage or hair | Existing overflow faceplate |
| Cable-operated | Flexible cable | Cable stiffness or breakage | Accessible, sleek control |
One practical rule matters more than finish color: buy the complete waste and overflow kit for the tub’s drain style, overflow shape, and pipe material. Mixing individual components can create thread, gasket, or alignment problems that remain hidden until the tub is filled.
What Should You Do Before Installation?
Before plumbing a bathtub drain, confirm the tub is in its final position, level in both directions, supported according to its manufacturer, and accessible from below or through a service opening. Gather the complete waste kit, measure the rough-in, and identify the existing drain material before cutting any pipe.
Before-you-start checklist
| Requirement | Typical figure or item | Why it matters |
|---|---|---|
| Working time | 2-4 hours with access | Allows dry fitting and testing |
| DIY material budget | $30-$120 | Covers kit, sealant, cement, and small fittings |
| Drain-wrench size | Tub-specific | Prevents flange and crossbar damage |
| Pipe material | PVC, ABS, brass, or tubular | Determines joining method |
| Access opening | 12-18 inches wide, typical | Allows hand and wrench clearance |
| Test water | 4-6 inches in tub | Loads the drain and shoe seal |
You may need a tub drain wrench, adjustable pliers, tape measure, torpedo level, marker, fine-tooth saw or plastic cutter, deburring tool, drill, screwdriver, primer and cement matched to the pipe, plumber’s putty or silicone, replacement washers, and a bucket.
Protect the tub finish before using metal tools. Read the waste-kit instructions, solvent-cement label, and tub manufacturer’s sealant guidance before assembly.
How Do You Plumb a Bathtub Drain?
Plumb a bathtub drain in nine stages: set the tub, locate the trap, dry-fit the waste and overflow, seal the drain shoe, seal the overflow, join the outlet, connect the vented drain, support the piping, and test before concealment. Dry fitting is the stage that prevents most permanent alignment errors.
Step 1: Set and level the bathtub
Place the tub on its approved feet, mortar bed, ledger, or support system. Check level along the rim and across the floor, because a tub that moves after the waste assembly is tightened can break the shoe or overflow seal.
Mark the drain-shoe center and overflow center on the framing or floor. Confirm that the finished floor, wallboard, surround, and access panel will not interfere with the waste kit.
You will know it worked when: the tub cannot rock and both openings align with the planned plumbing zone.
Common mistake: installing the waste assembly before the tub is finally supported.
Step 2: Locate the P-trap and drain arm
Position the 1 1/2-inch P-trap below the waste tee outlet, leaving enough vertical and horizontal room for the trap and drain arm. Use the actual tub dimensions rather than a universal rough-in number, because tubs vary in drain offset and overflow height.
Maintain the required slope on the drain arm and provide approved support so the trap cannot sag. Confirm the downstream connection and vent arrangement before cutting into an existing branch line.
You will know it worked when: the tee outlet reaches the trap without forcing the tub or creating a flat drain arm.
Common mistake: placing the trap directly under the drain shoe while ignoring the overflow tee outlet.
Step 3: Dry-fit every waste component
Hold the drain shoe under the lower opening and the overflow elbow behind the upper opening. Fit the connecting pipes, tee, trap, and drain arm without cement, then mark insertion depth and orientation.
For solvent-welded pipe, cut squarely and remove burrs from the inside and outside edges. A small chamfer can ease insertion, but follow the pipe and fitting manufacturer’s instructions; a specialized “DB4” chamfer is not a universal plumbing requirement.
For tubular assemblies, install the correct slip washers in the correct direction. Do not rely on thread engagement to correct a pipe that is under stress.
You will know it worked when: every joint reaches full socket depth and the faceplates sit squarely without pulling the fittings sideways.
Common mistake: cementing one connection before confirming that the overflow faceplate and drain flange align.
Step 4: Install and seal the drain shoe
Remove the dry-fitted shoe and clean the tub’s drain opening. Apply a continuous rope of plumber’s putty beneath the visible drain flange when the tub and manufacturer permit putty; use 100% silicone when the tub manufacturer specifies silicone or when putty could stain a porous finish.
Place the shoe or shoe elbow beneath the tub. From inside the tub, lower the flange through the opening and thread it into the shoe. Tighten with a tub drain wrench until the flange is seated and sealant squeezes evenly around the perimeter.
Do not place the shoe’s external rubber gasket inside the tub basin unless the kit diagram specifically shows that arrangement. Gasket location varies by assembly, but the flange seal and shoe connection must match the manufacturer’s cross-section.
You will know it worked when: the flange is centered, the sealant ring is continuous, and the shoe does not rotate when the drain linkage operates.
Common mistake: overtightening the flange until an acrylic or fiberglass tub flexes or cracks.
Step 5: Install the overflow gasket
Fit the beveled overflow gasket between the tub wall and overflow elbow. On many wedge-shaped gaskets, the thicker edge faces downward, but the kit’s molded markings or instructions control because tub-wall angles differ.
Center the elbow over the overflow opening. Install the faceplate and screws from inside the tub, tightening each screw alternately so the gasket compresses evenly.
Do not substitute a flat washer for a beveled overflow gasket. The gasket compensates for the tub wall’s slope, and an incorrect profile can leak only when water reaches the overflow level.
You will know it worked when: the faceplate sits flat and the gasket remains centered without bulging into the opening.
Common mistake: leaving protective film under the gasket or faceplate, which prevents a reliable seal.
Step 6: Join the tee and trap
For PVC, apply the specified primer and PVC cement to clean, dry mating surfaces. For ABS, use ABS cement according to the label. Push each pipe fully into its hub with a quarter-turn if the manufacturer permits, then hold the joint still for the initial set.
Assemble the branch connections in the order that preserves alignment. Keep the tee outlet directed toward the trap and avoid twisting a newly cemented joint after it begins to set.
You will know it worked when: the insertion marks show full depth and no joint has backed out during assembly.
Common mistake: using excessive cement that forms a ridge inside the pipe or contaminates the gasket surfaces.
Step 7: Connect the drain arm and vented branch
Connect the trap outlet to the approved building drain with the required slope and fitting sequence. Preserve the vent arrangement; a tub that drains slowly or gurgles after installation may have a venting or obstruction problem rather than a defective stopper.
Do not reduce the drain diameter to fit an old branch without confirming code compliance. Do not connect the tub into a pipe configuration that creates an unapproved S-trap or an inaccessible trap.
You will know it worked when: the drain arm is supported, continuously pitched, and connected to an approved vented drainage path.
Common mistake: treating the overflow tube as the vent.
Step 8: Support and inspect the assembly
Install pipe straps or framing supports where required, keeping plastic pipe from rubbing against sharp framing. Confirm that the waste assembly does not bear the tub’s weight and that the tub cannot move independently of the plumbing.
Inspect every threaded connection, washer, gasket, solvent-welded hub, and access opening with a flashlight. Remove excess putty or silicone from visible surfaces before it cures.
You will know it worked when: the assembly remains aligned after the tub is loaded and all connections are visible for testing.
Common mistake: closing the access panel before checking the underside of the shoe and overflow elbow.
Step 9: Test before closing the wall
Allow solvent cement to cure for the time stated on its label. Many products require at least 15-30 minutes before light handling, while cooler temperatures or larger joints require longer curing.
Close the stopper, add approximately 4-6 inches of water, and inspect the drain shoe, tee, trap, and drain arm for 15 minutes. Open the stopper and watch the joints while the tub drains at full flow. Fill water to the overflow opening and inspect the overflow gasket separately.
You will know it worked when: no moisture appears during standing, overflow, or full-drain tests.
Common mistake: testing only the drain shoe while never loading the overflow seal.
What Are the Most Common Installation Failures?
The most common bathtub drain failures come from movement, incorrect gasket placement, incompatible cement, and testing the wrong part of the system. A dry joint may still leak under a filled-tub water load, so test the shoe, overflow, tee, trap, and drain arm separately.
| Failure | Likely cause | Corrective action |
|---|---|---|
| Leak below drain opening | Flange seal, shoe gasket, or cracked shoe | Remove flange, clean surfaces, reseal, replace damaged part |
| Leak at overflow | Gasket reversed, off-center, or compressed unevenly | Recenter or replace the beveled gasket |
| Tub will not hold water | Stopper height or linkage adjustment | Adjust lift-and-turn, toe-touch, trip lever, or cable |
| Slow drainage | Hair, obstructed trap, poor venting, or flat arm | Remove stopper, snake mechanically, verify slope and vent |
| ABS-PVC joint leaks | Incompatible cement or stressed transition | Replace using approved transition method |
| Pipe separates | Incomplete insertion or poor solvent welding | Cut out joint and rebuild with clean, marked pipe |
A chemical drain cleaner is a poor first response to a slow bathtub drain. Caustic products can damage finishes, degrade some plastic components, and create a burn hazard for the person removing the stopper or trap. Mechanical removal through the stopper opening or overflow opening is safer when the assembly design permits it.
Expert installation rules
- Never use the tub waste assembly to correct a tub that is not structurally supported.
- Never bury a slip-joint connection where a future washer replacement would require demolition.
- Never assume a universal waste kit fits a deep, shallow, freestanding, or unusually angled tub.
- Never tighten plastic threads with force intended for steel pipe.
- Always photograph the tested assembly before installing drywall or a surround.
How Does Access Change the Installation?
A tub with a basement, crawlspace, or service panel below is substantially easier to install and repair than a tub enclosed by finished walls. Accessible work typically takes 2-4 hours; blind installation can take 4-8 hours when drywall removal, framing changes, or repeated dry fitting is necessary.
Basement or crawlspace access
Install the shoe and overflow from inside the tub, then connect and test the tee, trap, and drain arm from below. Leave a removable service panel where the manufacturer, local code, or future maintenance needs justify it.
Finished wall access
Create the smallest practical access opening after locating studs, electrical wiring, and other pipes. Do not close the wall until the overflow test and full-drain test are complete and the assembly has dried for inspection.
Concrete slab
A slab installation may require cutting concrete, relocating a branch drain, or using a manufacturer-approved shallow trap. Confirm finished tub elevation and code requirements before breaking the slab, because trap depth and drain-arm elevation can determine whether the tub is feasible without raising the floor.
Freestanding or specialty tub
Freestanding tubs may use a different waste configuration, floor penetration, or exposed decorative trap. Confirm whether the tub includes an integral overflow and whether the waste outlet aligns with the floor drain before setting the tub permanently.
How Much Does Bathtub Drain Plumbing Cost?
A basic DIY waste and overflow replacement typically costs $30-$120 in materials, while professional installation commonly ranges from $450-$1,050 for ordinary access conditions. New rough-in work, concrete cutting, concealed leaks, permits, and finish repairs can raise the total beyond those typical ranges.
| Project condition | Typical labor time | Typical total cost |
|---|---|---|
| Accessible kit replacement | 1-2 hours | $150-$450 |
| New drain with open basement access | 2-4 hours | $450-$900 |
| Enclosed tub with wall access | 4-8 hours | $700-$1,500 |
| Concrete slab relocation | 1-2 days | $1,000-$3,000+ |
| Concealed leak with finish repair | 4-12 hours | $600-$2,000+ |
Local labor rates, permit requirements, tub material, pipe type, and finish restoration create more variation than the waste kit itself. A plumber should also inspect the existing trap, vent, branch drain, and framing before quoting a concealed installation.
When Should You Hire a Plumber?
Hire a licensed plumber when the project changes the vent, moves a branch drain, requires slab excavation, involves cast iron or lead connections, or cannot be tested without opening finished construction. DIY replacement is more reasonable when the tub is stable, the existing drain location is correct, the material is identifiable, and all joints remain accessible.
Stop work if you find a cracked tub, rotten framing, active water damage, an inaccessible trap, an unapproved S-trap, or a drain branch that cannot maintain code-required slope. A new seal will not solve structural movement or an incorrectly routed drainage system.
FAQ
Can a bathtub drain run without a P-trap?
No, a standard bathtub drainage connection requires an approved trap to block sewer gases. The trap must remain within the permitted distance and seal-depth limits for the local code, and the trap cannot be replaced with an improvised loop of flexible hose.
Can I use a shower drain for a bathtub?
A shower drain is not automatically interchangeable with a bathtub waste and overflow. A bathtub needs a drain shoe and overflow connection, while a shower typically uses a floor drain body and a 2-inch branch. Use a tub-specific assembly unless the manufacturer provides another approved configuration.
Should plumber’s putty or silicone seal a tub drain?
Use the sealant specified by the tub and drain manufacturers. Plumber’s putty works with many metal or standard tub drain flanges, while 100% silicone is often preferred for acrylic, composite, stone, or manufacturer-sensitive surfaces where putty can stain or void a warranty.
Can I install a bathtub drain without access from below?
Sometimes, but blind installation is less forgiving because you cannot see the shoe, tee, trap, and drain-arm joints while testing. A removable access panel is preferable, and concealed solvent-welded or compression joints should never be closed before a complete standing-water and full-drain test.
Why does my bathtub gurgle after drain installation?
Gurgling commonly indicates restricted venting, an obstruction, an incorrectly pitched drain arm, or a trap problem. Remove and inspect the stopper first, then check drainage speed and downstream fixtures. If the issue began after new plumbing work, verify the vent and trap arrangement rather than repeatedly applying chemical cleaner.
How long should bathtub drain cement cure?
Follow the cement label because cure time changes with temperature, humidity, pipe diameter, and pressure. A typical small residential joint may need 15-30 minutes before light handling, but waiting longer before filling the tub is prudent, especially in a cool or damp room.
The Bottom Line
To plumb a bathtub drain successfully, match the waste and overflow kit to the tub, set the tub before measuring, install the shoe and overflow gaskets in their specified positions, preserve the approved P-trap and vent arrangement, and dry-fit every connection before cementing. Test standing water, overflow flow, and full drainage before closing the wall. The right sequence prevents leaks more reliably than excessive tightening or extra sealant.