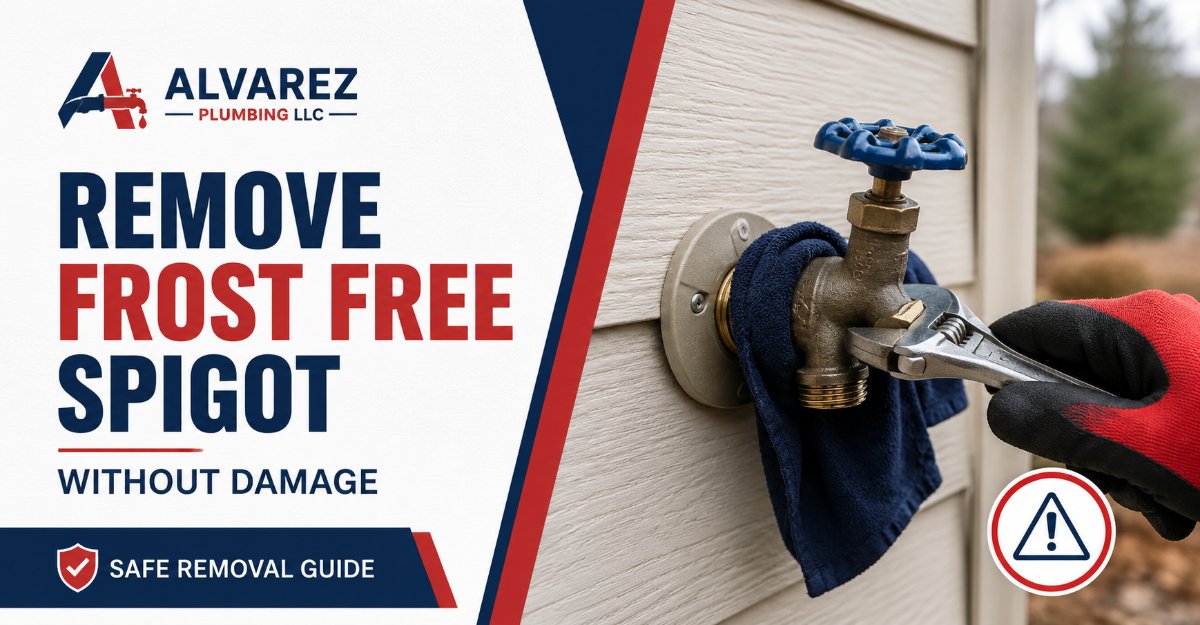
To remove a frost-free spigot, shut off its water supply, open the faucet to drain it, disconnect the indoor pipe connection, remove the exterior screws and caulk, then pull the sillcock straight through the wall. The job typically takes 1-3 hours, and the main safety requirement is supporting the interior plumbing while loosening the valve.
Key Facts at a Glance
- A frost-free spigot, also called a frost-proof sillcock, has its shutoff valve at the back of a long stem inside the wall.
- A dedicated indoor shutoff valve is safer than shutting off the house main, but the faucet must remain open during removal.
- Threaded connections usually need two wrenches; soldered copper connections require cutting or controlled desoldering.
- A frost-free sillcock must slope slightly downward toward the outside so residual water can drain.
- A garden hose, splitter, or timer left attached can prevent drainage and cause freeze damage.
- Water flowing into a basement or wall when the faucet opens usually indicates a ruptured concealed faucet tube.
What a Frost-Free Spigot Is
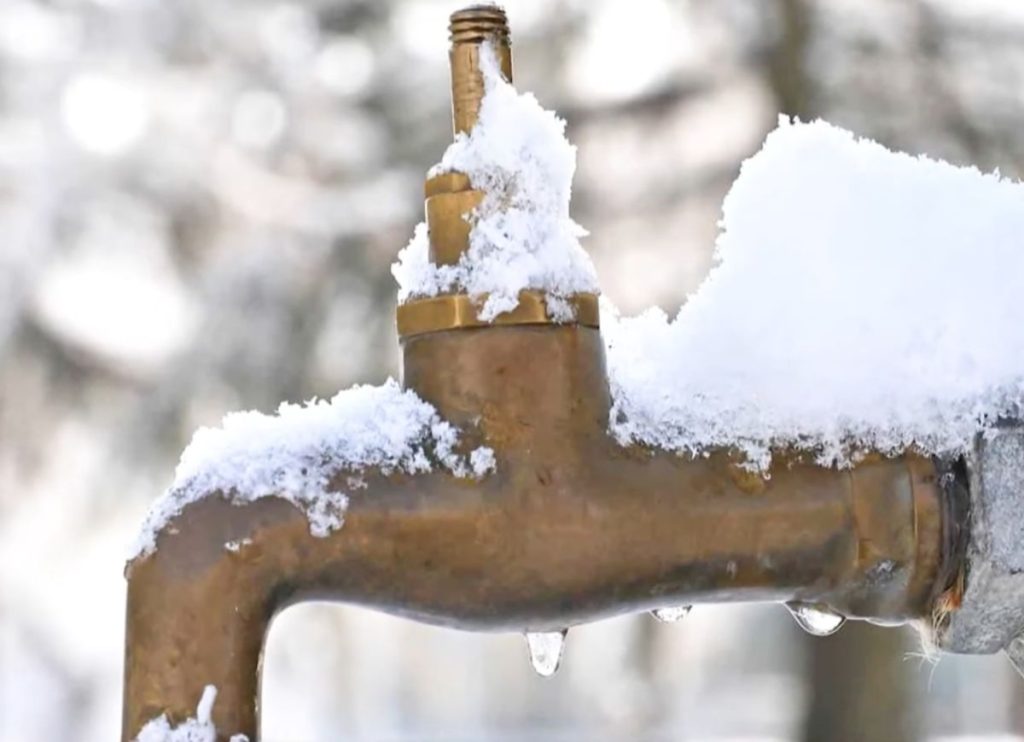
A frost-free spigot is an outdoor hose faucet designed to place the water shutoff valve inside the home’s heated space rather than at the exterior handle. The common names are frost-free faucet, frost-proof sillcock, freeze-proof faucet, and wall hydrant.
The faucet body usually extends 4-24 inches through the wall. Turning the outside handle rotates a long stem, which closes a rubber washer or cartridge near the indoor end. When the faucet is correctly installed and the hose is removed, water in the barrel can drain through the spout after shutoff.
The design reduces freeze risk, but it is not freeze-proof under every condition. A backward slope, attached hose, clogged vacuum breaker, unheated wall cavity, or pipe connected too far outside the heated envelope can leave water trapped in the barrel.
How does the mechanism drain?
The frost-free sillcock drains from the barrel after the internal valve closes, provided the spout is unobstructed and the body slopes toward the exterior. Woodford’s installation guidance specifies a downward pitch toward the outside because a level or reverse-pitched faucet can retain water.
The vacuum breaker above the outlet admits air and helps prevent backsiphonage into the potable water system. A small amount of water draining from the spout after shutoff is normal. Continuous dripping with the handle closed is a valve or washer problem, not normal frost-free operation.
Before You Start
A typical frost-free spigot removal costs $15-$60 in consumables when the replacement is already planned, takes 1-3 hours, and has intermediate difficulty. The connection type and indoor access determine the risk more than the exterior appearance.
Tools and materials
| Item | Typical quantity | Use |
|---|---|---|
| Adjustable wrench | 1 | Hold packing nuts or fittings |
| Pipe wrench or large tongue-and-groove pliers | 1 | Back up the indoor pipe |
| Screwdriver | 1 | Remove exterior mounting screws |
| Utility knife | 1 | Cut exterior sealant |
| Tubing or pipe cutter | 1 | Cut copper, CPVC, or PEX |
| Bucket and absorbent towels | 1 each | Catch residual water |
| Replacement screws | 2 | Secure the new flange |
| Exterior silicone sealant | 1 tube | Seal the wall penetration |
| Flashlight and inspection mirror | 1 each | Inspect concealed connections |
Use a fire-resistant blanket, spray bottle, and approved hot-work precautions if desoldering copper. Do not use a torch inside a closed wall cavity without a clear view of combustible materials.
Prerequisites and safety checks
Locate the dedicated shutoff valve, if one exists, before disconnecting anything. Common locations include the basement ceiling, crawlspace, utility room, mechanical closet, and branch manifold.
If no local valve exists, shut off the main water supply and tell occupants not to use fixtures during the work. Open a nearby indoor faucet and the outdoor sillcock to release pressure. Keep the outdoor handle open until the old valve is disconnected.
Stop and call a plumber when the indoor connection is inaccessible, the pipe moves when the spigot is turned, the wall contains unknown electrical wiring, the connection is inside a finished fire-rated assembly, or cutting would leave no usable pipe length.
How to Remove Frost Free Spigot Safely
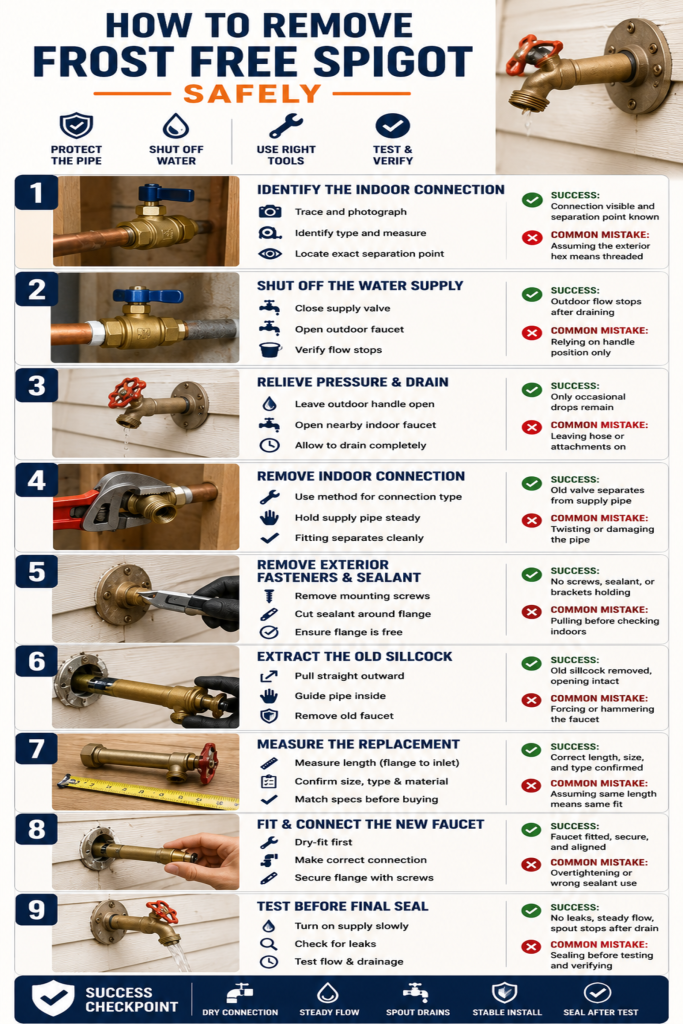
Removing a frost-free spigot requires nine controlled actions: identify the supply, shut off water, drain pressure, expose the connection, disconnect the pipe, remove the flange, extract the body, protect the opening, and inspect the pipe. The success checkpoint is a dry, undamaged supply line with enough straight pipe for reconnection.
Step 1: Identify the indoor connection
Trace the outdoor faucet from inside the basement, crawlspace, utility room, or wall access opening. Identify whether the inlet is threaded, soldered copper, push-to-connect, PEX crimped, PEX clamped, CPVC solvent-welded, or galvanized.
Photograph the connection and measure the available straight pipe before touching it. Look for a pipe bracket or clamp near the sillcock, because removing the valve without supporting the pipe can transfer torque into a hidden elbow or fitting.
You will know this step is complete when you can see the connection and identify the exact point where the old valve will separate. A common mistake is assuming the exterior hexagonal area proves the faucet is threaded; the visible hex may only be the valve body.
Step 2: Shut off the water supply
Close the dedicated valve clockwise, then open the outdoor faucet fully. If the local valve does not stop flow, close the home’s main shutoff and verify that an indoor cold-water faucet stops flowing.
Do not rely on handle position alone. A worn sillcock can appear closed while its internal washer still leaks. Place a bucket beneath the indoor connection before loosening any fitting.
The supply is isolated when the outdoor flow stops after the line drains. If water continues at full pressure, stop and locate another shutoff rather than cutting the pipe.
Step 3: Relieve pressure and drain the barrel
Leave the outdoor handle open and open a nearby indoor faucet for several seconds. Allow the water to drain until only occasional drops emerge from the spigot.
Remove any hose, hose reel, timer, splitter, or backflow attachment before judging whether the faucet drains. Attached accessories can trap water and make a healthy sillcock appear defective.
You will know the line is depressurized when a loosened connection produces no spray. Residual water may still remain inside a 12- or 18-inch barrel, so keep towels and a shallow container in place.
Step 4: Remove the indoor connection
Use the connection-specific method below. Hold the stationary supply pipe with one tool and turn only the sillcock fitting with the second tool whenever the design allows it.
| Connection | Removal action | Main risk | Replacement requirement |
|---|---|---|---|
| Threaded NPT | Back up the supply and turn the inlet counterclockwise | Twisted pipe or broken elbow | Matching 1/2-inch or 3/4-inch thread |
| Soldered copper | Desolder with visible hot-work clearance or cut copper | Fire and insufficient pipe length | Sweat, press, or approved push fitting |
| Push-to-connect | Release the collar with a disconnect clip, or cut behind the fitting | Damaged tubing or incomplete release | Compatible copper, PEX, or CPVC end |
| PEX crimp or clamp | Cut the tubing behind the ring and remove the barb | Shortened PEX and hidden kinks | New ring or clamp and compatible barb |
| CPVC solvent weld | Cut the pipe at a straight accessible section | Brittle pipe and difficult repair | CPVC-rated replacement fitting |
| Galvanized threaded | Use penetrating oil and two large wrenches | Corroded pipe fracture | New threaded transition or pipe section |
For a threaded sillcock, never twist the exterior handle or barrel while relying on the wall to resist movement. Apply one wrench to the indoor fitting or pipe nipple and a second wrench to the sillcock inlet. Turn the sillcock counterclockwise while keeping the supply motionless.
For copper, cutting is often safer than desoldering when the joint is inside a wall. Make the cut at least far enough from the old valve to leave clean, round pipe for a coupling or transition fitting, but confirm available length first.
You will know the connection is separated when the old body can move independently from the supply pipe. Stop if the pipe rotates, bends, cracks, or pulls against a nearby fitting.
Step 5: Remove exterior fasteners and sealant
Outside, remove the two or more screws holding the sillcock flange to siding, masonry, or the foundation. Cut the entire perimeter of old silicone with a utility knife, keeping the blade directed away from siding and your hand.
Do not pry aggressively against vinyl siding or fiber-cement board. A concealed mounting bracket may still hold the faucet after the screws are removed, especially on brick veneer or insulated sheathing.
The flange is free when no screw, sealant bead, pipe strap, or bracket resists gentle movement. A common mistake is pulling before checking indoors, which can tear insulation or disconnect a fitting inside the wall.
Step 6: Extract the old sillcock
Pull the frost-free spigot straight outward through the wall opening. Rotate it only slightly if the exterior flange catches on siding, and have a helper guide the indoor pipe so it does not scrape or bend.
If the body will not move, inspect for a pipe clamp, masonry sleeve, expanding foam, or a replacement valve installed over an old fitting. Do not hammer the faucet because impact can damage the wall penetration and connected pipe.
You will know extraction is complete when the full barrel, valve body, and inlet are outside and the wall opening remains structurally intact. Cover the opening temporarily if rain or debris can enter before installation.
Step 7: Measure the replacement
Measure the old sillcock from the exterior flange face to the inlet end, then compare that measurement with the manufacturer’s nominal length. Common nominal lengths are 4, 6, 8, 10, 12, 14, 18, and 24 inches.
Confirm four values before purchasing: nominal length, inlet size, connection type, and wall material compatibility. A 12-inch faucet is not automatically interchangeable with another 12-inch model because flange position, thread depth, and stem design vary by manufacturer.
| Replacement decision | Typical values | Why it matters |
|---|---|---|
| Inlet size | 1/2-inch or 3/4-inch | Must match the transition fitting |
| Nominal length | 4-24 inches | Must span the wall without excess interior reach |
| Exterior pitch | Slight downward angle | Allows barrel drainage |
| Mounting screws | 2 or more corrosion-resistant screws | Prevents movement at the wall |
| Sealant | Exterior-grade silicone | Blocks water and insects |
| Access allowance | 6-12 inches working clearance | Permits wrench or cutter use |
Do not choose a longer sillcock to compensate for an inaccessible connection. The inlet must remain inside the intended heated area, while the barrel should pass cleanly through the wall without sharp bends.
Step 8: Fit and connect the new faucet
Dry-fit the replacement from outside before applying sealant or making the final connection. Angle the spout slightly downward, align the screw holes where possible, and ensure the handle and vacuum breaker remain accessible.
For a threaded inlet, use thread sealant approved for potable-water plumbing and tighten with a backup wrench. Do not bury the flange in sealant before confirming the connection is leak-free.
For push-fit fittings, deburr and mark the insertion depth according to the fitting manufacturer’s instructions. For PEX, make a square cut and install the specified clamp or crimp ring with the correct tool. For solder, protect combustible materials and keep heat away from vacuum-breaker components and plastic parts.
Secure the flange with corrosion-resistant screws that enter sound material. Tighten until the flange is stable, not until siding deforms or the valve body bows.
Step 9: Test before sealing permanently
Close the outdoor handle, open the supply valve slowly, and inspect the indoor connection under pressure. Then open the faucet and check the joint again while water flows.
Run the faucet for 30-60 seconds, close it, and watch the spout for several minutes. A brief drain-down is normal; continuous flow indicates a washer, stem, or cartridge problem.
You will know the installation works when the indoor connection stays dry, the faucet delivers steady flow, the spout stops after the barrel drains, and the body remains stable when the handle turns. Apply the final silicone bead only after this test passes.
Which Connection Type Is Easiest to Remove?
Threaded frost-free spigots are usually easiest because the valve can be unscrewed without cutting, but they still require a backup wrench. Push-fit valves are convenient when accessible, while soldered, solvent-welded, and corroded galvanized connections usually require more skill or replacement pipe.
| Connection type | Typical DIY time | Tool complexity | Best removal strategy | DIY suitability |
|---|---|---|---|---|
| Threaded | 30-90 minutes | Two wrenches | Back up pipe and unscrew valve | Moderate |
| Push-to-connect | 30-60 minutes | Disconnect clip and cutter | Release or cut tubing | Moderate |
| PEX crimp | 45-90 minutes | PEX cutter and crimper | Cut ring and reconnect | Moderate |
| Soldered copper | 60-150 minutes | Cutter or torch | Cut when hot work is unsafe | Advanced |
| CPVC solvent weld | 60-120 minutes | Cutter and CPVC fittings | Cut straight section | Moderate |
| Galvanized steel | 90-180 minutes | Large wrenches and repair fittings | Replace corroded section | Advanced |
A threaded faucet is not automatically the lowest-risk option. If the indoor pipe is unsupported or badly corroded, unscrewing the valve can break an elbow inside the wall, creating a larger repair than cutting and rebuilding the line.
Should You Repair or Replace the Frost-Free Faucet?
Repair a frost-free sillcock when the leak comes from a serviceable washer, packing nut, or vacuum breaker. Replace the complete faucet when the concealed barrel has split, the body is cracked, the stem is unavailable, or corrosion prevents reliable disassembly.
| Symptom | Likely cause | Repair possible? | Immediate action |
|---|---|---|---|
| Leak under handle | Loose packing nut or worn packing | Usually | Tighten 1/8-1/4 turn |
| Drip from spout when closed | Worn bibb washer or cartridge | Usually | Replace washer or stem assembly |
| Leak at vacuum-breaker cap | Failed vacuum breaker | Usually | Install model-compatible kit |
| Water inside wall when opened | Burst barrel or inlet tube | Usually no | Shut off supply and replace |
| Cracked exterior body | Freeze or impact damage | No | Replace complete sillcock |
| Low flow after opening | Debris, screen, or valve restriction | Often | Clean aerator or service valve |
A concealed leak is the key dividing line. A frost-free faucet that leaks into the wall can damage insulation, framing, drywall, and flooring before the problem becomes visible.
Common Mistakes and How to Fix Them
Twisting the supply pipe
The most expensive removal error is turning the sillcock without stabilizing the indoor connection. If the pipe moved but did not crack, realign it and inspect every nearby joint under pressure; if a fitting split, keep the supply off until it is replaced.
Cutting too close to the wall
Cutting copper or PEX immediately beside the old valve can leave no straight pipe for a new fitting. Before cutting, identify the minimum insertion depth and the amount needed for a coupling, press fitting, or crimp connection.
Assuming the faucet drained
A hose, shutoff accessory, or clogged vacuum breaker can retain water. Remove every attachment and confirm the barrel is open to the atmosphere before winter, replacement, or freeze diagnosis.
Installing the body level or backward
A level or reverse pitch traps water in the barrel. Reposition the faucet so the spout is visibly lower than the inlet, following the replacement manufacturer’s installation instructions rather than relying on the siding line.
Over-tightening the flange
Excessive screw pressure can distort vinyl siding, crack masonry anchors, or bend the valve body. Use enough torque to stop movement and seal the perimeter with silicone instead of using screws to compress an uneven wall surface.
Applying heat without a clear cavity
A torch can ignite framing, insulation, vapor barriers, or wiring. Cut the copper when the joint is inside an obstructed wall, or hire a plumber for visible, controlled hot work.
Variations for Difficult Installations
Finished interior wall
A finished wall may require a small access opening to reach the inlet and support the pipe. Cut between studs only after checking for wiring and plumbing, save the drywall piece when possible, and install an access panel if the shutoff will remain serviceable.
Crawlspace with limited clearance
Use compact basin-style pliers or short-handled wrenches, but do not substitute adjustable pliers for a backup wrench on a fragile fitting. Support the pipe close to the sillcock with a strap or helper before applying torque.
Copper pipe with no local shutoff
Shut off the main, open the lowest faucet in the home, and work with towels ready because the branch line can retain water. After replacement, reopen the main slowly and inspect the new joint before restoring normal pressure.
PEX or CPVC tubing
PEX tolerates some movement but still requires a square cut and a properly installed connection. CPVC becomes brittle with age, so avoid bending it while removing the old sillcock and use only CPVC-rated fittings and cement.
Frozen or burst faucet
If water appears inside the basement or wall when the outdoor handle opens, stop using the faucet and close its shutoff. A burst tube may not leak until pressure is applied, so inspect the wall cavity and replace the damaged assembly before restoring service.
How Much Time and Money Does Removal Take?
A typical DIY replacement costs $30-$90 for a new frost-free sillcock, fittings, sealant, screws, and small consumables. Professional replacement commonly ranges from $150-$400, with finished-wall access, corroded pipe, masonry, and emergency service increasing the price.
| Work condition | Typical DIY time | Typical materials | Typical professional range |
|---|---|---|---|
| Accessible threaded connection | 1-2 hours | $30-$70 | $150-$250 |
| Accessible PEX connection | 1-2 hours | $35-$85 | $175-$300 |
| Soldered copper, cut and rebuilt | 2-3 hours | $45-$100 | $225-$400 |
| Finished-wall access | 2-4 hours | $60-$150 | $300-$600 |
| Corroded galvanized branch | 3-6 hours | $75-$200 | $400-$900 |
These are typical North American planning ranges, not fixed prices. The replacement valve, regional labor rate, wall repair, and amount of usable pipe account for most variation.
What Prevents the Replacement From Freezing?
Remove the garden hose before freezing weather, keep the spigot’s discharge unobstructed, and verify that the faucet slopes downward toward the exterior. A frost-free design cannot drain through a closed hose nozzle, spray gun, timer, or attached backflow device.
The faucet should connect inside the heated envelope whenever the building layout permits. Insulate nearby cold-air leaks, but do not pack insulation around a connection that needs inspection or around components that require manufacturer-specified clearance.
A frost-free sillcock also needs correct length. An excessively long valve can place the shutoff farther into a cold cavity, while a short valve may leave the connection near the exterior wall. Match the original nominal length and confirm the manufacturer’s installation requirements.
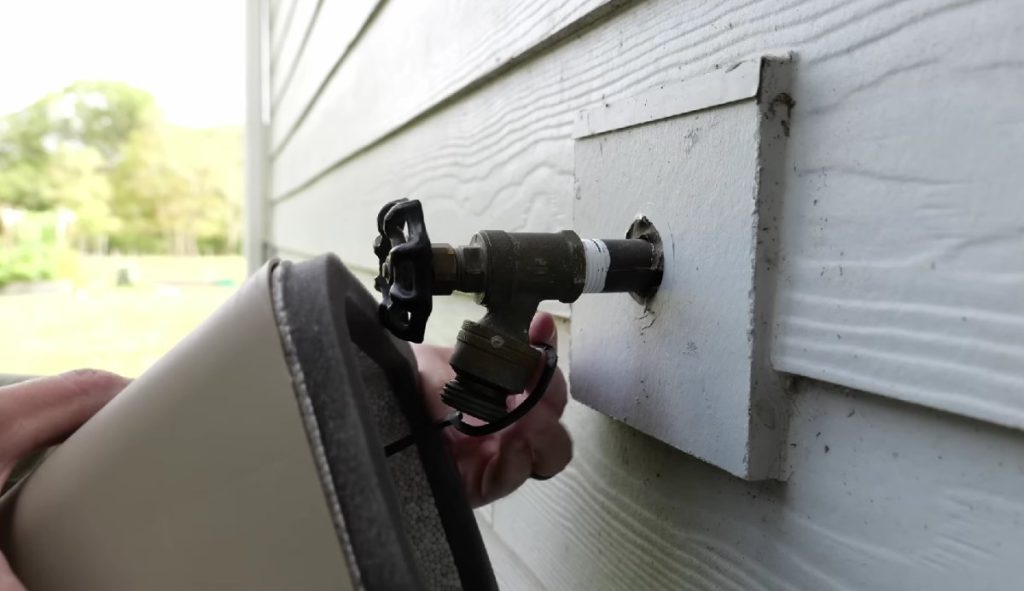
Alternatives to a Frost-Free Spigot
A standard hose bib with an indoor shutoff can work in a protected, nonfreezing location, but it requires manual winterization and does not provide the same automatic drainage design. A recessed wall hydrant can improve appearance and security, although its installation and replacement parts are more specialized.
| Option | Freeze protection method | Typical cost | Main limitation |
|---|---|---|---|
| Frost-free sillcock | Interior valve and drainable barrel | $30-$90 | Needs correct slope and hose removal |
| Standard hose bib | Indoor shutoff and manual draining | $10-$35 | Easy to forget in winter |
| Recessed wall hydrant | Insulated enclosure and internal valve | $100-$300 | Higher replacement cost |
| Yard hydrant | Buried drain valve below frost line | $80-$250 | Requires underground installation |
No outdoor faucet is a substitute for proper winter operation. In regions with severe cold, building exposure and pipe routing can matter as much as the product category.
When Should You Hire a Plumber?
Hire a plumber when the connection is hidden, corroded, soldered inside combustible construction, or connected to a pipe that moves under wrench pressure. Professional help is also appropriate when a frozen faucet has caused concealed water damage or when local plumbing rules require a specific backflow device.
A homeowner can usually manage an accessible threaded or push-fit replacement with shutoff control, correct tools, and careful testing. The project becomes substantially less suitable for DIY work when one mistake can flood a finished wall or when there is no way to inspect the connection after reconnection.
Frequently Asked Questions
Can I remove a frost-free spigot from outside only?
Usually, no. The exterior screws and sealant can be removed outside, but the supply connection normally requires indoor access or a planned pipe cut. Attempting to unscrew the faucet from outside without supporting the indoor pipe can twist a copper, PEX, or galvanized connection inside the wall.
What if the frost-free spigot will not unscrew?
Do not apply increasing force from the exterior. Confirm that the valve is actually threaded, remove interior pipe straps that block movement, apply penetrating oil to accessible metal threads, and use two opposing wrenches. If the supply pipe rotates or the threads are corroded, cut and rebuild the connection instead.
Does a frost-free spigot need an indoor shutoff valve?
An indoor shutoff valve is strongly recommended because it permits testing, repair, and seasonal isolation without shutting off the whole house. The faucet can function without one, but a concealed failure becomes harder to control and the branch line cannot be drained as conveniently.
Can a frost-free faucet freeze if the hose is removed?
Yes. A frost-free faucet can freeze when it slopes backward, the wall cavity is exposed to freezing air, the valve is installed outside the heated envelope, or the barrel cannot drain. Hose removal lowers the risk but cannot correct an installation defect or a severe unprotected exposure.
How do I know which replacement length to buy?
Measure from the exterior flange face to the inlet end of the old sillcock, then verify the nominal size against the new manufacturer’s dimensions. Match the connection type and inlet size as well. Wall thickness, siding, and interior fitting depth can make an apparently identical nominal length unsuitable.
Is water dripping from the spout after shutoff normal?
A short drain-down is normal because the barrel empties toward the exterior after the valve closes. Continuous dripping after several minutes indicates a worn washer, damaged cartridge, debris at the seat, or incomplete shutoff. A leak under the handle points to packing rather than barrel drainage.
The Bottom Line
To remove a frost-free spigot safely, shut off and drain the line, expose the indoor connection, support the supply pipe, disconnect the correct fitting, remove the exterior fasteners, and pull the valve straight through the wall. Match the replacement length and connection, install a slight downward pitch, test indoors under pressure, and never leave a hose attached during freezing weather. Following these controls is the reliable way to remove frost free spigot hardware without turning a small faucet replacement into a concealed plumbing repair.