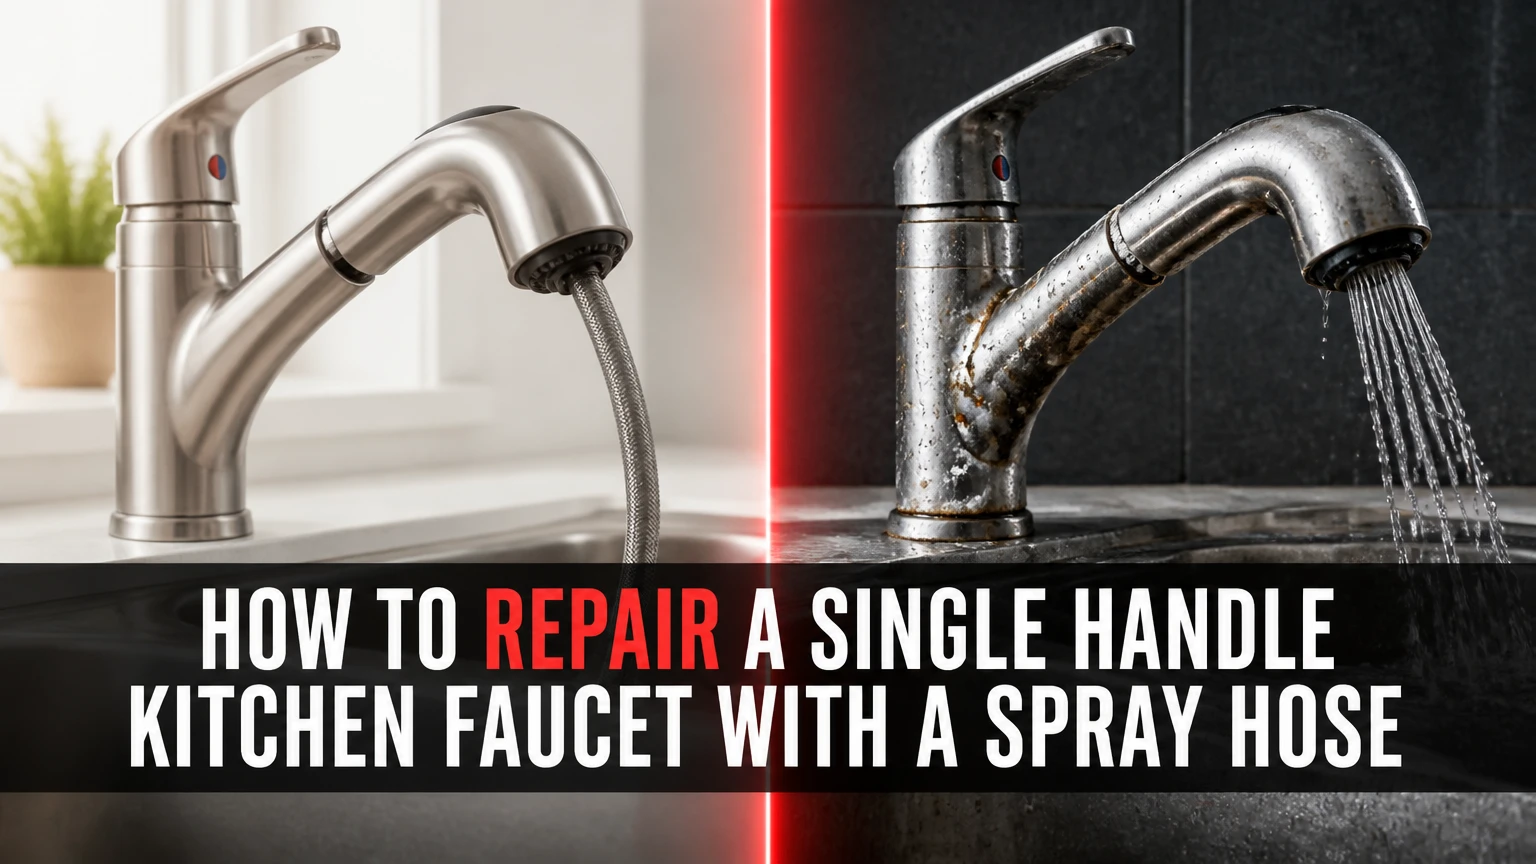
To repair a single handle kitchen faucet with a spray hose, first identify where the failure occurs, shut off both supply lines, and service the matching component: cartridge or ball seals for spout drips, O-rings for base leaks, the diverter for spray-transfer problems, or the hose and spray head for under-sink leaks. Most repairs require 45-90 minutes.
Key Facts at a Glance
- A constant drip from the spout usually points to a worn cartridge, valve seal, or ball-valve seat and spring.
- Water leaking around the rotating spout base usually comes from damaged or dry body O-rings.
- Weak spray flow is more often caused by mineral buildup or debris than by a failed diverter.
- A diverter problem commonly causes poor spray transfer or water flowing from both the spout and sprayer.
- Replacement parts must match the faucet brand, model, and valve generation.
- Faucet seals require plumber’s silicone grease, not petroleum jelly or general-purpose spray lubricant.
Before You Start
A typical single-handle kitchen faucet repair costs $10-$60 in parts and takes 45-90 minutes when the faucet model is identifiable and the shutoff valves work. A stuck cartridge, corroded fastener, obsolete part, or failed shutoff valve can extend the job beyond two hours.
Repair Requirements
| Item | Typical requirement | Practical note |
| Working time | 45-90 minutes | Add 30-60 minutes for corrosion |
| Difficulty | Beginner to intermediate | Cartridge identification is the main challenge |
| Basic repair cost | $10-$35 | O-rings, seats, springs, diverter, or spray head |
| Cartridge or hose cost | $20-$60 | OEM parts often cost more |
| Faucet replacement threshold | Typically $120-$350 | Excludes unusual countertop or plumbing work |
| Water shutdown | Hot and cold valves | Main shutoff may be needed if valves fail |
Tools and Materials
Prepare an adjustable wrench, correctly sized hex keys, Phillips and flat screwdrivers, needle-nose pliers, tongue-and-groove pliers, towels, a flashlight, a small parts container, white vinegar, an old toothbrush, and plumber’s silicone grease. A cartridge puller is useful when mineral deposits lock a cartridge inside the valve body.
Protect chrome, brushed nickel, black, and plated finishes by placing tape or a folded cloth between the wrench and faucet. Do not grip a decorative bonnet with bare serrated pliers.
How Does the Faucet and Spray Hose Work?
A single-handle kitchen faucet mixes hot and cold water inside a cartridge, ceramic valve, or rotating ball assembly. Moving the handle changes both the flow volume and the proportion of hot and cold water.
A side sprayer normally uses a diverter inside the faucet body. Pressing the spray trigger changes pressure inside the faucet, causing the diverter to reduce spout flow and redirect water through the hose. Kohler’s service instructions confirm that some single-control models place a removable diverter behind the faucet body, although its exact location varies by model.
Many modern pull-down and pull-out faucets route water directly through the retractable hose and spray head. These models may use an integrated flow path rather than the traditional removable diverter found in older side-spray faucets.
Identify the Faucet Mechanism Before Disassembly
The correct repair part depends on the valve design, not merely the faucet’s appearance. Locate the brand name on the spout, escutcheon, spray head, supply tag, or underside label, then search the manufacturer’s parts diagram using the model number.
Delta’s official parts system recommends identifying the exact product model before selecting components for leaks, cracks, or loose parts. This prevents a common mistake: buying a visually similar cartridge that does not match the valve body.
| Valve design | Identification clues | Common repair |
| Sleeve cartridge | Cylindrical plastic or brass insert under retaining clip or nut | Replace cartridge and lubricate seals |
| Ceramic cartridge | Compact cartridge, smooth lever movement, often model-specific | Replace complete cartridge |
| Ball valve | Rounded cap, metal or plastic ball, cam, seats, and springs | Replace seats, springs, cam, or ball |
| Integrated pull-down valve | Hose passes through spout, multi-function spray head | Service cartridge, hose, check valve, or head |
| Side-spray diverter system | Separate sprayer beside faucet spout | Clean or replace diverter and hose |
Photograph the handle position, cartridge stem, tabs, clips, washers, and hose routing before removing parts. Orientation errors can reverse hot and cold operation or prevent the handle from closing fully.
Diagnose the Fault Before Taking It Apart
The leak location usually identifies the failed component faster than complete disassembly.
| Symptom | Most likely cause | First confirmation test | Typical repair |
| Spout drips when off | Cartridge or seats and springs | Close one supply valve at a time | Replace valve components |
| Water leaks below handle | Cartridge stem seals or retaining nut | Dry faucet and operate handle | Tighten nut or replace cartridge |
| Water leaks at spout base | Body O-rings | Rotate spout while watching base | Replace and lubricate O-rings |
| Weak flow from faucet and sprayer | Supply restriction or debris | Remove aerator or spray head | Flush and clean |
| Strong spout flow, weak sprayer | Clogged spray head, hose, or diverter | Remove spray head and test hose | Clean head or service diverter |
| Spout runs during spraying | Diverter bypass or normal small residual flow | Compare flow with trigger released | Clean or replace diverter |
| Water under sink during spraying | Hose, swivel, or connector leak | Run sprayer while observing connections | Reconnect or replace hose |
| Handle is stiff | Mineral buildup, dry seals, overtightened nut | Loosen retaining nut slightly | Clean, lubricate, or replace cartridge |
A faucet that drips once every second can waste more than 3,000 gallons in one year, according to the US Environmental Protection Agency. Repairing the valve is therefore more than a noise-control measure.
Step 1: Obtain the Correct Replacement Parts
Identify the faucet brand and model before shutting off the water. Use the manufacturer’s exploded parts diagram to match the cartridge, O-ring kit, seats and springs, diverter, retaining clip, hose, or quick-connect fitting.
Do not assume that every faucet from one brand uses the same cartridge. Manufacturers revise valve designs, and similar-looking products may use different stem lengths, tabs, port arrangements, or retaining systems.
Success checkpoint: The replacement part number matches a manufacturer diagram, package cross-reference, or the number molded into the removed part.
Common mistake: Purchasing a universal cartridge before opening the faucet. Universal O-rings may work when their dimensions match exactly, but cartridges and diverters are generally model-specific.
Step 2: Shut Off and Test Both Water Supplies
Turn the hot and cold shutoff valves clockwise until they stop, then open the faucet in the central position. Water should slow and stop within several seconds as pressure leaves the lines.
Place a towel and shallow container beneath the faucet. Close the sink drain or cover it with a rag so screws, clips, and springs cannot fall into the drain.
When a shutoff valve continues passing water, do not disassemble the faucet under pressure. Close the home’s main water valve or arrange replacement of the failed stop valve first.
Success checkpoint: No water flows with the faucet handle fully open.
Common mistake: Trusting the valve position without testing it. Old multi-turn shutoffs can feel closed while still allowing substantial flow.
Step 3: Remove the Handle Without Damaging It
Find the set screw beneath the lever, behind a decorative plug, or under a red-and-blue temperature cap. Insert a fully seated hex key or screwdriver and loosen the fastener before lifting the handle straight off.
Kohler’s single-handle valve instructions use the same basic sequence: shut off the supply, remove the plug button, loosen the hidden screw, and remove the handle before opening the valve body.
Apply a vinegar-dampened cloth around mineral-bound joints for 15-30 minutes. Do not force a loose-fitting hex key because a rounded set screw may require extraction or drilling.
Success checkpoint: The handle lifts away while the cartridge stem remains intact.
Step 4: Remove the Bonnet and Retaining Hardware
Unscrew the decorative bonnet by hand when possible. Remove the retaining nut with an adjustable wrench, or pull the horseshoe-shaped retaining clip with needle-nose pliers.
Arrange every piece in removal order. Some ball-valve faucets contain a cap, adjusting ring, cam, cam washer, ball, two rubber seats, and two springs. Delta’s repair instructions specify aligning the ball slot with the valve pin and reinstalling the cam tab in the valve slot.
Success checkpoint: The valve component is exposed and its original orientation is documented.
Common mistake: Applying excessive force to the bonnet. A seized decorative cap can deform before the actual retaining nut moves.
Step 5: Inspect the Valve and Faucet Body
Check the cartridge for cracked plastic, distorted seals, mineral scale, scoring, and flattened O-rings. On a ball faucet, inspect the rubber seats, springs, cam washer, and ball surface.
Examine the brass or plastic valve-body cavity with a flashlight. Sharp corrosion, cracks, or deep pitting may prevent a new seal from seating, making full faucet replacement more reliable.
Soak reusable metal parts in white vinegar for 15-30 minutes, then scrub gently. Do not soak an entire cartridge unless the manufacturer permits it because vinegar can affect some rubber compounds and lubricants.
Success checkpoint: The valve cavity is clean, smooth, and free of loose debris.
Step 6: Replace the Cartridge or Ball-Valve Seals
Pull a cartridge straight upward while rocking it gently. When mineral deposits hold it in place, use the manufacturer’s cartridge puller rather than twisting the stem with excessive force.
Install the new cartridge in the exact original orientation. Align locating tabs with valve-body slots, reinstall the clip or retaining nut, and apply only a thin film of plumber’s silicone grease to approved rubber seals.
For a ball faucet, place the springs into the valve recesses, position the rubber seats over them, and reinstall the ball, cam, washer, and cap. Delta identifies worn seats and springs as a repair point for single-handle faucets that drip while turned off.
Success checkpoint: The cartridge seats fully and the retaining hardware installs without force.
Common mistake: Overtightening the retaining nut. Excess pressure can make the handle stiff, distort seals, or crack a plastic cartridge.
Step 7: Clean and Test the Spray Head
Unscrew the spray head from the hose while holding the hose end so it cannot retract beneath the sink. Inspect the inlet screen, check valve, aerator, and spray nozzles for sediment.
Soak removable mineral-covered parts in white vinegar for 20-30 minutes, brush them gently, and rinse thoroughly. The EPA recommends checking faucets for calcium buildup and using white vinegar or another suitable cleaner when deposits restrict flow.
Briefly direct the open hose into the sink and turn on the water. Strong hose flow confirms that the restriction is inside the spray head. Weak hose flow points toward the hose, connector, diverter, or supply path.
Success checkpoint: Water exits the open hose strongly and the cleaned head switches spray modes correctly.
Step 8: Service the Diverter When Spray Transfer Fails
Replace the diverter only after confirming that the spray head and hose are clear. A restricted nozzle can imitate a failed diverter, while replacing the diverter will not correct debris trapped at the spray head.
On serviceable side-spray faucets, remove the spout or valve components required by the manufacturer, locate the small diverter insert, and pull it out with needle-nose pliers. Kohler instructs users to grasp the diverter fins, remove the old assembly, and press the replacement into its valve-body opening with the fins facing outward on applicable models.
Lubricate only where the manufacturer directs. Some diverters use small sealing O-rings, while others are installed dry.
Success checkpoint: Squeezing the sprayer trigger redirects most or all flow from the spout to the sprayer.
Step 9: Repair a Leaking Spray Hose
A damaged spray hose should normally be replaced rather than patched. Adhesive tape, clamps, and sealant cannot provide a dependable long-term repair on a flexible hose that bends, retracts, and remains pressurized.
Inspect the hose at the spray-head swivel, quick-connect fitting, faucet outlet, counterweight, and areas that rub against cabinet edges or stored objects. Push a quick-connect fitting together until its retaining clip or locking tabs engage.
Threaded connections should be tightened according to the fitting design. Do not automatically add thread-seal tape because many spray hoses seal with an internal washer or O-ring rather than tapered threads.
Success checkpoint: The hose remains dry while fully extended, retracted, rotated, and operated in each spray mode.
Step 10: Reassemble, Flush, and Leak-Test
Reinstall the bonnet and handle, but leave the spray head or aerator removed for the first flush. Open the cold shutoff slowly, then the hot shutoff, while watching every connection beneath the sink.
Run water through the open hose or spout for 30-60 seconds to clear loosened sediment. Reinstall the spray head, operate the handle through its full temperature range, switch spray modes repeatedly, and dry all components before checking for fresh moisture.
Test again after 10 minutes. Slow connector leaks may not appear immediately.
Success checkpoint: The faucet shuts off completely, the handle moves smoothly, spray transfer works, and all above-sink and under-sink surfaces remain dry.
Common Mistakes and How to Fix Them
| Mistake | Result | Recovery |
| Cartridge installed backward | Reversed temperature or incomplete shutoff | Shut off water and rotate cartridge correctly |
| Retaining nut overtightened | Stiff or binding handle | Loosen slightly and retest |
| Wrong cartridge installed | Leak continues or handle will not fit | Match exact manufacturer part number |
| Petroleum lubricant used | Rubber may swell or deteriorate | Clean parts and replace affected seals |
| Hose twisted during installation | Poor retraction and early hose wear | Disconnect, straighten, and reroute |
| Quick-connect clip omitted | Hose separates under pressure | Install the correct locking clip |
| Lines not flushed | New cartridge or head clogs quickly | Remove head and flush for 30-60 seconds |
| Corroded valve forced with pliers | Broken stem or damaged faucet body | Stop and use the correct puller or replace faucet |
A counterintuitive repair rule is to diagnose low spray pressure before opening the faucet body. In practice, removing and testing the spray head takes less than five minutes and prevents unnecessary diverter replacement.
Another practitioner rule is to keep the old cartridge until the faucet passes every test. Packaging errors and visually similar replacement parts occur, and the original component provides the best physical reference.
How Much Does the Repair Cost and Take?
| Repair type | Typical DIY parts | Typical time | Main variable |
| Clean spray head | $0-$10 | 15-30 minutes | Mineral buildup |
| Replace O-rings | $5-$20 | 30-60 minutes | Spout removal |
| Replace seats and springs | $5-$20 | 30-60 minutes | Ball-valve access |
| Replace diverter | $10-$35 | 30-75 minutes | Diverter location |
| Replace cartridge | $20-$60 | 45-90 minutes | Cartridge seizure |
| Replace spray hose | $20-$70 | 30-75 minutes | Connector access |
| Replace complete faucet | $120-$350 typical | 1.5-3 hours | Mounting corrosion |
These are typical retail and working-time ranges, not fixed quotations. Brand-specific parts, premium finishes, limited cabinet access, regional labor rates, and failed shutoff valves can increase the total.
Should You Repair or Replace the Faucet?
Repair the faucet when its body is structurally sound, replacement parts are available, and the fault is confined to a cartridge, seal, diverter, spray head, or hose. Replace it when the valve body is cracked, badly corroded, repeatedly leaking, or unsupported by available parts.
| Condition | Repair | Replace |
| One identifiable failed cartridge | Preferred | Usually unnecessary |
| Leaking replaceable hose | Preferred | Only if hose is unavailable |
| Deep valve-body pitting | Unreliable | Preferred |
| Cracked faucet body | Not recommended | Required |
| Multiple recurring leaks | Temporary value | Often preferred |
| Obsolete proprietary parts | Difficult | Preferred |
| Loose mounting only | Tighten hardware | Not required |
| Severe corrosion under sink | Possible but labor-intensive | Often preferred |
An older faucet is not automatically beyond repair. Age matters less than body condition, part availability, mounting stability, and the number of separate failures.
When Should You Call a Plumber?
Stop the repair when the main water supply cannot be controlled, a shutoff valve begins leaking, the faucet body cracks, the cartridge breaks inside the valve, or corrosion prevents safe disassembly.
Professional help is also appropriate when water damage appears inside the cabinet or wall, supply tubing is kinked or corroded, the countertop mounting area is unstable, or repeated repairs fail to stop the leak. These conditions extend beyond ordinary cartridge or spray-hose maintenance.
FAQ
Can I replace only the O-rings instead of the cartridge?
You can replace only the O-rings when the cartridge body and internal control surfaces remain sound and the leak clearly comes from an external seal. Replace the complete cartridge when the faucet drips from the spout, the stem is damaged, movement is rough, or internal ceramic or plastic surfaces are worn.
Why does the faucet still drip after cartridge replacement?
Continued dripping usually means the replacement cartridge is incorrect, reversed, incompletely seated, damaged by debris, or installed into a scored valve body. Shut off the water, compare the old and new parts, clean the cavity, confirm tab orientation, and inspect the retaining nut for uneven or excessive tightening.
Is a small amount of spout flow normal while using the sprayer?
A brief residual stream may occur as the diverter changes position, but strong continuous spout flow during spraying usually indicates a restricted spray head, low pressure differential, debris inside the diverter, or a worn diverter seal. Clean the head and test the open hose before replacing internal parts.
Can I use WD-40 on a stuck faucet cartridge?
Do not use WD-40 as the sealing lubricant for faucet O-rings or cartridges. Use a manufacturer-approved cartridge tool, controlled rocking pressure, vinegar around external mineral deposits, and plumber’s silicone grease during reassembly. A badly seized cartridge may require a dedicated puller or complete faucet replacement.
What if the spray hose retracts poorly after repair?
Poor hose retraction usually comes from a misplaced counterweight, twisted hose, crowded cabinet, or hose rubbing against supply lines and stored items. Center the weight at the manufacturer’s marked location, straighten the hose, clear its travel path, and operate the sprayer several times while watching beneath the sink.
Do I need plumber’s tape on a spray-hose connection?
Use plumber’s tape only when the manufacturer specifies it for a tapered threaded connection. Many spray hoses use flat washers, O-rings, swivel seals, or quick-connect fittings, and tape can interfere with proper seating. Identify the sealing method before adding any thread compound.
Conclusion
The reliable way to learn how to repair a single handle kitchen faucet with a spray hose is to diagnose the exact symptom before replacing parts. Shut off both supplies, identify the model, service only the failed cartridge, seal, diverter, spray head, or hose, then flush and pressure-test every connection before returning the cabinet to use.
The repair is usually manageable when the faucet body remains sound and the correct parts are available. Severe corrosion, failed shutoff valves, structural cracks, or repeated leaks indicate that professional repair or complete faucet replacement will provide a safer result.