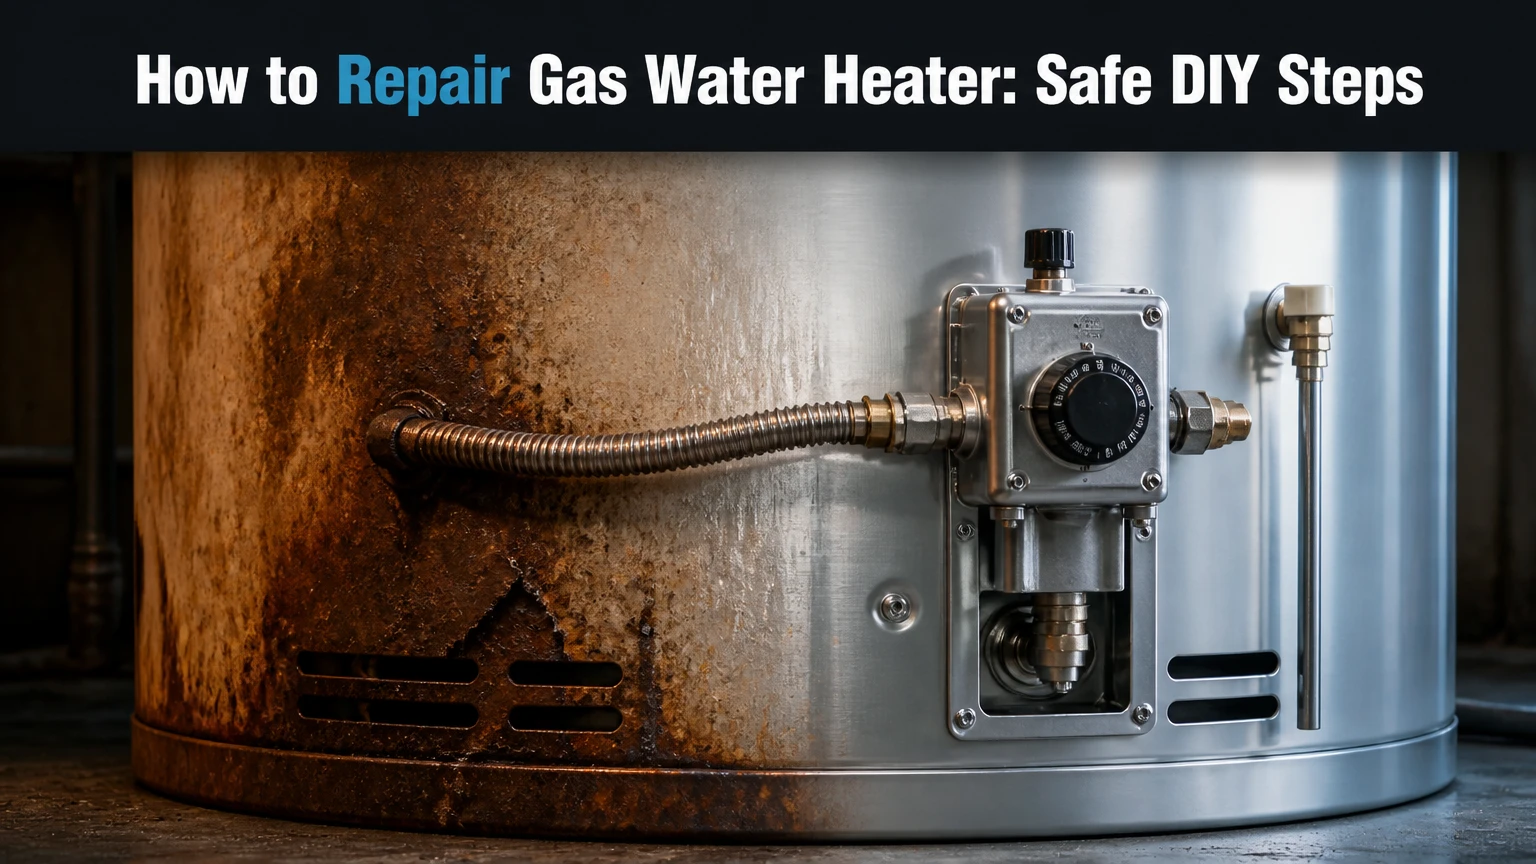
To repair a gas water heater, first identify the symptom, shut off gas and power when required, and follow the manufacturer’s service procedure for the failed component. Homeowners can usually inspect settings, relight an approved pilot, flush sediment, and replace some thermocouples, while gas valves, burners, venting, tank leaks, and combustion problems require a qualified professional.
Key Facts at a Glance
Set a residential water heater thermostat near 120°F (49°C) to reduce scald risk and standby energy use.
A gas odor, carbon-monoxide alarm, soot, unstable flame, or backdraft requires immediate shutdown and professional service.
Water leaking from the tank shell usually means the tank cannot be repaired economically and needs replacement.
Never fire a gas water heater until the tank is completely full and water flows steadily from an open hot-water tap.
A thermocouple commonly costs $15-$40 and may take 30-60 minutes to replace, depending on burner access.
Typical professional water-heater repair costs range from $150-$600, while gas-valve or control work can cost more.
How a Gas Water Heater Works
A conventional gas water heater stores cold water in an insulated steel tank and heats it with a burner below the tank. A dip tube directs incoming cold water downward, the thermostat calls for heat, and a pilot or electronic ignition lights the burner; hot water then rises to the outlet at the tank top.
The burner’s combustion gases travel through the center flue and leave through the vent connector or powered exhaust system. The flue transfers heat to the surrounding water, while the draft hood, vent, combustion-air openings, and safety controls keep combustion products moving away from living spaces.
The main components have different failure symptoms:
| Component | Function | Typical failure symptom | Homeowner action |
|---|---|---|---|
| Gas control valve | Regulates fuel and thermostat control | No burner, incorrect temperature, repeated shutdown | Check settings; call a professional |
| Thermocouple or flame sensor | Confirms pilot or burner flame | Pilot will not stay lit | Inspect or replace if model permits |
| Burner assembly | Produces heat under tank | Yellow flame, soot, weak heat | Do not adjust gas pressure; service required |
| Dip tube | Sends cold inlet water to tank bottom | Lukewarm water, sudden capacity loss | Professional inspection often needed |
| T&P relief valve | Relieves excessive temperature or pressure | Water discharge from relief pipe | Never cap it; diagnose pressure or temperature |
| Anode rod | Corrodes instead of tank steel | Rust-colored water, shortened tank life | Inspect and replace when accessible |
| Flue and vent | Removes combustion products | Soot, spillage, carbon-monoxide risk | Stop operation and call a technician |
A gas water heater is safe only when fuel, flame, draft, temperature, and pressure controls operate together. A heater can still produce hot water while venting carbon monoxide, so hot-water delivery alone does not prove safe operation.
What Should You Check Before Repairing a Gas Water Heater?
Before repairing a gas water heater, record the manufacturer, model, fuel type, symptom, status-light pattern, and approximate installation year. Read the rating plate and owner’s manual because pilot procedures, access panels, ignition systems, and approved replacement parts differ by model.
Before You Start
| Requirement | Typical value | Why it matters |
|---|---|---|
| Diagnostic time | 10-20 minutes | Identifies settings, supply, and visible leaks |
| Basic repair time | 30-90 minutes | Covers pilot, thermocouple, or simple drain work |
| Thermocouple part | $15-$40 | Must match the heater connection and length |
| Flush time | 45-120 minutes | Depends on tank size and sediment volume |
| Basic tools | Adjustable wrench, screwdriver, hose | Use only where the manual permits |
| Required condition | Full tank before firing | Prevents dry firing and internal damage |
Keep a flashlight, bucket, gloves, eye protection, a garden hose, and the correct replacement part available. Do not improvise with automotive parts, oversized burners, blocked vents, or unapproved pipe fittings.
Is It Safe to Repair a Gas Water Heater Yourself?
DIY repair is generally limited to observation, thermostat-setting checks, an approved pilot-light procedure, sediment flushing, and certain thermocouple replacements. Gas piping, gas-control valves, burner-pressure adjustments, vent repairs, combustion testing, tank relocation, and code-related work belong to a licensed gas or plumbing professional.
Immediately leave the building and contact the gas utility or emergency service if you smell gas. Do not operate switches, use a flame, start a vehicle nearby, or attempt to locate the leak. If a carbon-monoxide alarm sounds, leave first and investigate only after the building is declared safe.
Stop and Call a Professional When
- The heater has soot, scorch marks, a yellow or unstable flame, or exhaust spillage.
- The tank shell leaks, bulges, rusts through, or releases water from a seam.
- The gas smell persists after the control knob is turned off.
- The T&P valve repeatedly discharges or the discharge pipe becomes hot.
- A burner, gas valve, vent, manifold, or combustion chamber requires removal.
- The heater is installed in a closet with inadequate combustion air.
- A tankless unit displays a combustion, venting, overheating, or flame-failure code.
The U.S. Consumer Product Safety Commission recommends prompt professional attention to fuel-burning appliances that may produce carbon monoxide. Carbon monoxide is odorless, so a working alarm on every sleeping level provides protection that visual inspection cannot.
Step 1: Shut Down the Heater Safely
Turn the gas control to OFF, close the manual gas shutoff valve if service is needed, and switch off the electrical breaker for power-vented or tankless equipment. If the heater is hot, allow it to cool before opening drain valves or removing burner-access components.
For leak control, close the cold-water inlet above the heater. Open a nearby hot-water faucet only when draining is appropriate, because opening a tap can release stored hot water and create a scald hazard.
Success checkpoint: The control displays OFF, the manual gas handle is closed when required, and the burner cannot operate.
Common mistake: Turning off the gas control but leaving an electrical power-vent or tankless unit energized during service.
Step 2: Diagnose No Hot Water
A gas water heater with no hot water most often has a failed ignition or pilot, interrupted gas supply, a tripped safety control, or a thermostat or gas-valve fault. Start with the least invasive checks rather than removing the burner assembly.
Check whether other gas appliances operate. Confirm the heater’s gas valve is open, the thermostat is set above the current water temperature, and the status light or display shows an error. If the pilot is out, follow the exact relighting instructions printed on the heater.
Pilot and Ignition Troubleshooting
A standing-pilot heater usually requires turning the control to PILOT, holding the reset button, and using the specified igniter for the stated time, often 30-60 seconds. An electronic-ignition heater may require a power reset or fault-code procedure instead, and repeatedly resetting it can hide a dangerous combustion problem.
If the pilot lights but goes out when the button is released, the thermocouple may be weak, incorrectly positioned, dirty, or poorly connected. Drafts, a blocked air intake, a damaged pilot assembly, or a failing gas-control valve can create the same symptom.
Success checkpoint: The pilot remains lit after the manual’s hold period, the burner ignites with a mostly blue flame, and no gas odor or soot appears.
Common mistake: Holding the reset button indefinitely or repeatedly relighting a heater with a blocked vent.
Step 3: Replace an Approved Thermocouple
A compatible thermocouple can restore a standing pilot that will not remain lit, but the replacement must match the original connection and flame position. Turn off gas, allow the burner to cool, remove the access cover, and follow the manufacturer’s burner-assembly instructions.
Typical procedure:
- Disconnect the thermocouple from the gas-control valve with the correct wrench.
- Remove the burner access or burner assembly only as the manual directs.
- Release the old sensor from its clip or bracket.
- Position the new sensor so its tip sits directly in the pilot flame.
- Reinstall the burner assembly and reconnect the fitting without cross-threading.
- Restore gas and perform the approved pilot-light sequence.
Use the specified tightening method. “Hand-tight plus a quarter turn” is not universal, and overtightening can damage the soft connection or gas-control valve.
Success checkpoint: The pilot remains stable, the burner lights smoothly, and the flame does not lift, flutter, or produce yellow soot.
Common mistake: Replacing the thermocouple without correcting a weak pilot flame or venting problem.
Step 4: Flush Sediment From the Tank
Sediment causes popping, rumbling, slower recovery, and reduced usable capacity because mineral deposits insulate the tank bottom from the burner. Flushing can improve performance when the tank is sound, but it cannot repair a corroded shell, failed dip tube, defective thermostat, or severely restricted drain valve.
To flush a conventional tank:
- Turn the thermostat to the lowest setting or follow the manufacturer’s shutdown instruction.
- Turn off gas and allow the water to cool.
- Close the cold-water inlet.
- Attach a garden hose to the drain valve and route it to a safe drain location.
- Open a hot-water faucet to admit air.
- Open the drain valve and let the tank empty.
- Briefly open the cold-water inlet in short intervals until the discharge runs clearer.
- Close the drain, remove the hose, open the inlet, and keep a hot tap open.
- Wait until the tap flows steadily before restoring the gas operation.
Never direct near-boiling discharge onto landscaping, flooring, people, or plastic piping. If the drain valve clogs, do not force it with excessive torque; a failed valve can turn maintenance into a major leak.
Success checkpoint: The tank refills fully, the hot tap produces a steady stream without air, and no drain or connection leaks.
Common mistake: Lighting the burner before the tank is full. Dry firing can damage the tank lining and components, although it does not “instantly crack” every tank as a universal rule.
Step 5: Inspect or Replace the Anode Rod
An anode rod protects the tank by corroding before the steel tank does. An inspection every 2-3 years is a reasonable maintenance interval for many homes, but softened water, acidic water, high temperature, and heavy usage can consume the rod faster.
Turn off fuel, water, and power where applicable, then relieve pressure through a hot tap. The hex head is commonly located on top of the tank, and many models use a 1-1/16-inch socket, though the manual controls.
If overhead clearance is limited, a segmented or flexible replacement rod may be necessary. Remove the old rod carefully, compare its length and connection to the replacement, and use only the thread sealant specified by the manufacturer. Some manufacturers permit approved pipe-thread sealant; others advise against excessive tape that can interfere with electrical bonding or installation depth.
Success checkpoint: The new rod is fully seated, the fitting is dry under pressure, and the tank refills without a leak.
Common mistake: Attempting removal with the tank unsecured or using an impact tool that damages the tank connection.
What Do Common Gas Water Heater Leaks Mean?
A gas water heater leak requires identifying the exact source, not simply replacing the whole appliance. Water from a loose hot or cold connection, drain valve, or T&P discharge may be repairable, while water emerging from the tank seam or jacket bottom usually indicates internal tank failure.
| Leak location | Likely cause | Repair outlook | Immediate response |
|---|---|---|---|
| Top threaded connection | Loose fitting or corrosion | Usually repairable | Shut water off if spraying |
| Drain valve | Loose valve, worn washer, damaged seat | Often repairable | Do not overtighten |
| T&P discharge pipe | Excess pressure, heat, failed valve | Diagnose promptly | Never cap or plug it |
| Bottom center | Drain or burner opening leak | Requires inspection | Shut fuel and water if active |
| Tank seam or shell | Internal corrosion | Replace heater | Shut fuel, water, and contain damage |
| Under flue area | Condensation or tank failure | Diagnosis required | Stop operation if persistent |
Condensation can appear during cold starts, especially on oversized tanks or cold incoming-water conditions, but persistent dripping after the heater reaches operating temperature deserves inspection. A T&P valve must discharge freely through its correctly sized pipe and must never be capped.
Why Is the Water Too Hot or Not Hot Enough?
Water that is too hot commonly results from an incorrect thermostat setting, a stuck gas-control valve, a failed temperature sensor, or a mixing-valve problem. Water that is lukewarm can result from sediment, a broken dip tube, an undersized tank, a failed thermostat, or a cross-connection that mixes cold water into the hot line.
Measure temperature at a tap after allowing it to run for several minutes. A target near 120°F (49°C) is widely used for residential scald-risk reduction, while health-care facilities may use higher storage temperatures with thermostatic mixing controls.
| Symptom | Likely causes | Practical test | Typical repair |
|---|---|---|---|
| No hot water | Pilot, ignition, gas supply, control | Check status and pilot | Pilot service or professional diagnosis |
| Hot water lasts 5-15 minutes | Sediment, dip tube, undersizing | Compare recovery and flow | Flush, replace dip tube, or resize |
| Temperature fluctuates | Mixing valve, cross-connection | Test other fixtures | Valve service or plumbing repair |
| Water exceeds 120°F | Thermostat or gas valve | Measure outlet temperature | Adjust or replace control |
| Recovery is slow | Burner, vent, sediment | Observe burner pattern | Professional combustion service |
| Rust-colored hot water | Anode depletion or corrosion | Compare cold and hot samples | Replace anode or heater |
A temperature setting change cannot correct a failed dip tube or a burner that is not operating at the rated input. Repeated thermostat adjustment without measurement can increase scald risk.
How Do Tankless Gas Water Heaters Differ?
Tankless gas water heaters require different troubleshooting because they heat water only when flow activates a sensor and burner. Common faults include low flow, clogged inlet screens, ignition failure, scale in the heat exchanger, inadequate gas supply, blocked intake or exhaust, and power interruption.
A tankless unit generally needs electricity for controls, ignition, sensors, and sometimes a combustion fan, so it may not operate during an outage. Many models also require manufacturer-approved venting, periodic descaling, and minimum flow rates that vary by model.
| Feature | Conventional gas tank | Tankless gas unit |
|---|---|---|
| Stored capacity | 30-80 gallons | 0 gallons |
| Typical service life | 8-12 years | 15-20 years with maintenance |
| Heat delivery | Limited by tank recovery | Continuous within flow and input limits |
| Common maintenance | Annual flush, anode inspection | Descale, inlet-screen cleaning, vent inspection |
| Outage behavior | Many standing-pilot models operate | Usually needs electricity |
| Typical replacement cost | $600-$1,500 equipment | $1,200-$2,500 equipment |
Do not open a tankless gas burner compartment to clean or adjust it unless the manual specifically authorizes the work. Descaling instructions, isolation valves, pump requirements, and error-code meanings vary substantially.
How Much Does Gas Water Heater Repair Cost?
Typical gas water heater repair costs range from $150-$600, including a service visit and common parts, while a gas-control valve, vent correction, burner assembly, or difficult-access repair may exceed $700. Local labor, permits, fuel type, model availability, and emergency timing create large differences.
| Repair or service | Typical part cost | Typical time | Professional total |
|---|---|---|---|
| Thermocouple | $15-$40 | 30-60 minutes | $150-$350 |
| Pilot assembly | $30-$150 | 45-90 minutes | $200-$500 |
| Drain valve | $15-$60 | 45-90 minutes | $200-$450 |
| Anode rod | $25-$100 | 60-120 minutes | $200-$500 |
| Tank flush | $0-$40 supplies | 45-120 minutes | $150-$350 |
| Gas-control valve | $100-$300 | 1-3 hours | $400-$900 |
| Conventional replacement | $600-$1,500 unit | 4-8 hours | $1,500-$3,500 installed |
These are typical planning ranges, not quotes. A licensed contractor should confirm gas-line sizing, venting, seismic restraints where required, pan and drain arrangements, permits, and local code before replacement.
Should You Repair or Replace the Heater?
Repair a gas water heater when the tank is sound, the failure is an isolated replaceable component, and the unit is within its expected service life. Replace the unit when the tank shell leaks, repeated repairs approach replacement cost, corrosion is widespread, or the heater is unsafe or obsolete.
Use these practical thresholds:
- Repair: A seven-year-old tank with a failed thermocouple and no corrosion.
- Investigate first: A ten-year-old tank with rumbling, slow recovery, and a healthy shell.
- Replace: A leaking tank seam, severe rust at the base, or recurring internal leaks.
- Professional assessment: A heater with soot, backdrafting, unstable flame, or carbon-monoxide concerns.
- Replacement planning: A unit over 12 years old with a major gas-valve or burner failure.
Check the serial number for the manufacture date, because the installation date can be several years later. Warranty coverage may apply to the tank or selected parts but often excludes labor, sediment damage, improper installation, and relocation.
Common Mistakes and How to Fix Them
Firing an Empty Tank
Close the drain, open the cold-water inlet, and run a hot tap until air stops sputtering. Do not restore gas operation until the tank has filled completely.
Capping a T&P Relief Valve
Remove any obstruction and arrange an immediate pressure and temperature diagnosis. A capped relief valve eliminates a safety device designed to prevent dangerous overpressure.
Replacing Parts Without Matching the Model
Use the rating plate and manufacturer part number. Universal-looking thermocouples, igniters, pilots, and gas controls may have incompatible flame positions or safety connections.
Ignoring Venting
Stop the heater if soot, exhaust odor, corrosion near the draft hood, or unusual flame behavior appears. A technician must test draft and combustion rather than simply cleaning the burner.
Flushing a Failing Tank
If water is already leaking from the shell, flushing may worsen the leak or provide no useful benefit. Plan replacement and protect the surrounding floor.
Repeatedly Resetting a Safety Control
A reset restores operation temporarily but does not identify the cause. Repeated trips point toward airflow, overheating, flame-sensing, gas-pressure, or control problems.
Preventive Maintenance That Extends Service Life
Inspect the heater annually for rust, moisture, loose connections, vent damage, blocked combustion-air openings, and unusual burner noise. Test the temperature at a tap, confirm the relief-valve discharge pipe terminates safely, and keep combustible storage away from the appliance.
Flush a conventional tank according to the manufacturer’s instructions, often annually in sediment-heavy water. Inspect the anode rod every 2-3 years, especially where a water softener is installed. Tankless systems need descaling intervals based on water hardness and usage, not a universal calendar.
A useful practitioner rule is to photograph the rating plate, gas piping, vent connection, and shutoff valves before disassembly. Those images preserve the original configuration and make it easier to identify a misplaced bracket or connection.
Another rule is to diagnose the symptom before buying the part. A pilot that will not stay lit can involve a thermocouple, pilot flame, draft, combustion air, or gas valve, so a thermocouple is not automatically the correct repair.
FAQ
Can I relight a gas water heater after the pilot goes out?
You can follow the printed relighting procedure when the heater has no gas odor, visible damage, soot, or venting concern. Wait the specified time after turning the control off, then use the built-in igniter if provided. If the pilot repeatedly fails, stop resetting the heater and arrange service.
How often should a gas water heater be flushed?
Many conventional gas water heaters benefit from annual flushing, particularly in areas with hard or sediment-heavy water. A partial flush may be insufficient when deposits are compacted. Tankless heaters require descaling through service ports at an interval determined by water hardness, flow volume, and the manufacturer.
Why does the pilot keep going out after a new thermocouple?
A new thermocouple cannot correct a weak pilot flame, blocked combustion air, downdraft, damaged pilot assembly, contaminated burner, or failing gas-control valve. Confirm the sensor tip sits in the flame, then stop troubleshooting if the flame remains unstable or the heater shows soot.
Can a leaking water heater be repaired without replacement?
A leaking connection, drain valve, or relief valve may be repairable after the cause is identified. Water from the steel tank seam, shell, or internal bottom generally means the tank has failed. Tank liners are not normally field-repaired to restore safe, long-term pressure integrity.
Does a gas water heater work during a power outage?
A conventional standing-pilot heater may continue operating without household electricity if its gas supply and safety controls function. Power-vented, electronic-ignition, and tankless gas models usually need electrical power for ignition, controls, or exhaust fans, although a backup system may support some installations.
When should a professional replace the gas valve?
A professional should replace a gas-control valve when it fails temperature control, will not pass gas correctly, repeatedly trips, or cannot maintain a safe pilot or burner sequence. Gas-valve replacement involves leak testing, correct input settings, combustion verification, and model-specific safety controls.
The Bottom Line
To repair a gas water heater, begin with the symptom and model instructions, then secure the gas, water, and electrical systems before service. Pilot and thermocouple problems may be manageable for a careful homeowner, while gas controls, venting, combustion faults, recurring relief-valve discharge, and tank-shell leaks require professional work. The safest repair is the one that restores hot water without bypassing a safety control, and this guide explains how to repair gas water heater problems without treating every failure as a DIY task.