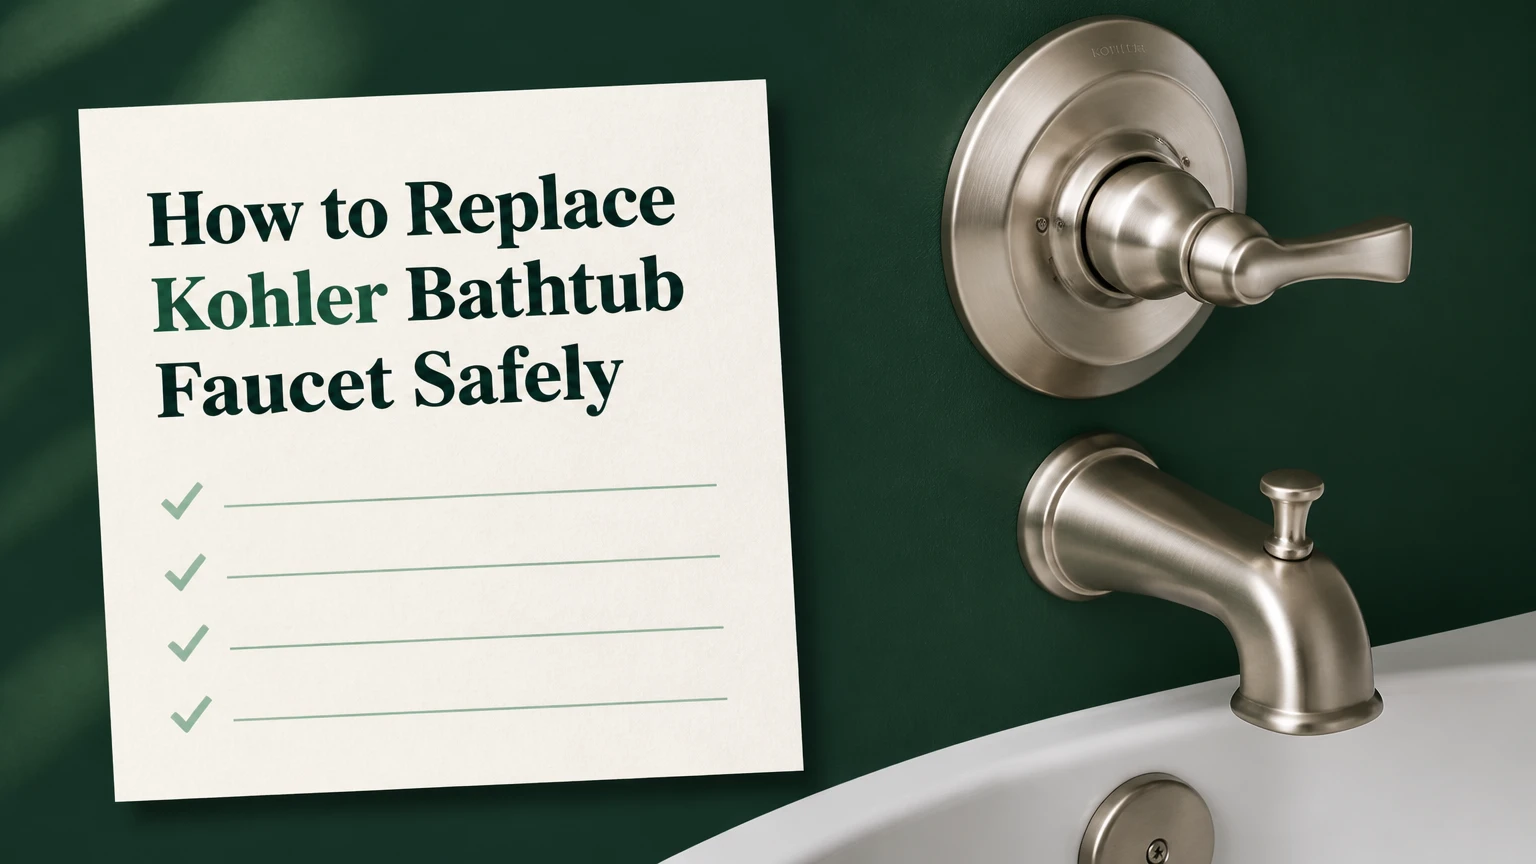
To replace a Kohler bathtub faucet, first identify whether you have a wall-mounted Rite-Temp, MasterShower thermostatic, or deck-mounted Roman tub system. Shut off the water, remove the handle and trim, replace the compatible cartridge or faucet assembly, install the spout, and test for leaks. A trim-and-cartridge job typically takes 1-3 hours.
Key Facts at a Glance
Kohler trim kits are compatible only with specified valve families, not with every Kohler valve.
A dripping single-handle tub faucet usually needs a cartridge inspection before a complete faucet replacement.
A cartridge replacement normally avoids opening the finished wall, while a rough-in valve replacement may require rear or front wall access.
Pure silicone plumbing grease is appropriate for cartridge O-rings; petroleum jelly can damage rubber seals.
Typical DIY material cost is $40-$500, depending on whether you replace a cartridge, trim, spout, or valve.
The cartridge orientation, retainer clip, and valve identification determine whether the repair succeeds.
What Are You Replacing on a Kohler Bathtub Faucet?
A Kohler bathtub faucet has three functional layers: the rough-in valve inside the wall, the cartridge or thermostatic mechanism inside that valve, and the visible trim outside the wall. The handle, escutcheon, sleeve, and tub spout are trim components, while the brass valve body remains connected to the hot and cold plumbing.
The correct replacement path depends on the symptom. A worn cartridge can cause dripping, a stiff handle, poor temperature control, or water that continues flowing after shutoff. Damaged, corroded, or incompatible trim can be replaced separately when the existing valve is sound and the new trim explicitly supports that valve.
| Component | Typical location | Replace separately? | Main replacement signal |
|---|---|---|---|
| Rough-in valve | Inside finished wall | Yes, with access | Cracked body, failed connections, obsolete valve |
| Cartridge | Inside valve body | Yes | Drip, stiff handle, poor temperature control |
| Pressure-balancing unit | Inside older Rite-Temp valve | Yes | Temperature swings during pressure changes |
| Escutcheon plate | Against wall surface | Yes | Corrosion, finish damage, failed gasket |
| Handle and sleeve | Outside wall | Yes | Stripped screw, broken handle, worn finish |
| Tub spout | Wall outlet or deck | Yes | Drip at diverter, corrosion, damaged threads |
A faucet with a tub spout and showerhead may still use one shower valve. The tub spout is the outlet, not necessarily the valve. That distinction prevents an unnecessary wall-opening project.
How Do You Identify the Kohler Valve and Cartridge?
Identify the valve from the existing trim, handle arrangement, cartridge markings, access dimensions, and Kohler model information. Do not select a replacement by finish or handle shape alone, because similar-looking Kohler trim can fit different rough-in valves.
The most common wall system is Kohler Rite-Temp, a pressure-balancing valve that uses a single control handle. Common replacement references include older GP77759 components and newer cartridge families associated with K-304 or K-8304 valves, including GP1224151 and K-GP1024522. Confirm the exact part through Kohler’s official parts documentation or a dealer before ordering.
| Kohler system | Visible configuration | Valve or part examples | Replacement implication |
|---|---|---|---|
| Rite-Temp pressure-balancing | Usually one handle | K-304, K-8304, GP77759 | Match cartridge and trim to valve generation |
| MasterShower thermostatic | Separate temperature and volume controls | K-2972-KS, K-2975-KS | Use thermostatic parts and follow model-specific instructions |
| Deck-mount Roman tub | Two handles and high-arch spout | K-300-K, K-301-K | Access is usually below or behind the tub deck |
| Three-handle older system | Separate hot, cold, and diverter controls | Model-specific legacy parts | Cartridge or stem configuration must be identified individually |
Photograph the faucet before disassembly. Record the number of handles, the handle screw location, the escutcheon screw pattern, the distance from the wall to the spout outlet, and any stamped part number. Keep the old cartridge until the new one has been compared physically.
Can You Replace Only the Trim?
You can replace only the trim when the new Kohler trim kit lists the existing valve as compatible and the valve body is not leaking or damaged. A trim-only conversion generally includes the handle, escutcheon, sleeve, and sometimes the tub spout, but it does not replace concealed plumbing.
Kohler trim is not universally interchangeable across Rite-Temp, MasterShower, legacy, and deck-mounted systems. A new matte-black trim kit does not solve an incompatible valve problem. Check the rough-in valve family, cartridge generation, handle direction, and required maximum wall thickness before purchase.
What Tools and Materials Do You Need?
A standard wall-mounted cartridge and trim replacement requires basic hand tools, a compatible Kohler cartridge or trim kit, pure silicone grease, and a cartridge puller for difficult removals. Thread seal tape is used only where the replacement spout or pipe connection requires threaded sealing.
Before You Start
| Project detail | Typical requirement | Planning value |
|---|---|---|
| DIY time | 1-3 hours | Allows for cartridge removal and testing |
| Difficulty | Moderate | Higher if the cartridge is seized |
| Cartridge cost | $40-$90 | Genuine Kohler parts vary by valve family |
| Trim kit cost | $80-$500+ | Finish and design affect price |
| Professional labor | $200-$450 | Typical range without wall opening |
| Replacement spout | $25-$150 | Depends on connection and finish |
Gather a Phillips screwdriver, a 3/32-inch or 1/8-inch Allen wrench, adjustable pliers, a strap wrench, a flashlight, rags, a small brush, a cartridge puller, and a tub drain cover. Use a plastic pry tool when possible so plated trim does not receive tool marks.
Do not use petroleum jelly on cartridge seals. Kohler cartridges use rubber O-rings and sealing surfaces that need a thin coat of plumbing-safe silicone grease. Excess grease can obstruct passages, so apply only enough to wet the O-ring surface.
How to Replace a Kohler Bathtub Faucet
The following procedure applies to the common wall-mounted Kohler Rite-Temp faucet where the existing rough-in valve remains usable. MasterShower thermostatic and deck-mounted systems require different access and component procedures.
Step 1: Shut Off the Water Supply
Turn off the bathroom fixture stops if they exist, or close the home’s main water shutoff when local stops are unavailable. Open the tub faucet fully to release pressure, then cover the drain with a stopper or cloth so screws and retaining clips cannot enter the waste line.
Close the hot and cold supply, then wait until water stops flowing from the tub spout. If water continues at full pressure, the shutoff is not closed or another supply valve serves the fixture.
Success checkpoint: The handle produces no pressurized flow when opened.
Common mistake: Closing a nearby sink stop that does not isolate the bathtub valve.
Step 2: Remove the Handle and Existing Trim
Look beneath the handle for a small set screw, or remove the decorative cap to expose a central screw. Use the correctly sized Allen wrench or Phillips screwdriver, keeping the tool fully seated to prevent stripping. Pull the handle straight from the cartridge stem rather than twisting against the escutcheon.
Remove the sleeve or collar, then take out the screws securing the escutcheon plate. Keep the screws in a labeled container because replacement trim often uses different lengths. Inspect the wall opening for moisture, dark staining, or corrosion before installing anything new.
Success checkpoint: The valve stem, cartridge retainer, and wall opening are visible without bending the trim.
Common mistake: Levering against tile with a metal screwdriver and chipping the finished surface.
Step 3: Remove the Old Cartridge
Kohler Rite-Temp valves typically retain the cartridge with either a metal retaining clip or a threaded bonnet or locking nut. Remove the clip with pliers, or loosen the nut carefully with an adjustable wrench or channel-lock pliers while protecting the valve finish with a cloth.
Pull the cartridge straight outward. A cartridge that has been installed for years may bind because mineral deposits grip the O-rings. Rock the stem gently from side to side, apply controlled pulling force, and use a cartridge puller if the stem begins to deform.
Do not pry against the brass valve body. A damaged valve body can require wall access and soldered or threaded plumbing repairs.
Success checkpoint: The entire cartridge exits, including its seals and alignment tabs.
Common mistake: Leaving a broken O-ring or cartridge fragment inside the valve.
Step 4: Clean and Install the New Cartridge
Compare the replacement cartridge with the old one before applying grease. Confirm the stem length, inlet openings, O-ring positions, alignment tabs, and retaining features. Clean scale and debris from the valve bore with a soft brush and a damp cloth.
Apply a thin coat of pure silicone plumbing grease to the new O-rings. Align the cartridge with the valve’s internal notches and the manufacturer’s “UP” marking. Insert it straight into the brass body, then reinstall the retaining clip or bonnet nut.
The cartridge must be fully seated before the retainer is installed. A partially inserted cartridge can cause leaks, incorrect temperature control, or a handle that will not sit flush.
Success checkpoint: The retainer fits without force and the cartridge stem rotates smoothly.
Common mistake: Installing the cartridge upside down or rotated 180 degrees, which can reverse hot and cold operation.
Step 5: Install the New Escutcheon and Handle
Place the escutcheon gasket against the wall, then slide the plate over the valve. The gasket should contact the finished wall evenly around the opening. Install the screws in alternating turns so the plate does not cock to one side.
Install the sleeve and handle according to the trim instructions. Tighten the handle set screw firmly, but stop when the handle is secure. Small set screws strip easily when an undersized Allen wrench is used.
If the wall opening is oversized or uneven, the trim gasket may not seal. A cosmetic bead of bathroom-grade sealant can help in some installations, but do not seal the bottom edge if the manufacturer requires a drainage path.
Success checkpoint: The escutcheon sits flat, the handle rotates through its intended range, and the wall opening is covered.
Common mistake: Caulking around the entire plate and trapping a concealed leak behind the trim.
Step 6: Replace the Kohler Tub Spout
Determine whether the existing tub spout is slip-fit or threaded. A slip-fit spout normally has a set screw underneath and slides off a smooth copper or brass stub-out. A threaded spout rotates counterclockwise and must be replaced with a model matching the pipe length and thread type.
Remove a slip-fit set screw with the correct Allen wrench, then pull the spout straight outward. For a threaded spout, use a strap wrench to avoid damaging the finish and inspect the stub-out after removal. Apply thread seal tape to compatible male pipe threads, wrapping in the tightening direction, but do not tape a slip-fit connection.
Push a slip-fit spout fully against the wall before tightening its set screw. A loose spout can leak into the wall even when the visible outlet appears dry.
Success checkpoint: The spout is rigid, flush to the wall, and directs water into the tub without spraying at the connection.
Common mistake: Forcing a threaded spout onto a short stub-out, leaving insufficient thread engagement.
Step 7: Restore Water and Test the Installation
Open the supply valve slowly while the tub spout is open. Allow water to run for approximately 30 seconds to flush loose debris, then close the handle and inspect the spout, handle stem, escutcheon perimeter, and spout connection.
Test both temperature range and pressure-balancing behavior. Flush a nearby toilet or open another cold-water fixture briefly, then check whether the Kohler faucet maintains a reasonably stable temperature. Do not place a hand directly under potentially scalding water during the first test.
Leave the trim dry and inspect it again after 10-15 minutes. If water appears behind the escutcheon, shut off the supply immediately and investigate before sealing the wall.
Success checkpoint: No water drips from the spout after shutoff, the handle operates smoothly, and no moisture appears around the plate or spout.
Common mistake: Testing only the flowing faucet and failing to inspect the concealed connection after shutoff.
Which Replacement Path Fits Your Problem?
The best replacement path is cartridge-only for an internal leak, trim-only for cosmetic damage, spout-only for a damaged outlet, and rough-in valve replacement for a failed or incompatible concealed valve. Replacing the entire faucet when one service part has failed increases cost and may create compatibility problems.
| Symptom or condition | First component to inspect | Typical parts cost | Wall access normally needed? |
|---|---|---|---|
| Drip from tub spout when off | Cartridge | $40-$90 | No |
| Stiff single handle | Cartridge and valve bore | $40-$90 | No |
| Damaged finish or broken handle | Trim kit or handle | $80-$500+ | No |
| Loose or corroded spout | Tub spout and stub-out | $25-$150 | Usually no |
| Temperature changes during flushing | Pressure-balancing unit | $30-$100 | No |
| Cracked valve body or leaking connection | Rough-in valve | $100-$350+ | Often yes |
| Wrong valve for desired trim | Rough-in valve and trim | $250-$900+ | Often yes |
A cartridge cannot repair a cracked brass valve body. Conversely, opening tile to replace a sound valve does not improve a faucet that needs only a worn cartridge.
What Changes for Other Kohler Faucet Types?
MasterShower Thermostatic Faucets
MasterShower systems separate temperature regulation from volume control, so they often have two controls or multiple outlets. Their cartridges, stops, thermostatic elements, and calibration procedures differ from Rite-Temp components.
Shut off the water and follow the exact model instructions for K-2972-KS, K-2975-KS, or the installed valve. Do not insert a Rite-Temp cartridge into a thermostatic valve because similar external trim does not establish internal compatibility.
Two-Handle or Three-Handle Wall Faucets
Two-handle and three-handle Kohler faucets use separate hot and cold stems or cartridges, and a third handle may operate the tub-to-shower diverter. Repair may require replacing one stem, both cartridges, seats, O-rings, or the diverter assembly.
Replace the affected side first when only hot or cold water leaks. If both handles are corroded and parts are obsolete, a complete conversion may be more practical than repairing individual legacy components.
Deck-Mount Roman Tub Faucets
Roman tub faucets mount through the flat tub deck and usually have separate hot and cold valves with a high-arch spout. Shutoffs may be located below the tub, behind an access panel, or at the manifold rather than at the wall valve.
Remove the handles and decorative trim, disconnect the flexible supply lines, and support the valves from below while loosening mounting hardware. Do not proceed without confirmed access, because a deck-mounted faucet cannot be serviced safely when the underside is permanently inaccessible.
Can You Replace the Valve Without Opening the Wall?
You can replace a concealed Kohler valve without removing the front tile only when a rear access panel or an adequately sized adjacent access opening is available. Without access, the wall must usually be opened from the finished side or from the room behind the plumbing.
A trim-and-cartridge replacement does not normally require wall demolition. A rough-in replacement requires exposing the valve, cutting and reconnecting supply lines, securing the new valve at the correct depth, pressure-testing connections, and repairing the wall finish.
Stop and call a licensed plumber when the valve leaks inside the wall, the supply cannot be shut off, the pipe is galvanized or badly corroded, soldering is required near combustible framing, or the installation is in a condominium with shared plumbing restrictions. Local plumbing codes may also require a permitted valve replacement or anti-scald calibration.
Common Mistakes and How to Fix Them
The Replacement Cartridge Does Not Fit
The cartridge may belong to another Kohler valve generation, or an old seal may remain inside the valve. Compare part numbers and dimensions, remove all fragments, and never force a cartridge into the bore.
The Faucet Still Drips After Installation
A retained clip that is not fully seated, debris on the valve seat, a damaged O-ring, or an incorrect cartridge orientation can cause continued dripping. Shut off water, remove the cartridge, inspect every sealing surface, flush the valve body, and reinstall the correct component.
Hot and Cold Operation Is Reversed
A reversed temperature direction usually means the cartridge is rotated incorrectly. Shut off the water, remove the retainer, rotate the cartridge according to the valve markings, and retest before reinstalling the handle.
The Set Screw Strips
Stop turning as soon as the Allen wrench slips. Use the correct metric or inch size, tap the wrench fully into the recess, and replace the screw if possible. Drilling a stripped screw can damage the handle and cartridge stem.
The Spout Leaks at the Wall
A threaded spout may have inadequate thread engagement, incorrect tape placement, or a damaged adapter. A slip-fit spout may have a loose set screw or a scratched stub-out. Remove the spout, inspect the connection, and replace the damaged adapter rather than concealing the leak with sealant.
The Temperature Remains Unstable
A new temperature cartridge does not always correct a seized pressure-balancing unit. Mineral scale can restrict the balancing spool, especially in older Rite-Temp valves. Clean or replace the pressure-balancing assembly if the faucet temperature changes sharply when another fixture uses cold water.
How Much Time and Money Should You Budget?
A cartridge-only replacement commonly costs $40-$90 in parts and takes 1-2 hours for a first-time DIY installer. A trim-and-spout update typically costs $105-$650 and takes 1-3 hours, while a behind-the-wall valve replacement can exceed $900 after plumbing labor and wall repair.
| Replacement scope | Typical DIY time | Typical material cost | Typical professional labor |
|---|---|---|---|
| Cartridge only | 1-2 hours | $40-$90 | $150-$300 |
| Handle and escutcheon | 45-90 minutes | $80-$300 | $150-$250 |
| Trim and tub spout | 1-3 hours | $105-$650 | $200-$450 |
| Roman tub faucet | 2-4 hours | $200-$1,000+ | $300-$700 |
| Rough-in valve | Not ideal for beginners | $100-$350+ | $400-$1,200+ |
| Valve plus wall repair | 1-2 days | $300-$1,500+ | $800-$2,000+ |
These are typical North American planning ranges, not fixed prices. Labor varies with region, access, pipe material, finish restoration, permits, and whether a plumber must open tile or drywall.
Expert Rules That Prevent Expensive Repairs
Match the valve before matching the finish. Matte black, chrome, and brushed bronze describe surface treatment, not mechanical compatibility. The valve model and cartridge family determine fit.
Use the old cartridge as a temporary reference, not as proof of correctness. A previous repair may contain an aftermarket or incorrect part. Confirm the valve model and compare the new cartridge against official Kohler documentation.
Treat water behind the escutcheon as an active leak. The trim plate can hide a slow connection leak for months, allowing framing, insulation, and drywall to absorb water. Drying the surface does not prove the wall is safe.
Do not over-tighten plastic cartridge hardware. The retainer must hold the cartridge firmly, but excessive force can deform the cartridge housing or damage threads. Tighten until secure, then stop when the manufacturer’s instructions provide no further torque specification.
Frequently Asked Questions
Is a Kohler bathtub faucet cartridge universal?
No. Kohler cartridges are specific to valve families, generations, and configurations. Rite-Temp, MasterShower thermostatic, deck-mount, and legacy three-handle systems do not share one universal cartridge. Use the valve model, existing part number, or Kohler parts documentation to identify the correct replacement.
How do I remove a Kohler tub faucet handle with no visible screw?
Look for a decorative cap, plug, or underside set screw. A cap may pry out with a plastic tool and reveal a Phillips screw, while a lever handle often uses a small Allen screw underneath. Protect the finish and do not twist the handle against the escutcheon while the fastener remains installed.
Can a leaking tub spout damage the wall?
Yes. A leak at a threaded adapter, slip-fit joint, or valve connection can travel behind the escutcheon and wet the wall cavity. Shut off water when moisture appears around the plate, inspect the connection, and check the opposite side of the wall for staining before closing the repair.
Should I replace the cartridge whenever I replace the trim?
Not necessarily. Replace the cartridge when the faucet drips, binds, or has poor temperature control, or when the new trim kit requires a different cartridge. If the existing cartridge works correctly and the trim is explicitly compatible, a trim-only replacement can be sufficient.
Why does my Kohler tub faucet lose temperature when the toilet flushes?
The pressure-balancing mechanism may be restricted by mineral scale, worn, or incorrectly assembled. Rite-Temp valves are designed to respond to pressure changes, but a seized balancing spool can prevent stable temperature control. Inspect the pressure-balancing unit and cartridge before replacing the entire valve.
When should I hire a plumber for a Kohler faucet replacement?
Hire a plumber for concealed leaks, failed shutoffs, damaged supply piping, inaccessible Roman tub connections, rough-in valve replacement, or any repair requiring soldering or wall reconstruction. A homeowner can usually handle a cartridge or compatible trim replacement when the water supply and valve access are reliable.
The Bottom Line
To replace a Kohler bathtub faucet successfully, identify the existing valve family before ordering parts, shut off and drain the water, replace the cartridge or compatible trim, install the correct spout connection, and test every joint under pressure. The exact Kohler model matters more than the handle style or finish.
For a dripping Rite-Temp faucet, start with the cartridge and pressure-balancing components. For cosmetic damage, use a valve-compatible trim kit. Replace the concealed valve only when the valve body, plumbing connections, or compatibility problem justifies wall access. That sequence keeps a Kohler bathtub faucet replacement within the usual 1-3 hour DIY scope whenever the rough-in valve remains sound.