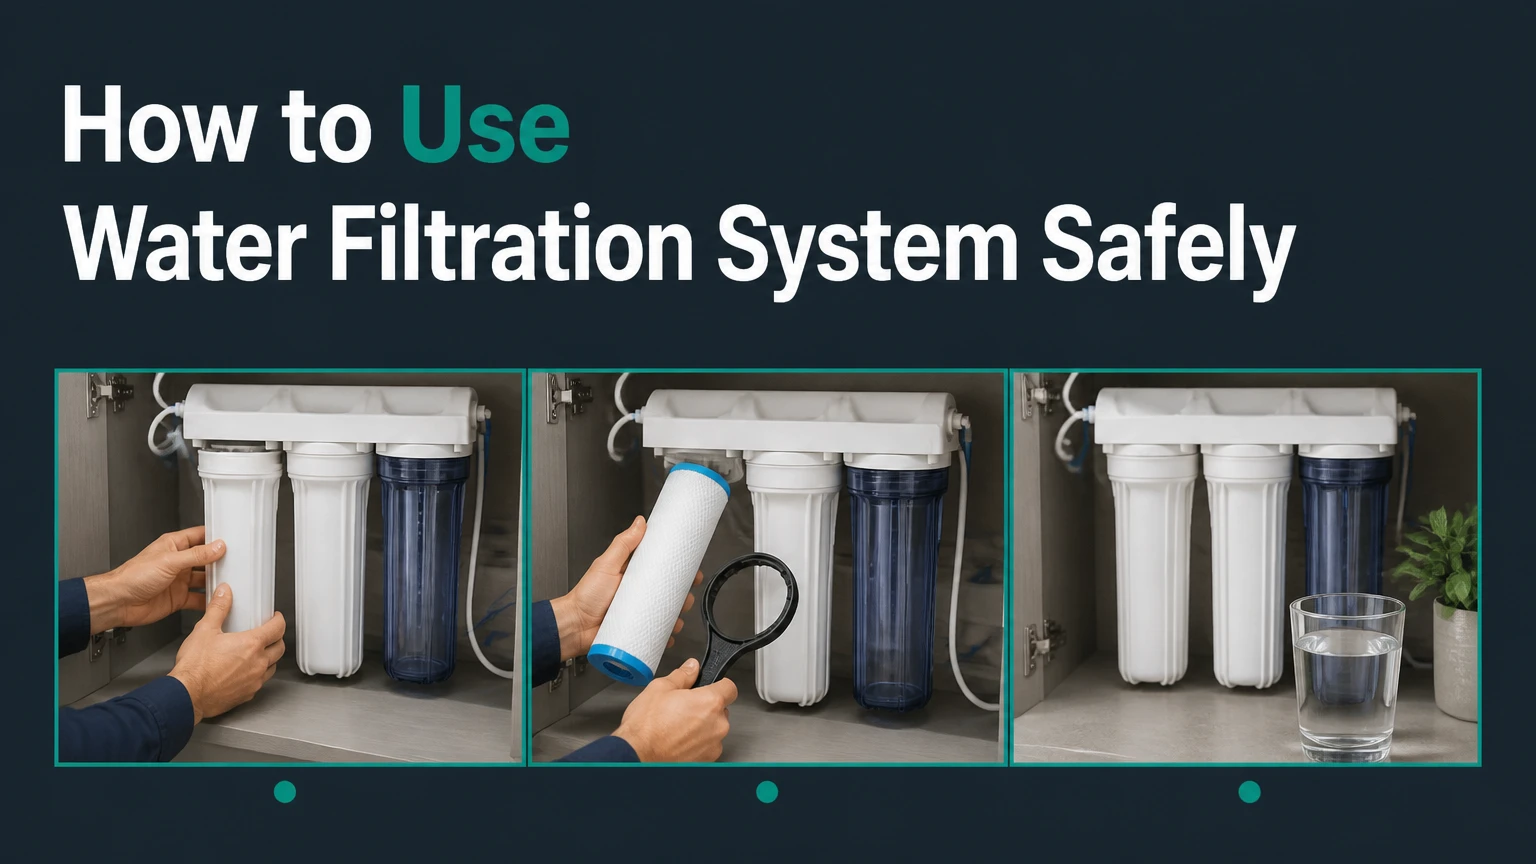
To use a water filtration system safely, identify the contaminants it is designed to reduce, install the correct cartridge, flush it with cold water, and replace it on the manufacturer’s schedule. The complete process usually takes 10-60 minutes, depending on the system, and success depends more on correct cartridge selection than on filtration speed.
Key Facts at a Glance
A carbon filter improves chlorine taste and odor but usually does not disinfect water containing bacteria or viruses.
Reverse osmosis can reduce many dissolved contaminants, including nitrate, fluoride, arsenic, and lead, when the specific system is certified for them.
New cartridges require flushing because carbon fines, trapped air, and manufacturing residue can temporarily discolor water.
Filter replacement depends on time, gallons processed, and contaminant loading; a slow flow rate is a warning sign, not a complete replacement rule.
Private well owners should test water at least annually and after flooding, repairs, or changes in taste, odor, or appearance.
Boiling can address many biological hazards, but boiling does not remove lead, nitrate, PFAS, salts, or most chemical contaminants.
Before You Start
A water filtration system can be installed and put into service safely when you have the correct replacement cartridge, the manufacturer’s manual, cold-water access, and a way to check for leaks. Plan 10-20 minutes for a pitcher or faucet filter, 30-60 minutes for an under-sink unit, and several hours for a whole-house installation if plumbing modifications are required.
| Requirement | Pitcher or faucet filter | Under-sink RO | Whole-house filter |
|---|---|---|---|
| Typical setup time | 10-20 minutes | 30-60 minutes | 2-6 hours |
| Typical equipment cost | $20-$120 | $150-$600 | $300-$2,000+ |
| Main tools | Clean container, cold tap | Adjustable wrench, towel, bucket | Pipe cutter, wrench, shutoff valve |
| Replacement interval | 2-6 months | 6-12 months for filters | 6-12 months for cartridges |
| Installation skill | None to basic | Basic plumbing | Basic to professional |
Wash your hands before touching cartridges, housings, tubing, or storage tanks. Keep a towel and bucket under every connection because a small pressure leak can release several liters before the shutoff valve is noticed.
Check three prerequisites before installation:
- Water source: Confirm whether the supply is municipal water, a private well, rainwater, or an emergency source.
- Contaminant target: Read the performance data sheet instead of assuming that every filter removes every pollutant.
- Temperature and pressure: Use cold water unless the manufacturer explicitly rates the system for another temperature, and verify that inlet pressure is within the stated operating range.
A filter certified to NSF/ANSI 42 generally addresses aesthetic issues such as chlorine taste and odor. NSF/ANSI 53 covers specific health-related contaminant reduction claims, while NSF/ANSI 58 applies to reverse osmosis systems. Certification applies to named claims, not to every contaminant.
How Does a Water Filtration System Work?
A water filtration system uses mechanical filtration, adsorption or ion exchange, membrane separation, ultraviolet treatment, or a combination of these methods. Mechanical media trap sediment, activated carbon adsorbs many organic compounds and chlorine, and membranes separate contaminants according to molecular size, charge, and pressure.
Mechanical filtration captures particles such as sand, rust, and silt. A 5-micron sediment cartridge can protect downstream carbon and membrane stages, but it cannot reliably remove dissolved lead or nitrate.
Activated carbon reduces chlorine, some volatile organic compounds, and unpleasant taste or odor through adsorption. Carbon performance depends on contact time, cartridge design, water temperature, and the contaminant’s chemical properties, so a nominal micron number does not predict its chemical performance.
Ion-exchange resin swaps selected dissolved ions. Water softeners exchange calcium and magnesium for sodium or potassium, while specialty resins can target nitrate or certain metals. A softener is not the same as a drinking-water filter.
Reverse osmosis pushes water through a semipermeable membrane under pressure. A typical residential RO membrane has an effective separation scale near 0.0001 microns, but the system still needs sediment and carbon prefilters because chlorine and particles can damage membrane performance.
Ultraviolet treatment uses UV energy to inactivate many bacteria, viruses, and protozoa. UV does not remove sediment, dissolved chemicals, or metals, and cloudy water can shield microorganisms from the lamp.
The CDC states, “If you are concerned about germs in your drinking water, you can boil it.” That advice addresses microbial risk, not dissolved chemical contamination. A filter should never be treated as a universal substitute for a water advisory, laboratory test, or approved disinfection method.
Which System Fits Your Water?
The best water filtration system depends on the contaminant, water source, required flow, installation constraints, and verified performance claim. A pitcher is usually sufficient for chlorine taste, an under-sink RO unit fits many dissolved-contaminant concerns, and a well-water system often requires testing, sediment control, and disinfection.
| System type | Typical reduction target | Typical capacity or flow | Replacement interval | Main limitation |
|---|---|---|---|---|
| Pitcher carbon filter | Chlorine, odor, selected metals | 1-3 liters per fill | 2-6 months | No reliable pathogen protection |
| Faucet or countertop carbon | Chlorine, VOCs, selected cysts | 0.5-2 gallons per minute | 3-6 months | Faucet compatibility varies |
| Under-sink RO | Nitrate, fluoride, arsenic, lead, TDS | 50-100 gallons per day membrane rating | 6-12 months filters, 2-3 years membrane | Produces reject water |
| Ultrafiltration | Sediment, bacteria, selected cysts | 0.5-2 gallons per minute | 6-24 months | Limited dissolved-solid reduction |
| UV purifier | Bacteria, viruses, protozoa | 5-20 gallons per minute | Lamp annually | Does not remove chemicals |
| Whole-house media system | Sediment, chlorine, iron, sulfur, scale | 5-20 gallons per minute | 6-12 months cartridge | Higher installation cost |
Pitchers and Dispensers
Use a pitcher filter by filling the reservoir with cold tap water and waiting until the water passes through the cartridge. Keep the pitcher covered, refrigerate it if the manufacturer recommends refrigeration, and replace the cartridge when the calendar limit or rated capacity is reached.
Pitchers work well for renters, students, and households seeking better taste without plumbing changes. They are poor choices for high-volume use, heavy sediment, microbiologically unsafe water, or a contaminant that the cartridge’s performance sheet does not name.
Do not fill a pitcher with hot water. Heat can damage the housing and alter adsorption performance.
Faucet and Countertop Filters
Use a faucet-mounted unit by selecting the filtered-water position, running cold water at the specified flow rate, and discarding the first water after a new cartridge is installed. A diverter valve may not fit pull-out, pull-down, or spray faucets, so check the faucet connection before buying.
Countertop carbon-block units provide faster access than pitchers and usually require no permanent plumbing. Their performance can decline sharply when sediment blocks the cartridge, so a sudden flow reduction usually indicates clogging rather than improved filtration.
Under-Sink Reverse Osmosis
Use an under-sink RO system by opening the dedicated faucet, allowing the storage tank to refill, and following the specified flush procedure after every membrane or filter replacement. Reverse osmosis typically sends a portion of feed water to the drain, and the reject ratio may range from approximately 1:1 to 4:1 depending on system design, pressure, temperature, and water quality.
RO is useful when laboratory results or a certified performance claim identifies dissolved contaminants. RO is inefficient for removing only chlorine taste, and a carbon block may provide that improvement with less water waste, lower cost, and higher delivery speed.
Whole-House Systems
Use a whole-house filter by opening the main supply gradually, checking every housing and bypass valve, and confirming that all downstream fixtures receive the intended treatment. A point-of-entry system protects multiple taps, appliances, and showers, but it requires more careful sizing because undersized media can cause pressure loss throughout the home.
Whole-house systems may combine a sediment cartridge, carbon tank, iron filter, water softener, or UV unit. No single tank reliably addresses sediment, hardness, chlorine, nitrate, and microorganisms simultaneously.
How to Use a Water Filtration System Step by Step
Step 1: Identify the Filter’s Intended Use
Read the cartridge label, performance data sheet, and certification claim before connecting the system. Match the cartridge to a named contaminant, such as chlorine, lead, nitrate, cysts, or arsenic, rather than selecting a filter from a general micron rating.
Success checkpoint: The cartridge model and contaminant claim match the water problem.
Common mistake: Installing a generic carbon cartridge for bacteria or nitrate, which carbon alone generally does not remove reliably.
Step 2: Shut Off the Water Supply
Turn off the faucet or inlet valve for a countertop unit. For under-sink and whole-house systems, close the local isolation valve or main supply, then open a downstream cold faucet to release pressure.
Success checkpoint: Water flow stops and the housing can be opened without forceful spray.
Common mistake: Opening a pressurized housing. Stop and depressurize the line first.
Step 3: Prepare the New Cartridge
Wash your hands, remove protective packaging, and flush or soak the cartridge exactly as the manual specifies. Most activated-carbon cartridges need cold-water flushing to remove loose carbon fines, while some RO membranes require a longer initial flush.
Success checkpoint: Flush water becomes clear and free of visible black particles.
Common mistake: Washing a carbon cartridge with soap or bleach. Cleaning agents can remain in the media and contaminate drinking water.
Step 4: Inspect and Seat the O-Ring
Remove the old cartridge and inspect the housing, gasket, and O-ring for cracks, flattening, twists, or mineral deposits. Apply only the manufacturer-approved food-grade silicone lubricant, then seat the O-ring in its groove rather than leaving it on the housing threads.
Success checkpoint: The gasket lies flat and continuous around the groove.
Common mistake: Using petroleum jelly, which can degrade some rubber compounds.
Step 5: Install the Cartridge in the Correct Order
Insert the cartridge firmly and follow the labeled stage order, such as sediment, carbon, membrane, and post-carbon. RO systems depend on sequence because the sediment stage protects carbon, carbon protects the membrane, and the postfilter polishes stored water.
Success checkpoint: The cartridge locks into place without excessive twisting or force.
Common mistake: Reversing inlet and outlet tubing. Photograph the connections before removing the old filter.
Step 6: Close the Housing Without Overtightening
Thread the housing by hand until the gasket contacts its sealing surface, then tighten according to the manual. A housing wrench is for loosening or final light tightening, not for applying maximum force.
Success checkpoint: The housing is closed evenly and the threads are not crossed.
Common mistake: Overtightening, which can distort the gasket or crack a plastic sump.
Step 7: Restore Water Pressure Slowly
Open the inlet valve gradually, pause for several seconds, and inspect the housing, tubing, faucet adapter, drain saddle, and tank valve. Pressure spikes can dislodge fittings and expose a weak gasket immediately.
Success checkpoint: No connection produces a bead of water after two minutes under pressure.
Common mistake: Leaving the system unattended during the first pressurization.
Step 8: Flush the System
Run cold filtered water for the time listed in the manual. A common range is 5-10 minutes for faucet units, while RO systems may require one or two complete storage-tank fills before drinking.
Success checkpoint: Water runs clear, without unusual taste, odor, or carbon dust.
Common mistake: Saving the first batch to drink or cook with. Discard it.
Step 9: Test the Treated Water When Needed
Test for the contaminant that motivated installation, especially when using a private well or addressing lead, nitrate, arsenic, PFAS, or microbial contamination. A TDS meter can show dissolved-solids change after RO, but it cannot confirm that lead, bacteria, or PFAS are absent.
Success checkpoint: A certified laboratory result or relevant field test confirms the intended reduction.
Common mistake: Treating a low TDS reading as proof that water is safe.
Step 10: Record the Installation Date
Write the date, cartridge model, source-water condition, and meter reading in a maintenance log. Record unusual pressure changes or taste changes because these details help distinguish a clogged filter from a source-water problem.
Success checkpoint: The next replacement date is calculated from the manufacturer’s interval and rated capacity.
Common mistake: Waiting for bad taste alone. Some contaminants have no smell or taste.
How Often Should You Change a Water Filter?
Replace a water filter at the earliest of the manufacturer’s time limit, rated gallon capacity, or a clear performance warning such as persistent low flow or taste change. Typical intervals range from 2-6 months for pitchers, 6-12 months for under-sink prefilters, and 2-3 years for many RO membranes.
| Component | Typical replacement period | Replace sooner when | Verification method |
|---|---|---|---|
| Pitcher carbon cartridge | 2-6 months | High daily use or chlorine taste returns | Capacity indicator, calendar |
| Sediment cartridge | 3-12 months | Pressure drops or cartridge turns brown | Pressure gauge, visual inspection |
| Carbon block | 6-12 months | Taste, odor, or chlorine returns | Chlorine test, flow check |
| RO membrane | 2-3 years | Rejection falls or TDS rises | Feed/permeate TDS comparison |
| UV lamp | 12 months | Lamp alarm or cloudy feed water | Controller alarm, prefilter inspection |
| Whole-house media | 5-10 years for some tanks | Iron, sulfur, hardness, or odor returns | Water test, service record |
An expired cartridge can harbor microorganisms, especially when warm, wet, and left unused. If a system sits unused for several weeks, follow the manufacturer’s sanitization and restart procedure rather than assuming the stored water remains fresh.
Common Mistakes and How to Fix Them
| Problem | Likely cause | Immediate fix | Escalate when |
|---|---|---|---|
| Low water pressure | Clogged sediment cartridge | Replace prefilter and check inlet valve | Pressure remains low with a new cartridge |
| Cloudy water | Trapped air or carbon fines | Flush with cold water for 5-10 minutes | Cloudiness persists or has color |
| Black specks | Carbon dust | Continue flushing; replace damaged cartridge | Specks continue after full flush |
| Housing leak | Twisted, dry, or damaged O-ring | Shut off water and reseat gasket | Housing or threads are cracked |
| Bad taste after change | Wrong cartridge or inadequate flush | Confirm model and flush again | Taste remains after 24 hours |
| RO drain runs constantly | Misadjusted shutoff, flow restrictor, or leak | Check tubing and valves | Drain flow continues with a full tank |
Never run hot water through a cold-rated filter. Heat can damage plastic components, reduce adsorption performance, and release material from the cartridge.
Do not bypass a whole-house filter during normal drinking-water use unless the bypass is part of the manufacturer’s maintenance procedure. Bypass water may reintroduce sediment, chlorine, iron, or microbial contamination.
An expert rule of thumb is to diagnose low flow from the source forward: check the main valve, prefilter, cartridge seating, tubing kink, pressure regulator, and downstream faucet in that order. Replacing every cartridge first can conceal a closed valve or failing pressure regulator.
Is Filtration Enough for Unsafe Water?
Filtration is not enough when water may contain pathogens and the installed unit lacks a validated disinfection claim. Use bottled water or an official boil-water instruction during an emergency, and use an approved UV, chlorination, or boiling method for biological hazards according to public-health guidance.
Boiling is effective against many bacteria, viruses, and parasites when performed according to the relevant health authority’s instructions. Boiling does not remove nitrate, arsenic, lead, PFAS, fuel compounds, or dissolved salts, and evaporation can concentrate some dissolved contaminants.
Private well owners should arrange laboratory testing after flooding, a well repair, a change in water appearance, or a nearby chemical spill. Typical annual panels may include coliform bacteria, nitrate, pH, total dissolved solids, and region-specific metals, but local health departments may recommend additional tests.
Water with suspected chemical contamination should not be made safe by adding a carbon cartridge without a verified performance claim. Contact the local health department or environmental agency before using the water for drinking, cooking, infant formula, or food preparation.
Which Setup Fits Common Household Situations?
| Household situation | Recommended starting setup | Add or change when testing shows | Avoid |
|---|---|---|---|
| Renter with chlorine taste | Pitcher or faucet carbon filter | NSF/ANSI 42 cartridge for verified chlorine reduction | Permanent plumbing without permission |
| Older home with lead concern | Certified point-of-use filter | NSF/ANSI 53 lead claim; flush plumbing | Relying on TDS or taste |
| Private well with bacteria | Sediment prefilter plus UV | Shock treatment or professional assessment | Carbon-only drinking filter |
| Well with nitrate | Certified RO or nitrate-selective resin | Annual nitrate testing | Boiling as the only treatment |
| Hard-water scale | Water softener | RO for selected drinking-water contaminants | Calling a softener a purifier |
| Whole-home chlorine odor | Whole-house carbon tank | Sediment prefilter for visible particles | Undersized tank with high flow |
A municipal supply is usually treated and monitored before reaching the property, but the service line and indoor plumbing can change water quality. An older building may require point-of-use lead control even when the treatment plant meets regulatory requirements.
A private well has no universal municipal treatment barrier. The owner carries responsibility for testing, maintenance, and disinfection, so a whole-house sediment filter alone is rarely a complete well-water solution.
How Can You Confirm the System Works?
Confirm a water filtration system by matching its certified claim to a laboratory test or appropriate field measurement, then recording results before and after cartridge replacement. Visual clarity, taste, and a TDS reading can reveal changes, but they cannot prove removal of every health-related contaminant.
Use the certification database or performance data sheet associated with the exact model. NSF/ANSI certification is specific to a contaminant and reduction claim, so two filters carrying the same general standard may not address the same substances.
For RO, calculate apparent rejection with this formula:
Rejection percentage = (feed-water TDS minus treated-water TDS) divided by feed-water TDS, multiplied by 100.
A high rejection percentage does not prove removal of a specific pesticide, PFAS compound, or microorganism. Laboratory testing is the appropriate confirmation method when the health consequence is significant.
Water Filtration System Costs and Running Time
Typical purchase costs range from $20 for a basic pitcher to more than $2,000 for a professionally installed whole-house treatment train. Annual replacement costs commonly range from $20-$60 for a pitcher, $50-$120 for RO filters, and $70-$200 for whole-house cartridges, excluding labor and water testing.
| System | Purchase range | Annual consumables | Typical filtered delivery | Installation |
|---|---|---|---|---|
| Pitcher | $20-$60 | $20-$90 | 0.1-0.5 gallons per minute | 0 minutes |
| Faucet or countertop | $30-$120 | $30-$160 | 0.5-2 gallons per minute | 5-20 minutes |
| Under-sink carbon | $80-$300 | $40-$150 | 0.5-2 gallons per minute | 30-60 minutes |
| Under-sink RO | $150-$600 | $50-$120 | 50-100 gallons per day rating | 45-90 minutes |
| Whole-house cartridge | $300-$1,000 | $70-$200 | 5-20 gallons per minute | 2-6 hours |
| Whole-house media and UV | $1,000-$3,000+ | $150-$500 | 5-20 gallons per minute | Professional recommended |
These are typical retail and service ranges, not guaranteed quotes. Local labor, water pressure, replacement volume, electrical requirements, drain access, and certification can change the final cost substantially.
FAQ
Can I Use Filtered Water Immediately After Installation?
Usually not. Flush a new cartridge until the water is clear and the manual’s required volume has passed; RO systems commonly need one or two tank fills discarded. Carbon dust and trapped air are normal during startup, but persistent odor, color, or particles require inspection.
Should a Water Filter Be Installed on Every Faucet?
No. Install point-of-use filtration at faucets used for drinking and cooking when the concern is limited to consumption. Use point-of-entry treatment when bathing, laundry, appliances, plumbing protection, or whole-home sediment control also requires treatment.
Does a Water Filter Remove Bacteria?
Some filters reduce specified bacteria or cysts, but ordinary activated-carbon cartridges generally do not disinfect water. A system needs a validated microbiological claim, UV treatment, ultrafiltration, reverse osmosis, chlorination, or boiling to address pathogen risk.
Can I Use a Water Filter With Well Water?
Yes, but test the well water first. Well-water treatment may require a sediment filter, iron or sulfur treatment, UV disinfection, softening, nitrate control, or RO, and the correct combination depends on laboratory results rather than the water’s appearance.
Why Is My Filtered Water Slow?
Slow water usually results from a clogged cartridge, low inlet pressure, a partly closed valve, a kinked tube, or an incorrectly installed cartridge. Replace the sediment stage first, then inspect valves and tubing; persistent low pressure may require plumbing diagnosis.
Does a TDS Meter Prove Water Is Safe?
No. A TDS meter measures total dissolved ions and can help monitor RO consistency, but it does not identify lead, nitrate, bacteria, viruses, PFAS, or individual chemicals. Use a certified contaminant claim and laboratory testing for health-related decisions.
The Bottom Line
To use a water filtration system correctly, match the technology to a verified contaminant, install the cartridge in the correct direction, flush it with cold water, inspect every seal under pressure, and record the replacement date. A pitcher or carbon block suits taste and odor, RO suits many dissolved contaminants, and well water may require testing plus UV disinfection. Use the system’s certified performance claim, not appearance or a low TDS reading, to decide whether the treated water is safe.