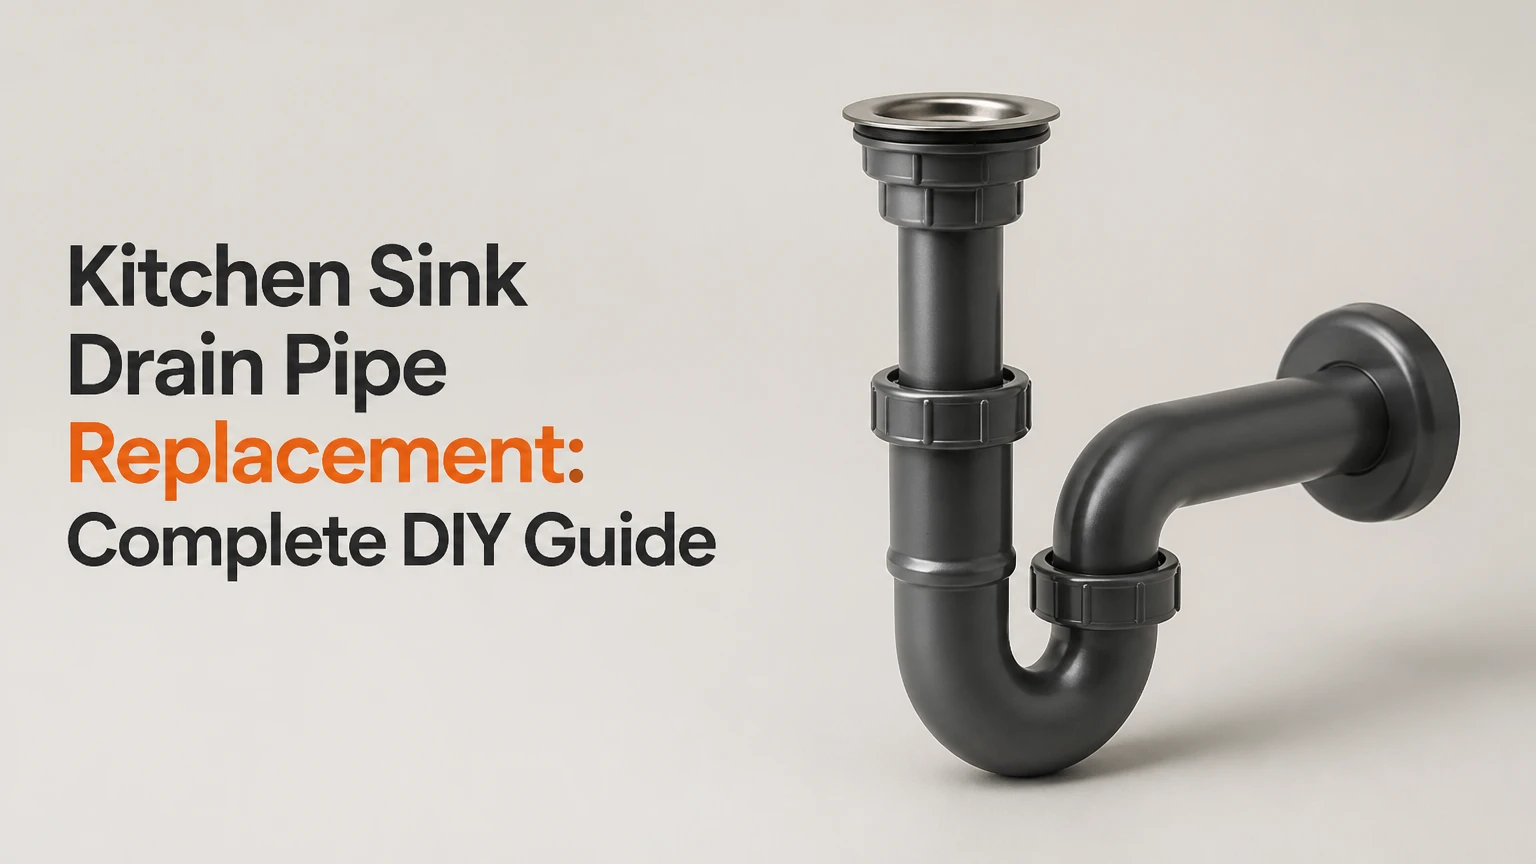
Kitchen sink drain pipe replacement normally involves removing the tailpiece, waste fittings, P-trap, and trap arm, then installing a correctly sized 1-1/2-inch assembly that aligns naturally with the wall drain. A basic slip-joint replacement usually takes 30-90 minutes, but corroded wall fittings, garbage disposals, and glued PVC can turn it into a plumbing repair.
At a Glance
- Most residential kitchen sinks use a 1-1/2-inch tubular drain assembly.
- A standard slip-joint replacement generally costs $15-$40 in parts.
- The P-trap must retain a water seal that blocks sewer gases.
- Pipes should align without bending, stretching, or sideways pressure.
- Plastic slip-joint nuts should normally be tightened by hand.
- A full-basin discharge test is more revealing than running the faucet briefly.
What Does a Kitchen Sink Drain Assembly Include?
A kitchen sink drain assembly carries wastewater from the sink or garbage disposal to the branch drain inside the wall. The replaceable under-sink portion normally includes the tailpiece, connecting waste tubes, P-trap bend, trap arm, slip-joint nuts, and beveled washers.
The P-trap is the U-shaped section that retains water after the sink empties. That trapped water forms a seal between the kitchen and the sanitary drainage system. Modern plumbing codes generally require fixture traps to maintain a liquid seal between 2 and 4 inches.
| Component | Location | Function | Common replacement reason |
| Sink strainer | Sink drain opening | Screens debris and seals the basin | Leaking putty or damaged basket |
| Tailpiece | Below strainer | Carries water vertically downward | Corrosion, incorrect length, cracks |
| Continuous waste tube | Between double bowls | Combines two sink outlets | Misalignment or leaking tee |
| Disposal discharge tube | Disposal outlet | Connects disposal to drain system | Wrong height, cracked flange |
| P-trap bend | Lowest curved section | Retains the sewer-gas water seal | Crack, corrosion, clog, poor alignment |
| Trap arm | P-trap to wall | Carries water to branch drain | Wrong length, poor slope, damage |
| Wall adapter | At wall opening | Connects tubular pipe to DWV piping | Loose seal or damaged threads |
The International Plumbing Code also limits the vertical distance from a fixture outlet to the trap weir to 24 inches. This restriction helps prevent layouts that empty or siphon the trap improperly.
Should You Replace One Pipe or the Whole Assembly?
Replace the complete exposed assembly when several fittings are old, corroded, mismatched, or forced out of alignment. Replacing only one leaking nut may save money, but joining a new component to thin, pitted metal often moves the leak to the next weakest connection.
A complete replacement is usually sensible when:
- Chrome-plated tubing has pinholes or green corrosion.
- Plastic fittings have cracked threads.
- The P-trap has been patched with tape or sealant.
- Multiple washers drip after realignment.
- The existing layout uses a corrugated accordion tube.
- A new sink or garbage disposal changed the outlet height.
- The assembly must be twisted or pulled sideways to connect.
Replacement of the visible tubular assembly does not repair a damaged pipe inside the wall. Stop the DIY job if the wall adapter rotates freely, crumbles, leaks behind the cabinet, or reveals extensive corrosion.
Which Drain Pipe Material Should You Choose?
Polypropylene slip-joint tubing is the most practical option for a typical under-sink cabinet. Schedule 40 PVC is better for permanent DWV modifications, while chrome-plated brass is mainly selected where the plumbing remains visible.
| Material | Connection method | Typical DIY cost | Adjustability | Best application |
| Polypropylene tubular | Slip nuts and washers | $15-$40 | High | Standard cabinet installation |
| ABS tubular | Slip nuts and washers | $20-$45 | High | Areas where black tubular fittings are common |
| Schedule 40 PVC | Primer and solvent cement | $25-$70 | Low after gluing | Permanent branch-drain modification |
| Chrome-plated brass | Slip joints or threaded fittings | $50-$150 | Moderate | Exposed designer plumbing |
| Flexible corrugated tube | Threaded or slip adapters | $10-$30 | Very high | Temporary alignment only, where permitted |
Tubular polypropylene is lightweight, corrosion-resistant, removable, and easy to adjust. A 1-1/2-inch slip-joint P-trap can be installed without solvent cement, and some systems use tool-free connections designed for 1-1/2-inch outside-diameter drain tubing.
Schedule 40 PVC should not be confused with thin tubular sink-drain pipe. PVC DWV joints are permanent solvent-welded connections. Charlotte Pipe specifies a two-step process using primer that meets ASTM F656 and solvent cement that meets ASTM D2564 for its PVC Schedule 40 DWV system.
Before You Start
| Requirement | Typical value |
| Difficulty | Beginner to intermediate |
| Working time | 30-90 minutes |
| Basic parts cost | $15-$40 |
| Disposal or double-sink parts | $25-$70 |
| Main pipe size | 1-1/2-inch tubular |
| Water shutdown required | Usually no |
| Permit required | Usually not for like-for-like exposed replacement, but local rules vary |
Tools and Materials
- 1-1/2-inch kitchen P-trap kit
- Correct single-bowl or double-bowl waste kit
- Replacement tailpiece if needed
- Slip-joint nuts and beveled washers
- Bucket or shallow pan
- Absorbent towels
- Tape measure
- Marker
- Fine-tooth hacksaw or plastic tubing cutter
- Deburring tool, file, or utility knife
- Tongue-and-groove pliers for seized metal fittings
- Flashlight
- Disposable gloves
Do not buy parts based only on the visual diameter. Tubular 1-1/2-inch drain fittings and Schedule 40 1-1/2-inch pipe use different dimensional systems and are not directly interchangeable without the proper trap adapter.
How to Measure the Replacement Layout
Measure the wall-drain height, sink outlet height, horizontal offset, and distance between bowls before cutting anything. The P-trap should connect to the wall without an upward-running trap arm, excessive vertical drop, or stress at any joint.
Record these four measurements:
- Bottom of strainer or disposal outlet to cabinet floor.
- Center of wall drain to cabinet floor.
- Horizontal distance from sink outlet to wall drain.
- Center-to-center distance between double-bowl outlets.
The wall opening must be low enough to receive the trap arm. Installing a deeper sink or garbage disposal can lower the outlet below the existing wall connection. In that situation, adding elbows or forcing the P-trap downward does not solve the geometry. The branch connection inside the wall may need to be lowered by a plumber.
How Much Slope Does the Trap Arm Need?
The trap arm should drain toward the wall while remaining within the slope and developed-length limits adopted by the local plumbing code. A commonly used drainage slope for small horizontal piping is 1/4 inch per foot.
Do not create a dramatic downward angle. Excessive fall before the vent connection can allow the trap arm to function like an unvented vertical drain, increasing the risk of trap siphonage.
Kitchen Sink Drain Pipe Replacement Steps
Step 1: Photograph and Inspect the Existing Layout
Take clear photographs before loosening any fittings. Identify the strainer, tailpiece, disposal outlet, waste tee, P-trap, trap arm, wall adapter, dishwasher hose, and any air admittance valve.
Look for corrosion at the wall, cabinet-floor damage, standing water, mold, or previous sealant patches. You will know the job is suitable for a basic replacement when the wall connection is solid and the leak is limited to accessible tubing.
Common mistake: Removing everything before documenting washer direction and pipe routing.
Step 2: Place a Bucket Under the P-Trap
Clear the cabinet and position a shallow bucket beneath the trap bend. The P-trap always contains water, food residue, grease, and potentially sharp debris.
Do not pour chemical drain cleaner into the sink before disassembly. A trap containing caustic cleaner creates a splash and burn hazard when opened.
Success checkpoint: The bucket covers the lowest joint and leaves enough space to lower the trap.
Step 3: Remove the Existing P-Trap and Waste Tubes
Turn slip-joint nuts counterclockwise. Plastic nuts often loosen by hand, while corroded metal nuts may require pliers held close to the joint to avoid twisting the wall pipe.
Lower the trap slowly and empty it into the bucket. Remove the trap arm from the wall adapter, then disconnect the tailpiece, continuous waste tubing, or disposal discharge tube.
Oatey summarizes the basic sequence as connecting the tailpiece to the trap bend, attaching the wall tube, tightening the slip joints, and testing for leaks.
Common mistake: Pulling sideways on a corroded wall adapter and breaking piping behind the cabinet.
Step 4: Clean and Inspect Every Connection
Wipe the strainer threads, disposal flange, and wall adapter. Remove old washers, hardened residue, plumber’s putty fragments, tape, and corrosion.
Inspect the wall adapter with a flashlight. The sealing surface should be smooth enough for the new washer to seat evenly. A cracked adapter, heavily corroded metal nipple, or loose fitting requires repair before reassembly.
Success checkpoint: Each receiving socket is clean, stable, and free of damaged washer material.
Step 5: Dry-Fit the Tailpiece and Waste Assembly
Install the new tailpiece beneath the strainer, or position the disposal discharge tube at the manufacturer’s outlet. For a double sink, connect the two bowls with a center-outlet or end-outlet continuous-waste kit.
Keep the waste tubes as short and direct as the layout permits. Rotate adjustable fittings until they align naturally with the planned P-trap inlet.
Do not tighten fully during dry fitting. Leave each joint loose enough to make small rotational adjustments.
Common mistake: Cutting the first tube before assembling the full layout.
Step 6: Cut and Deburr the Trap Arm
Insert the trap arm into the wall adapter until it seats, then pull it back slightly so it does not project far enough to obstruct the drainage path. Mark the length needed to reach the trap bend while maintaining adequate insertion at both ends.
Cut the tube square. Remove burrs from the inside and outside edges because rough cuts can damage washers, collect debris, and prevent the pipe from seating straight.
Charlotte Pipe’s professional guidance begins with the same principle for permanent piping: “Cut the pipe square.”
Success checkpoint: The trap arm enters both fittings without bending or pulling the P-trap sideways.
Step 7: Install the Nuts and Beveled Washers
Slide the slip nut onto the pipe with its threads facing the receiving fitting. Slide the beveled washer on next, with the narrow tapered edge entering the receiving socket.
The washer creates the seal. Thread tape and pipe dope are generally unnecessary on a standard plastic slip joint because the nut compresses the washer around the tubing rather than sealing through the threads.
Hand-tighten each plastic nut until snug. Recheck the alignment, then apply only a small additional turn when required.
Common mistake: Reversing the washer, doubling washers, or overtightening until the plastic distorts.
Step 8: Test Under Maximum Drain Flow
Run the faucet and inspect every joint with a dry paper towel. A paper towel reveals small beads of water before they become visible drips.
Next, plug the sink, fill the basin substantially, and release the water at once. For a double-bowl sink, test each bowl separately and then discharge both according to the fixture’s normal capacity.
Oatey estimates that most DIYers can replace a standard P-trap in about 30-45 minutes with a slip-joint kit and basic hand tools.
Success checkpoint: All joints remain dry during flow and for at least five minutes afterward.
How Do You Replace a Double-Sink Drain?
A double-sink drain uses a continuous-waste assembly to combine both bowls before wastewater enters one P-trap. The two common layouts are center-outlet and end-outlet configurations.
| Layout | Tee position | Main advantage | Common problem |
| Center outlet | Between the bowls | Balanced path from both basins | Uses central cabinet space |
| End outlet | Under one bowl | More open storage area | Longer cross tube |
| One bowl plus disposal | Usually at disposal side | Direct disposal discharge | Outlet height may be too low |
| Rear space-saving kit | Toward cabinet back | Preserves cabinet floor | Requires accurate alignment |
Use only one P-trap for the combined kitchen-sink waste assembly unless the approved design requires otherwise. Plumbing codes generally prohibit double trapping because air can become trapped between the two water seals and restrict drainage.
What Changes When a Garbage Disposal Is Installed?
A garbage disposal replaces the normal tailpiece beneath one sink bowl. Its discharge tube must connect to the waste tee without rising uphill or forcing the P-trap below the wall outlet.
Turn off and verify electrical power before working around the disposal. The plumbing job may not require removing the disposal itself, but accidental activation can cause serious injury.
When connecting a dishwasher, confirm whether the disposal’s dishwasher inlet knockout has already been removed. Do not remove it when no dishwasher hose will be connected, because the open inlet can leak.
A deep sink combined with a large disposal often creates the hardest alignment problem. When the disposal outlet sits lower than the wall drain, the correct repair may require lowering the sanitary tee inside the wall.
Common Mistakes and How to Fix Them
| Problem | Likely cause | Corrective action |
| Drip at slip nut | Reversed, twisted, or damaged washer | Disassemble, replace washer, and realign |
| Leak after tightening | Joint under sideways stress | Recut or rotate tubing for natural alignment |
| Nut will not thread | Cross-threading or mismatched parts | Replace damaged nut and confirm system type |
| Slow drainage | Trap arm inserted too far | Pull arm back slightly and retest |
| Gurgling | Venting problem or partial blockage | Clear drain and inspect vent arrangement |
| Sewer odor | Dry or siphoned trap seal | Refill trap and investigate venting |
| Repeated grease clogs | Corrugated or poorly sloped tube | Install smooth-wall rigid tubing |
| Leak at wall | Damaged adapter or wall pipe | Stop and repair the fixed drainage connection |
Avoid Accordion-Style Flexible Drain Tubes
Corrugated drain tubes simplify difficult alignment, but their internal ridges retain grease and food particles. They are harder to clean than smooth-wall tubular fittings and may not comply with local plumbing requirements.
Use adjustable rigid fittings, an approved offset, or a professionally modified wall connection instead of treating a flexible tube as the permanent solution.
Do Not Build an S-Trap
An S-trap occurs when the pipe leaves the trap and turns vertically downward without a properly vented horizontal trap arm. The falling water can siphon the trap seal and allow sewer gases to enter the kitchen.
A legal correction may require a vented wall connection or an approved air admittance valve installed according to local code. An air admittance valve is not universally permitted and must remain accessible.
How Much Does Kitchen Sink Drain Replacement Cost?
A straightforward DIY kitchen sink drain pipe replacement usually costs $15-$70. Professional service commonly costs more when the plumber must correct disposal height, replace a corroded wall adapter, open the wall, or rebuild permanent DWV piping.
| Repair scope | Typical parts | DIY cost | Typical working time |
| Replace P-trap only | Trap bend, arm, nuts, washers | $10-$30 | 30-60 minutes |
| Replace single-sink assembly | Tailpiece and complete trap kit | $15-$40 | 45-90 minutes |
| Replace double-sink assembly | Continuous waste and trap | $25-$60 | 60-120 minutes |
| Reconnect garbage disposal | Discharge tube, tee, trap | $25-$70 | 60-150 minutes |
| Replace chrome brass assembly | Brass tailpiece and trap | $50-$150 | 60-150 minutes |
| Modify glued PVC | Pipe, fittings, primer, cement | $30-$100 | 2-4 hours |
| Professional exposed replacement | Parts and labor | $150-$400 | 1-3 hours |
| Wall opening or branch relocation | Plumbing and cabinet/wall repair | $400-$1,500+ | Half day or longer |
Retail pricing changes by location and configuration. As one current reference point, a 1-1/2-inch single-bowl all-in-one drain kit was listed at approximately $20, while kitchen drain components ranged widely by material and design.
When Should You Call a Plumber?
Call a licensed plumber when the repair extends beyond removable under-sink tubing. Permanent DWV changes affect drainage slope, venting, fitting orientation, cleanout access, and code compliance.
Professional help is appropriate when:
- The wall drain is higher than the disposal outlet.
- The wall adapter spins, cracks, or leaks inside the wall.
- Galvanized or cast-iron piping is heavily corroded.
- Water appears beneath the cabinet or behind the wall.
- The replacement would create an S-trap.
- The drain remains slow after the trap is removed and cleaned.
- Several fixtures gurgle or back up together.
- Solvent-welded fittings must be redesigned.
- Local rules require a permit or inspection.
A like-for-like P-trap replacement is a manageable DIY task. Moving the branch connection or changing the vent system is not the same job.
Limitations of a DIY Replacement
Kitchen sink drain pipe replacement does not cure every slow drain, odor, or cabinet leak. A new P-trap cannot clear a blockage deeper in the branch line, repair a failed vent, seal a leaking sink rim, or correct deteriorated piping behind the wall.
Codes also vary by jurisdiction. The International Plumbing Code provides widely adopted model requirements, but states, cities, and counties may amend trap-arm lengths, venting methods, approved materials, and permit rules. Confirm local requirements before altering permanent piping.
Conclusion
Kitchen sink drain pipe replacement succeeds when the new 1-1/2-inch assembly is smooth-walled, correctly trapped, properly sloped, and aligned without mechanical stress. Dry-fit the complete layout before cutting, orient every beveled washer correctly, hand-tighten plastic joints, and finish with a full-basin leak test.
Replacing removable tubular parts is normally a practical homeowner repair. Stop when the wall connection, vent system, disposal height, or permanent DWV layout must be changed.
Frequently Asked Questions
Can I replace a kitchen sink drain without turning off the water?
Yes. Replacing the drain assembly normally does not require shutting off the water supply because the work is performed on the waste side of the sink. Keep the faucet off during disassembly, and make sure nobody runs water until the new trap and waste tubes are connected.
Do slip-joint drain fittings need plumber’s tape?
Standard slip-joint drain fittings normally do not need plumber’s tape. The beveled washer, not the nut threads, creates the watertight seal. Tape can interfere with nut movement or conceal cross-threading. Use the correct washer, clean the mating surfaces, align the tubes, and tighten the nut evenly.
Can I connect PVC directly to a metal wall drain?
PVC or polypropylene tubular pipe can connect to a metal wall drain when a compatible trap adapter, compression washer, or approved transition fitting is installed. Do not force mismatched threads together. Corroded metal threads or a loose wall nipple should be repaired before the new tubular assembly is attached.
Why does my new P-trap still leak?
A new P-trap usually leaks because a washer is reversed, twisted, damaged, missing, or compressed unevenly. Misaligned tubes are another common cause. Loosen the entire assembly, align the pipes without sideways pressure, confirm that each tapered washer points into its receiving fitting, and retighten by hand.
How far should the trap arm enter the wall?
The trap arm must enter far enough to seal securely inside the wall adapter, but it should not extend so deeply that it obstructs the sanitary tee or branch drain. Mark the insertion depth during dry fitting, cut the tube square, and leave enough engagement for the washer to compress fully.
Can a new sink be too deep for the existing drain?
Yes. A deeper sink or added garbage disposal can place the fixture outlet below the wall drain. The P-trap cannot drain uphill. Avoid improvised loops or S-traps. The proper correction is usually to raise the sink outlet, choose a shallower disposal configuration, or lower the branch connection inside the wall.