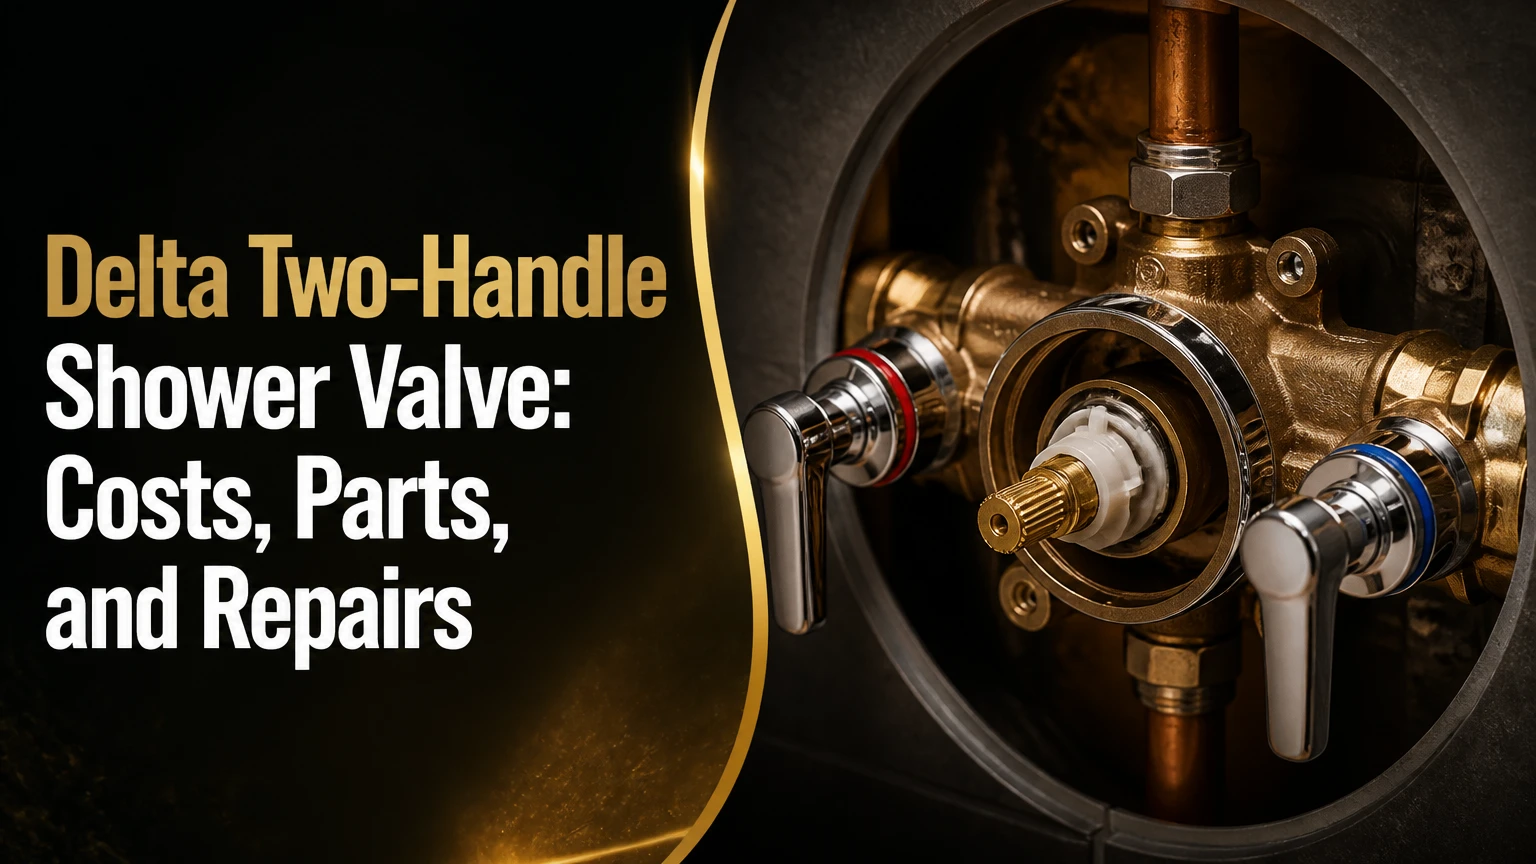
A Delta two-handle shower valve controls shower water through either two separate hot-and-cold handles or a modern stacked dual-control trim with separate temperature and volume functions. The correct repair depends on the valve generation, cartridge, rough-in body, and trim design, because Delta uses different replacement parts across legacy and MultiChoice systems.
Key Facts at a Glance
- A traditional Delta two-handle valve has independent hot and cold stems or cartridges.
- A Delta Monitor 17 system uses one pressure-balancing cartridge with separate temperature and volume controls.
- A Delta TempAssure 17T system uses thermostatic temperature control and a separate volume control.
- The Delta R10000 is a rough-in valve body, not a complete trim kit or cartridge.
- Typical cartridge repairs cost $15-$95 in parts and take 30-90 minutes when the shutoff is accessible.
- A new rough-in installation commonly costs $500-$1,200 or more when tile or finished wall material must be opened.
What Is a Delta Two-Handle Shower Valve?
A Delta two-handle shower valve is the in-wall assembly that receives hot and cold water, controls flow, mixes the supplies, and sends water to the showerhead or tub spout. In older bathrooms, “two-handle” usually means physically separate hot and cold knobs; in newer Delta products, it often describes two stacked controls for temperature and volume.
That distinction determines almost everything: replacement cartridge, trim compatibility, anti-scald behavior, rough-in requirements, and repair method. A legacy two-handle valve may use two stem assemblies with rubber washers, seats, springs, or ceramic components. A modern Monitor 17 or TempAssure 17T normally uses a single cartridge inside a Delta MultiChoice Universal rough-in body.
The visible handles are trim. The brass or composite valve behind the wall is the rough-in. Delta sells many trim designs that fit a particular rough-in family, but trim appearance alone does not identify every internal part.
Traditional split-handle design
Traditional Delta tub and shower valves place the hot handle on the left and the cold handle on the right, with the controls separated across the escutcheon or wall. Each side operates its own water inlet, so the user adjusts flow and temperature manually by balancing both handles.
Older mechanisms vary by model year. Some use replaceable stems, seats, and washers; others use ceramic or proprietary cartridge assemblies. A two-handle valve does not automatically provide pressure balancing or thermostatic protection.
Modern stacked dual-control design
Modern Delta dual-control trim generally places a smaller volume lever within or above a larger temperature handle. The user sets temperature with one control and water quantity with the other, allowing the temperature setting to remain consistent between showers.
The arrangement looks like two handles, but the internal design is not the same as a legacy split valve. A Delta Monitor 17 cartridge uses pressure balancing, while a TempAssure 17T cartridge uses thermostatic regulation.
How Does a Delta Two-Handle Shower Valve Work?
A Delta two-handle shower valve either mixes hot and cold water through independent inlet controls or uses one cartridge with separate temperature and volume interfaces. Hot water normally enters the left port, cold water enters the right port, and the mixed outlet travels upward to the shower riser.
In a traditional valve, turning each handle opens its respective supply. Water pressure and handle position determine the final temperature. A pressure change on one side can therefore alter the mixture, especially if another fixture starts using water.
In a Monitor 17 valve, the cartridge senses pressure changes and adjusts internal passages to reduce hot-water temperature swings. In a TempAssure 17T valve, a thermostatic element responds to water temperature and modulates the hot and cold inlets more directly. Neither cartridge creates additional water pressure. The showerhead, supply piping, and household pressure still limit flow.
Pressure-balancing versus thermostatic control
Pressure-balancing and thermostatic cartridges solve different problems. Pressure balancing responds primarily to changes in hot and cold supply pressure, while thermostatic control responds to the temperature of the mixed water.
| Feature | Legacy split valve | Monitor 17 | TempAssure 17T |
|---|---|---|---|
| Main control layout | 2 separate handles | Stacked dual control | Stacked dual control |
| Temperature technology | Manual mixing | Pressure balancing | Thermostatic regulation |
| Volume control | Combined with each stem | Separate control | Separate control |
| Typical cartridge family | Model-specific stems | RP32104 or model-specific equivalent | 17T-specific cartridge |
| Anti-scald adjustment | Often absent | Rotational limit stop | Temperature limit and stop |
| Best retrofit use | Matching an existing bathroom | Standard family shower | Stable temperature and custom use |
Delta’s product naming and cartridge numbers have changed over time, so a part number found in a search result should not be treated as proof of compatibility. The valve body and trim model matter together.
Which Delta Valve Type Fits Your Project?
The best Delta configuration depends first on the wall condition, then on safety and control preferences. A legacy replacement is usually the least destructive choice when the existing valve remains serviceable; a MultiChoice system is more flexible for a fully open-wall remodel.
| Project condition | Recommended Delta system | Typical reason | Main limitation |
|---|---|---|---|
| Existing separate hot and cold handles | Matching legacy stem or cartridge | Avoids opening tile | Limited modern trim options |
| New standard shower | R10000 with Monitor 17 trim | Pressure-balanced control | Requires rough-in installation |
| High-stability temperature demand | R10000 with TempAssure 17T trim | Thermostatic regulation | Higher cartridge and trim cost |
| Tub and shower combination | Valve with tub outlet and diverter | Supports two discharge points | Tub spout piping affects performance |
| Multiple outlets | Multi-outlet rough-in and diverter | Coordinates showerhead and hand shower | Requires flow planning |
| Accessible bathroom renovation | Easy-grip dual control or thermostatic trim | Separate volume and temperature control | Handle reach and layout need planning |
A two-handle arrangement is not automatically better than a single handle. Separate volume and temperature control can be easier for repeatable use, but legacy hot-and-cold handles are slower to adjust and provide weaker protection against pressure changes.
What Does the R10000 Rough-In Valve Do?
The Delta R10000 MultiChoice Universal valve is an in-wall rough-in body that accepts compatible Delta shower trim; it is not, by itself, a complete two-handle shower faucet. The cartridge and external control functions come from the selected trim kit, while the R10000 determines pipe connections, wall position, and basic installation options.
R10000 versions differ by connection method and included features. Common configurations include threaded IPS connections, sweat connections for copper, and PEX-compatible versions. Some versions include screwdriver stops, which can isolate the valve for service without shutting off the whole house.
The rough-in body also supports tub-shower arrangements, but the installer must use the correct outlet configuration. Capping an unused outlet and pressure-testing before closing the wall prevents a concealed leak from becoming a tile removal project.
Important rough-in limits
The plaster guard indicates the intended finished-wall relationship. Backer board, waterproofing, mortar, and tile all count toward finished depth, so setting the valve from the exposed studs alone is unreliable.
The common adjustment window is approximately 1/4 inch on compatible Delta installations, but the exact requirement belongs to the installation sheet for the valve and trim. A valve set too deep may leave the handle adapter short; a valve set too far forward may prevent the escutcheon from sealing against the wall.
How Do You Identify the Correct Delta Cartridge?
Identify the cartridge from the valve’s handle arrangement, trim markings, rough-in family, and original model documentation rather than from color or a generic online photograph. Remove the handle and escutcheon only after shutting off water, then photograph the exposed cartridge and count the control functions.
Useful identification clues include:
- Two separated handles: Look for two independent stems, bonnet nuts, or cartridges. Each side may use a different hot or cold stem.
- One large temperature handle and one volume lever: Check for Monitor 17 or TempAssure 17T trim and an R10000-compatible rough-in.
- Single handle with one rotating control: This is usually a Monitor 13/14-style system, not a two-handle valve.
- Visible model markings: Record letters and numbers from the escutcheon, handle, instruction sheet, or valve body.
- Cartridge dimensions: Compare length, retaining clip, tabs, seals, and orientation with Delta’s parts documentation.
Two commonly confused parts deserve correction. Delta RP47422 is associated with certain single-handle Monitor-style valves, and RP4993 seats and springs are also widely associated with Delta single-handle cartridge repairs. Neither part should be assumed to fit a traditional two-handle Delta valve.
How Is a New Valve Installed?
A new Delta rough-in installation normally takes 2-4 hours for a plumber when framing and pipe access are straightforward, but a finished-wall replacement can take substantially longer. The most important variables are finished-wall depth, pipe material, outlet configuration, and whether the old valve can be reached without tile removal.
Before you start
| Requirement | Typical value |
|---|---|
| Professional installation time | 2-4 hours |
| DIY difficulty | High, especially with soldered copper |
| Basic rough-in cost | $50-$150 for valve body |
| Complete trim and valve | $150-$600 or more |
| Framing support | 2×6 blocking, approximately 16 inches long |
| Pressure test duration | 15-30 minutes minimum |
Use a tubing cutter, adjustable wrench, screwdriver, level, measuring tape, pipe-support hardware, approved transition fittings, and the manufacturer’s installation guide. A torch requires fire protection, ventilation, a wet cloth, and removal or shielding of heat-sensitive components.
Step 1: Shut off water and open the wall
Close the relevant fixture stops or the main supply, then open a lower faucet to relieve pressure. Remove enough wall material to expose the old valve and confirm pipe direction before cutting.
You will know the supply is isolated when the shower produces no continuing flow after pressure drains. A common mistake is trusting a partially closed stop that allows enough water to enter while soldering.
Step 2: Install solid blocking
Secure horizontal 2×6 blocking between studs at the valve’s specified height. Fasten the rough-in body firmly so the valve cannot move when the handle is operated.
The support is adequate when the valve remains level and stationary under hand pressure. Flexible mounting creates trim movement, stress on solder joints, and difficulty sealing the escutcheon.
Step 3: Set finished-wall depth
Position the plaster guard according to the finished-wall mark in the Delta instructions. Include cement board or backer board, waterproofing membrane, mortar, and tile in the measurement.
The valve is correctly positioned when the plaster guard aligns with the manufacturer’s finished-wall reference. Installing it flush with studs is a frequent error because studs are not the finished surface.
Step 4: Connect hot, cold, and outlets
Connect hot water to the left inlet and cold water to the right inlet when facing the valve. Connect the upper outlet to the shower riser and the lower outlet to the tub spout when the model uses both.
Use the connection type supplied by the rough-in body, such as sweat copper, threaded IPS, or PEX-compatible fittings. The checkpoint is correct flow direction and secure, accessible joints. Do not apply heat with the cartridge, plastic test plug, or seals exposed to flame.
Step 5: Cap, flush, and pressure-test
Cap unused outlets, open the supply gradually, and inspect every joint for leaks. Flush debris before installing the cartridge or trim, because solder particles and pipe scale can damage balancing or thermostatic components.
A successful test shows stable pressure and dry joints for at least 15-30 minutes. Never close the wall after a quick visual check lasting only a few seconds.
How Do You Replace a Leaking Cartridge?
A leaking Delta cartridge replacement usually takes 30-90 minutes and costs $15-$95 in parts when the shutoff and valve are accessible. The correct sequence is isolate water, remove trim, release the retaining hardware, extract the cartridge, inspect the valve body, install the matched part, and test temperature.
- Shut off and drain: Close fixture or main stops, then open the shower to release pressure.
- Remove the handle: Take out the set screw or handle screw, protecting the finish with a cloth.
- Remove the escutcheon: Keep track of sleeves, adapters, limit stops, and orientation rings.
- Release the cartridge: Remove the retaining clip, bonnet nut, or threaded retainer specified for that valve.
- Extract carefully: Use a cartridge puller if mineral deposits prevent straight removal. Twisting against a fragile valve body can damage it.
- Clean the cavity: Remove scale and debris without gouging sealing surfaces.
- Install the matched cartridge: Align tabs, hot-side orientation, and retaining hardware exactly.
- Reassemble and test: Restore water slowly, check for leaks, and set the rotational temperature limit.
You will know the repair worked when the shower stops dripping with both controls closed, the handle operates smoothly, and the outlet temperature remains stable. Over-tightening the bonnet nut is a common failure because it can distort seals or damage plastic cartridge components.
How Much Does Replacement Cost?
A Delta two-handle repair typically costs $15-$95 for a replacement stem or cartridge, while replacing an inaccessible rough-in valve commonly costs $500-$1,200 or more. Tile removal, copper soldering, water-damage repair, and new trim can move the project above that range.
| Repair or installation | Parts cost, typical | Labor cost, typical | Time, typical |
|---|---|---|---|
| Legacy stem or washer repair | $10-$45 | $150-$350 | 30-90 minutes |
| Monitor cartridge replacement | $35-$75 | $150-$350 | 45-90 minutes |
| TempAssure cartridge replacement | $70-$125 | $200-$400 | 60-120 minutes |
| Accessible rough-in replacement | $50-$150 | $400-$900 | 2-5 hours |
| Tile-side rough-in replacement | $100-$600 | $500-$1,200+ | 1-2 days |
| Complete valve and trim upgrade | $150-$600+ | $500-$1,500+ | 1-2 days |
These are typical North American project ranges, not fixed Delta prices. A plumber should diagnose the leak before quoting a rough-in replacement, because a stem seal or cartridge can often solve the problem without opening the wall.
Two-Handle vs. Single-Handle Alternatives
A traditional two-handle Delta valve is best when preserving an existing layout matters, while a single-handle pressure-balancing valve is usually simpler for new standard showers. A stacked Monitor 17 or TempAssure 17T provides separate control without requiring two independent hot-and-cold adjustments.
| Option | Temperature control | Wall work for retrofit | Service complexity | Best use |
|---|---|---|---|---|
| Legacy two-handle | Manual hot-cold mixing | Low if compatible | Model-specific | Historic or matching remodel |
| Single-handle Monitor 13/14 | Pressure balancing | High if valve changes | Moderate | Basic new shower |
| Monitor 17 dual control | Pressure balancing plus volume | High unless existing rough-in matches | Moderate | Family shower |
| TempAssure 17T | Thermostatic plus volume | High unless compatible | Higher | Stable temperature demand |
| Separate thermostatic system | Thermostatic mixing and outlets | High | High | Custom multi-outlet shower |
The U.S. Environmental Protection Agency’s WaterSense specification limits labeled showerheads to 2.0 gallons per minute at 80 psi, while federal plumbing rules commonly allow showerheads up to 2.5 gallons per minute. The valve does not guarantee either rate; the showerhead, pressure, pipe sizing, and simultaneous outlets determine actual delivery.
Why Does the Showerhead Drip?
A Delta showerhead that drips after shutoff usually has a worn cartridge, stem seal, seat, spring, or debris on an internal sealing surface. A few residual drops from water trapped in the shower arm can be normal, but continuous dripping for several minutes indicates a valve-side problem.
For a legacy split-handle valve, close both handles and determine which side stops the leak when its supply is isolated. For a modern dual-control valve, inspect the cartridge and retaining components. Do not replace RP4993 seats and springs unless the valve documentation identifies that repair set.
A persistent drip can also come from a tub-shower diverter or a damaged tub spout connection, although those failures usually affect where water exits rather than causing a showerhead leak with the valve closed.
Why Does Shower Temperature Fluctuate?
Temperature fluctuation occurs when a legacy valve lacks pressure balancing, when a Monitor cartridge has debris or a sticking balancing spool, or when a thermostatic cartridge is misadjusted or failing. A toilet flush, washing machine fill, or second shower can expose the weakness.
Check the following in order:
- Confirm hot and cold supplies are connected to the correct ports.
- Clean the cartridge screen or balancing spool where the model permits service.
- Verify household hot-water temperature and shower limit-stop adjustment.
- Inspect supply stops for partial closure.
- Replace the cartridge if cleaning does not restore stable movement.
- Test for a cross-connection if hot water appears at cold fixtures or the shower remains warm when closed.
A pressure-balancing cartridge reduces pressure-driven temperature changes but does not correct an undersized water heater, blocked supply line, or incorrect plumbing connection.
Common Mistakes That Damage Delta Valves
Experienced installers avoid four recurring errors because each can create a concealed failure that looks like a defective cartridge.
- Using the wrong cartridge family: Similar Delta handles do not prove internal compatibility. Confirm the rough-in and model.
- Heating the assembled valve: Soldering near plastic plugs, seals, or cartridges can deform components. Remove vulnerable parts first.
- Setting the body by stud depth: The finished-wall mark, not the stud face, determines trim fit.
- Skipping the pressure test: A dry joint can leak after thermal expansion or line pressure returns.
- Forcing a seized cartridge: A puller is safer than levering against the brass body or surrounding tile.
- Ignoring the rotational limit stop: A repaired valve can still deliver dangerously hot water if the stop is set incorrectly.
A practitioner rule is to photograph every trim layer before removal. The image records handle orientation, adapter placement, and limit-stop position when the manufacturer diagram is unclear.
Should You Repair or Replace the Valve?
Repair the cartridge or stem when the valve body is sound, the trim remains available, and the failure is limited to dripping, stiffness, or unstable temperature. Replace the rough-in when the body is cracked, badly corroded, repeatedly leaks at the casting, or cannot accept the desired modern trim.
| Condition | Repair recommendation | Expected consequence |
|---|---|---|
| Drip from one legacy handle | Replace stem seals or stem | Lowest cost, preserves trim |
| Stiff handle with intact body | Clean or replace cartridge | Usually no wall opening |
| Cracked valve body | Replace rough-in | Wall access required |
| Desired TempAssure trim on old valve | Confirm compatibility first | Often requires new rough-in |
| Corroded threaded connection | Replace affected valve or fitting | Prevents future concealed leak |
| No anti-scald protection in family home | Consider modern pressure balance | Higher renovation cost, better control |
Do not upgrade solely because the existing valve has two handles. A compatible repair preserves tile and may outperform a rushed replacement. Conversely, a full bathroom remodel is the practical time to install blocking, replace inaccessible piping, and choose the desired rough-in.
FAQ
Can a Delta two-handle shower valve use any Delta trim?
No. Delta trim compatibility depends on the rough-in body, cartridge technology, outlet arrangement, and model generation. A legacy split-handle valve generally cannot accept modern R10000 trim without changing the in-wall valve, while compatible MultiChoice trim can share an R10000 rough-in when the product documentation confirms fit.
Does a two-handle Delta valve prevent scalding?
A traditional split-handle Delta valve generally does not provide the same automatic protection as a pressure-balancing or thermostatic valve. Monitor 17 systems use pressure balancing and a temperature limit stop; TempAssure 17T systems add thermostatic regulation, but correct installation and adjustment remain necessary.
Can I replace only the visible handles?
Sometimes, but only when the replacement handles match the existing stem spline, adapter, screw pattern, and trim geometry. A handle that fits the stem can still leave the escutcheon, limit stop, or wall seal incompatible. Record the valve model before ordering cosmetic parts.
Why is the hot water on the wrong side?
Reversed hot and cold connections, an upside-down rough-in, or incorrect cartridge orientation can place hot water on the right. Some modern Delta cartridges can be reoriented for reverse plumbing, but the manufacturer’s instructions should determine whether to rotate the cartridge or correct the piping.
Is a thermostatic Delta valve worth the additional cost?
A TempAssure 17T system is worthwhile when stable temperature matters, several fixtures share the supply, or users have difficulty adjusting manual controls. A Monitor 17 is usually the more economical choice for a standard family shower, especially when household pressure is consistent and the water heater is properly sized.
Should a homeowner solder a new shower valve?
A homeowner should solder only with demonstrated copper-piping skill, adequate wall protection, and the cartridge and heat-sensitive parts removed. PEX-compatible Delta rough-ins can reduce torch risk, but connections still require correct crimp or clamp tools, testing, and compliance with local plumbing requirements.
The Bottom Line
A Delta two-handle shower valve can mean a legacy hot-and-cold stem assembly or a modern stacked dual-control system, and those designs are not interchangeable. Identify the rough-in and cartridge before buying parts, repair a sound existing valve when possible, and choose Monitor 17 or TempAssure 17T technology when a remodel justifies new in-wall work. A correct diagnosis saves more money than a generic cartridge replacement.