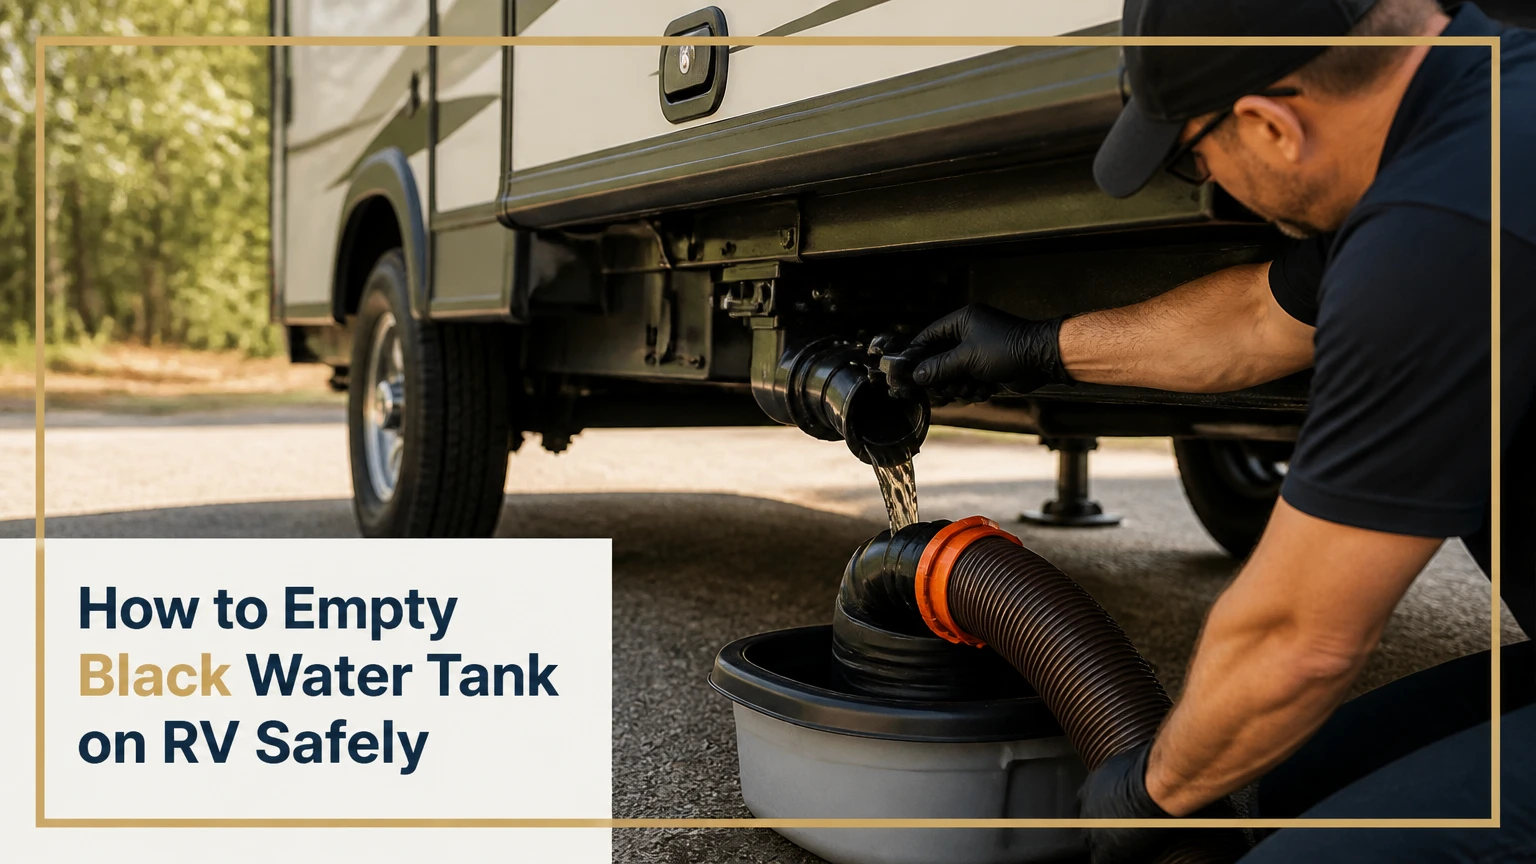
To empty an RV black water tank, park at an approved dump station, wear gloves and eye protection, connect a secure 3-inch sewer hose, open the black valve fully, rinse the tank, then drain the gray tank to clean the hose. The complete process usually takes 10-20 minutes, and keeping the black valve closed between dumps prevents solid buildup.
Key Facts at a Glance
- An RV black water tank stores toilet wastewater, while the gray tank stores sink and shower water.
- A typical gravity dump uses a 3-inch bayonet sewer hose and takes approximately 5-10 minutes to drain.
- A black tank does not need to reach exactly 66% full, but more liquid generally improves gravity flow and rinsing.
- Drain the black tank before the gray tank so gray water can rinse sewage residue from the sewer hose.
- Use a dedicated waste hose for tank flushing, never the hose used for drinking water.
- Leave approximately 1-2 gallons of clean water in the black tank after dumping unless the RV is being winterized or stored dry.
What an RV Black Water Tank Holds
An RV black water tank holds toilet wastewater, including urine, feces, and toilet paper. The tank sits below the RV toilet and normally connects to a roof vent, a termination valve, and a sewer outlet.
The gray water tank holds wastewater from sinks and showers. The two tanks may share a termination outlet, but separate valve handles control them. The black valve is usually identified by a black handle, while the gray valve often has a gray handle, although handle colors vary by manufacturer.
A typical RV black tank holds 30-50 gallons. Class B camper vans may use tanks below 20 gallons, while larger fifth wheels can have black tanks above 50 gallons. Tank size, occupants, toilet-water usage, and campsite length determine dumping frequency.
How the RV Waste System Drains
An RV waste system normally drains by gravity:
RV toilet → black tank → termination valve → sewer outlet → sewer hose → dump-station inlet
The sewer hose does not need a natural downhill campsite grade. Gravity only needs the hose to maintain a continuous downward path from the RV outlet to the dump inlet. If the sewer inlet is higher than the RV outlet, a macerator pump or a different parking position may be necessary.
The black tank valve holds waste inside the tank while the RV is occupied. Leaving that valve open at a full-hookup site lets liquid escape while solids remain behind, which can form a compacted mound under the toilet opening or around the tank outlet.
Before You Start
Prepare the dump site, protective equipment, hose connection, and tank level before opening any valve. Most first-time dumping problems result from an unsecured sewer hose or an incorrect connection, not from the tank itself.
| Requirement | Typical specification | Why it matters |
|---|---|---|
| Work time | 10-20 minutes | Includes draining, rinsing, and cleanup |
| Gloves | Long-cuff nitrile, 6-8 mil | Reduces skin contact with contaminated fittings |
| Eye protection | Sealed or wraparound safety glasses | Protects against splashes and hose leaks |
| Sewer hose | 3-inch, 15-20 feet | Matches most RV bayonet outlets |
| Dump-station adapter | Clear elbow plus threaded or tapered adapter | Lets you see flow and secure the inlet |
| Utility hose | 25-50 feet, dedicated to waste work | Supplies flush water without contaminating drinking gear |
| Optional flush tool | Tank flush inlet or toilet wand | Breaks up residue and improves rinsing |
| Cleanup supplies | Disinfectant, paper towels, disposable bags | Keeps contaminated equipment isolated |
Check These Prerequisites
- Confirm that the dump station is approved for RV sewage and identify the inlet before connecting anything.
- Park so the RV sewer outlet is close enough to the dump inlet for the hose to reach without stretching.
- Turn off the water pump and disconnect city water if the toilet could be flushed accidentally during setup.
- Verify that the black and gray valve handles move normally, but do not force a stuck handle.
- Keep the fresh-water hose, drinking-water fittings, and tank-flush hose physically separate.
A black tank that is one-third full can still be dumped. The often-repeated two-thirds threshold is a practical target for stronger flow, not a mechanical requirement. If the tank is low, add several gallons through the toilet before dumping, provided freezing conditions and local water restrictions do not prevent it.
How to Empty Black Water Tank on RV
Empty an RV black water tank in eight controlled steps: connect the hose, verify the seal, open the black valve, rinse the tank, close black, drain gray, disconnect safely, and leave water in the tank. The most important success factor is maintaining a leak-proof connection before opening the termination valve.
Step 1: Put on Protective Equipment
Put on long-cuff disposable gloves and eye protection before handling the sewer cap, bayonet fitting, or dump-station adapter. Keep a second pair of gloves available in case the first pair tears.
Do not kneel directly over the dump inlet. Position your body to one side because trapped air or an imperfect seal can cause a sudden splash.
Success checkpoint: Gloves, glasses, and cleanup supplies are on your body or within immediate reach.
Common mistake: Starting the connection bare-handed and trying to put gloves on after a fitting leaks.
Step 2: Connect the Sewer Hose to the RV
Remove the RV sewer outlet cap and inspect the bayonet lugs and rubber gasket. Push the sewer hose bayonet fitting onto the outlet, rotate it until all locking tabs engage, and attach a clear elbow to the opposite end.
Use a hose support or a shallow continuous slope when possible. A supported hose drains more completely and is less likely to sag into a low spot filled with sewage.
| Connection point | Correct action | Failure indication |
|---|---|---|
| RV outlet | Lock all bayonet tabs over the lugs | Fitting twists or lifts off |
| Hose gasket | Seat the gasket flat | Drips appear before dumping |
| Clear elbow | Tighten the threaded or bayonet connection | Elbow rotates under pressure |
| Dump inlet | Use a rated adapter or sewer donut | Adapter rises or ejects |
| Hose support | Maintain a downward path | Liquid pools in a sag |
A sewer donut improves stability and odor control, but it does not turn an unsuitable dump location into an approved one. Follow campground rules and local wastewater requirements.
Success checkpoint: The hose is locked at both ends, the clear elbow is visible, and no fitting is under sideways tension.
Common mistake: Inserting a loose hose end into the dump hole without an adapter, which can allow the hose to recoil or discharge outside the inlet.
Step 3: Test the Assembly Before Opening the Valve
Open the RV toilet briefly or add a small amount of clean water to the tank through the toilet if the tank is nearly empty. Watch every connection for leakage. A water test is safer than discovering a loose fitting after sewage enters the hose.
Never use a household garden hose for black tank flushing if that hose may later contact drinking-water equipment. A dedicated utility hose should have a distinct color and storage container.
Success checkpoint: The test water reaches the dump inlet without leakage, hose movement, or a disconnected adapter.
Common mistake: Assuming the fitting is secure because it feels tight. Bayonet tabs must be fully engaged, not merely pressed against the outlet.
Step 4: Open the Black Tank Valve Fully
Pull the black termination valve handle all the way out in one smooth motion. Open the valve fully rather than leaving it partly open, because a restricted opening can reduce flow and allow solids to collect near the gate.
Expect the first discharge to be the strongest. Watch the clear elbow and listen for the flow to slow. A typical 30-50-gallon gravity tank takes approximately 5-10 minutes to drain, although a long hose, low liquid level, paper buildup, or a blocked vent can extend that time.
Do not shake, disconnect, or lift the hose while the black valve is open.
Success checkpoint: Flow decreases substantially and then stops or becomes an intermittent trickle.
Common mistake: Closing the valve after the first drop in flow. A tank often drains in pulses as air enters through the toilet or roof vent.
Step 5: Flush the Black Tank
Flush the black tank through the RV’s built-in black-tank flush inlet, a rotating toilet wand, or a manufacturer-approved backflush adapter. Use a dedicated utility hose and moderate water pressure. The RV owner’s manual takes priority because flush ports differ in construction and backflow protection.
Run the flush for several minutes, then allow the discharge to slow before closing the black valve. Repeat the fill-and-drain cycle if the water remains visibly dark or contains substantial paper.
A flush inlet is not permission to leave the black valve closed indefinitely while water runs. A blocked or unattended tank can overfill. Remain beside the valve and monitor the clear elbow throughout the rinse.
Success checkpoint: The discharge changes from dark sewage to mostly clear water, with no persistent paper stream.
Common mistake: Connecting the utility hose to the fresh-water fill port or opening a pressurized flush system without confirming the correct inlet.
Step 6: Close the Black Valve and Drain Gray Water
Push the black valve handle completely closed, then pull the gray valve open. Gray water should drain after black water because it contains less contamination and can rinse residual sewage from the sewer hose.
Gray water is not sterile. Dishwater, body oils, food particles, and cleaning chemicals may be present, so gloves remain necessary during this step.
Let the gray tank drain until flow stops, then close its valve. If the gray tank contains very little water, add water from a sink before dumping only when the campground permits that action and the extra volume will not overfill the tank.
Success checkpoint: Both valve handles are closed, and the hose contains little standing liquid.
Common mistake: Draining gray water first, then leaving sewage residue in the hose until the next connection.
Step 7: Disconnect Without Spilling
Close the dump-station adapter or cap the inlet if required by the facility. Disconnect the RV end only after the black and gray valves are closed. Hold the hose below the outlet, rotate the bayonet fitting carefully, and direct residual liquid into the dump inlet.
Raise the hose from the RV side toward the dump inlet to push remaining liquid through the hose. Rinse the exterior and interior only where the dump station provides a designated rinse point. Do not rinse contaminated equipment at a drinking-water spigot.
Cap both hose ends before storage. Store the sewer hose in a sealed bin or dedicated bumper compartment away from fresh-water equipment.
Success checkpoint: No liquid escapes onto the ground, both ends are capped, and the hose is isolated from drinking-water gear.
Common mistake: Pulling the dump-station end free first and carrying a sewage-filled hose across the campsite.
Step 8: Refill and Treat the Tank
For normal camping, add approximately 1-2 gallons of clean water through the toilet after dumping. That shallow reserve helps prevent dried solids from adhering to the tank floor and keeps the toilet seal from sitting over a completely dry waste system.
Add an RV-specific treatment only if the product label supports black-tank use. Treatments vary: some use biological enzymes, while others use surfactants, odor-control compounds, or formaldehyde-free formulas. A treatment cannot compensate for inadequate water or a damaged vent.
For winter storage, follow the RV manufacturer’s winterization procedure instead of leaving ordinary water in the tank. A black tank and a potable-water system have separate requirements.
Success checkpoint: The tank contains a shallow water reserve, the toilet seal holds water, and the selected treatment matches the product instructions.
Common mistake: Pouring bleach, drain cleaner, or concentrated household chemicals into the black tank. These can damage seals, interfere with biological treatments, and create hazardous fumes.
Which RV Waste System Should You Use?
A gravity sewer hose is the best choice for most RV owners because it is inexpensive, fast, and independent of electricity. A macerator pump is better when the dump inlet is uphill or more than roughly 20-30 feet away, while a portable tote is better for boondocking when moving the entire RV is inconvenient.
| System | Typical cost | Typical time | Useful reach | Main limitation |
|---|---|---|---|---|
| Gravity hose | $30-$75 | 5-10 minutes | 15-20 feet | Needs a practical downward hose path |
| Macerator pump | $150-$300 | 10-15 minutes | Up to 100 feet | Needs power and must not run dry |
| Portable waste tote | $140-$350 | 15-30 extra minutes | Tow distance to dump station | A full 30-gallon tote weighs about 250 pounds |
| Sewer service | $50-$150 typical visit | 20-60 minutes | On-site service | Availability and local pricing vary |
Gravity Hose
A standard 3-inch sewer hose uses bayonet fittings and gravity to move waste quickly. The system is inexpensive and reliable because it has no motor, impeller, electrical cable, or pump controller.
Gravity hoses are not ideal when the dump inlet is uphill, the run crosses a long distance, or the RV outlet sits lower than the inlet. A sewer hose can bridge a modest rise, but flow becomes slower and residue remains more likely when the hose cannot maintain a downward path.
Macerator Pump
A macerator pump grinds waste into a slurry and pushes it through a smaller discharge hose, often around 1 inch in diameter. The pump can send waste uphill or across a long property, which makes it useful for permanent sites and home sewer cleanouts approved for RV waste.
Macerators are slower than gravity systems and require electrical power. Running a pump dry, feeding it incompatible objects, or allowing a clog to remain can overheat the motor or damage the impeller.
Portable Waste Tote
A portable waste tote lets a boondocking camper transport black or gray waste to a dump station without moving the RV. Common capacities range from 15 to 45 gallons, but capacity creates a weight problem: sewage weighs approximately 8.3 pounds per gallon before the tote itself is added.
A 35-gallon full tote can exceed 300 pounds. Use the manufacturer’s tow rating, secure the tote properly, and avoid lifting it manually.
How Often Should You Dump the Black Tank?
Most couples dump an RV black tank every 3-7 days, but tank capacity and water use matter more than the calendar. A 40-gallon tank used by two people may last several days, while a small 15-gallon tank used by a family can require frequent dumping.
| Camping pattern | Tank example | Typical interval | Practical adjustment |
|---|---|---|---|
| One person, weekend use | 30 gallons | 5-10 days | Dump before departure |
| Two adults, full hookups | 40 gallons | 3-7 days | Keep valve closed between dumps |
| Family of four | 40-50 gallons | 1-3 days | Use sufficient flush water |
| Boondocking couple | 20-35 gallons | 5-10 days | Carry a tote or plan a dump trip |
| Seasonal storage | Any capacity | Before storage | Rinse, drain, and follow winterization instructions |
The black tank should generally be dumped before it reaches its rated capacity. Tank sensors are often unreliable because probes become coated with paper or sludge, so toilet behavior, time since the last dump, and visible flow are useful secondary indicators.
Common Mistakes and How to Fix Them
Leaving the Black Valve Open at a Full-Hookup Site
Keeping the black valve open allows liquids to leave continuously while solids dry inside the tank. Close the valve and dump only when the tank has accumulated enough liquid for a strong discharge.
If a mound has already formed, add water through the toilet and use a tank wand or approved flush system. Persistent blockage may require a professional tank-cleaning service.
Using Too Little Water
Dry toilet paper and concentrated solids adhere to tank surfaces. Use the toilet’s full flush function when appropriate and add water to the bowl after solid waste enters the tank.
The correct water amount depends on the toilet design. A low-water composting-style or cassette toilet does not use the same procedure as a conventional RV flush toilet.
Flushing With the Potable-Water Hose
A potable hose can become contaminated at a flush inlet, faucet, or hose end. Mark the waste utility hose permanently and store it in a separate sealed container.
If cross-contamination occurs, stop using the hose for drinking water and sanitize the affected potable-water system according to the RV manufacturer’s instructions.
Using Household Wipes or Excessive Paper
Flush only human waste and toilet paper approved for the RV toilet. Wet wipes, facial tissues, paper towels, diapers, and feminine hygiene products can block the tank outlet even when labeled flushable for residential plumbing.
RV-safe toilet paper reduces risk, but water volume and tank condition remain more important than a packaging label.
Opening a Valve Before Testing the Hose
A loose fitting can release sewage outside the dump inlet. Test the connection with clean water first and keep the clear elbow visible during the entire dump.
Using Bleach or Drain Cleaner
Bleach and caustic drain cleaners are not general-purpose black tank solutions. They can degrade rubber components and create chemical exposure hazards. Use a product specifically labeled for RV holding tanks.
What If Nothing Comes Out?
If an RV black tank valve opens and no liquid exits, suspect a blocked outlet, compacted solids, a closed secondary valve, or a venting problem. Confirm that the valve handle actually moved the gate, then add water through the toilet and use an approved flush or backflush device.
Never insert a stick, coat hanger, or improvised rod through the open sewer outlet. That approach can damage the valve, puncture the tank, or expose the operator to sewage.
Safe Clog Recovery
- Close the black valve if the hose connection is secure and the dump inlet can contain any sudden discharge.
- Add several gallons of warm, not boiling, water through the toilet.
- Use a tank wand or manufacturer-approved backflush adapter.
- Allow an RV-specific treatment to work for the label-specified period.
- Reopen the valve while monitoring the clear elbow.
- Stop and call an RV sanitation technician if water backs up into the toilet or the valve will not move.
A pressure washer or unregulated compressed air is unsafe for most RV tanks. Excessive pressure can damage tank fittings, seals, and internal plumbing.
Why Does the Sensor Still Read Full?
An RV black tank sensor can read full after dumping because toilet paper, sludge, or mineral residue bridges the internal probes. Sensor readings are useful trends, but many factory probe systems are not reliable enough to prove that the tank is empty.
Fill the tank partway with water and use a manufacturer-approved cleaning method. Some owners use a water-softener or detergent treatment followed by driving to agitate the tank, but product compatibility and manufacturer guidance should come first.
Do not assume a false reading is always a sensor problem. A partially blocked outlet, a tank that did not fully drain, or a wiring fault can produce the same symptom. If the level remains high after a thorough rinse, inspect the wiring and seek service.
How Do You Stop RV Black Tank Odors?
RV black tank odors usually come from a failed toilet seal, dry sink P-traps, a blocked roof vent, or poor tank airflow. Add water to every sink and shower drain, confirm that the toilet bowl retains water, and inspect the roof vent for nests or debris.
The roof vent allows gases to leave above the RV instead of entering the living area. A chemical deodorizer may mask an odor, but it cannot correct a dried trap, damaged seal, or blocked vent.
Use the toilet seal manufacturer’s recommended lubricant, commonly a compatible silicone product. Avoid petroleum grease because it can swell or degrade some rubber seals.
Can You Dump an RV Black Tank at Home?
You can dump an RV black tank at home only where local regulations, the receiving sewer system, and the equipment permit it. An approved RV sewer connection or macerator connected to a suitable cleanout is safer than directing waste into a yard, storm drain, toilet, or sink.
A municipal sanitary sewer and a private septic system have different limits. A small residential septic tank may not be designed for a sudden RV discharge, and some jurisdictions prohibit RV waste disposal through certain cleanouts.
Before dumping at home, verify:
- The sewer cleanout is approved for sanitary waste.
- The connection is watertight and compatible with the RV hose or macerator.
- The property owner and local authority permit the discharge.
- The sewer or septic system can accept the volume.
- A backflow or spill plan is available.
Never dump black water onto soil or into a storm drain. Untreated sewage can spread pathogens and violate environmental regulations.
Situations That Change the Procedure
Dumping at a Campground
Follow the campground’s dump-station sequence and rinse rules. Some facilities prohibit rinsing a sewer hose at the potable-water faucet, while others provide a separate nonpotable rinse connection.
Using a Portable Tote
Close both RV tank valves before attaching the tote. Confirm the tote’s capacity, secure its tow connection, and make multiple trips rather than overfilling a container that may weigh several hundred pounds.
Using a Macerator
Connect the pump to the RV outlet, open the black valve, and power the pump only after the discharge hose reaches the receiving inlet. Never allow the pump to run dry, and flush the pump with clean water according to its manual.
Preparing for Winter Storage
Dump and rinse the black tank, drain residual water as directed, and winterize the plumbing separately. Do not pour automotive antifreeze into the black tank unless the RV manufacturer specifically directs that procedure.
Frequently Asked Questions
Is it better to dump an RV black tank when it is full?
Dumping at roughly two-thirds to three-quarters full often produces stronger flow, but waiting for an exact percentage is unnecessary. Dump before the tank reaches capacity, and add water if the tank is nearly empty and solids need more liquid for effective movement.
How long can an RV black tank stay closed?
An RV black tank can remain closed for the length of a normal camping stay if the tank has adequate water and receives only approved waste. Dumping every 3-7 days is typical for two adults, although a small tank or larger household may require earlier service.
Can you use regular toilet paper in an RV?
Regular toilet paper may work in some RV systems, but RV-safe or marine-grade paper generally breaks apart more readily in a holding tank. Regardless of paper type, never flush wipes, paper towels, tissues, or hygiene products.
Should you leave water in an RV black tank during storage?
For ordinary short-term use, leaving 1-2 gallons of clean water in the black tank helps prevent dried residue. For freezing weather or long-term storage, follow the RV manufacturer’s draining and winterization instructions instead of relying on a generic water amount.
Why does the RV toilet smell when the black tank is empty?
An empty-tank odor can come from a dry P-trap, failed toilet bowl seal, blocked roof vent, or residue above the tank level. Refill sink traps, confirm the toilet holds water, and inspect the vent before adding more deodorizer.
The Bottom Line
Emptying an RV black water tank safely requires a secure 3-inch sewer connection, protective equipment, a fully opened black valve, a controlled rinse, and a gray-water rinse afterward. The tank does not have to reach exactly two-thirds full, and gravity does not require a steep downhill slope. Keep the black valve closed between dumps, use plenty of water, separate waste equipment from drinking-water gear, and leave 1-2 gallons behind for normal camping. Following that sequence makes how to empty black water tank on rv a predictable maintenance task rather than a spill-prone emergency.