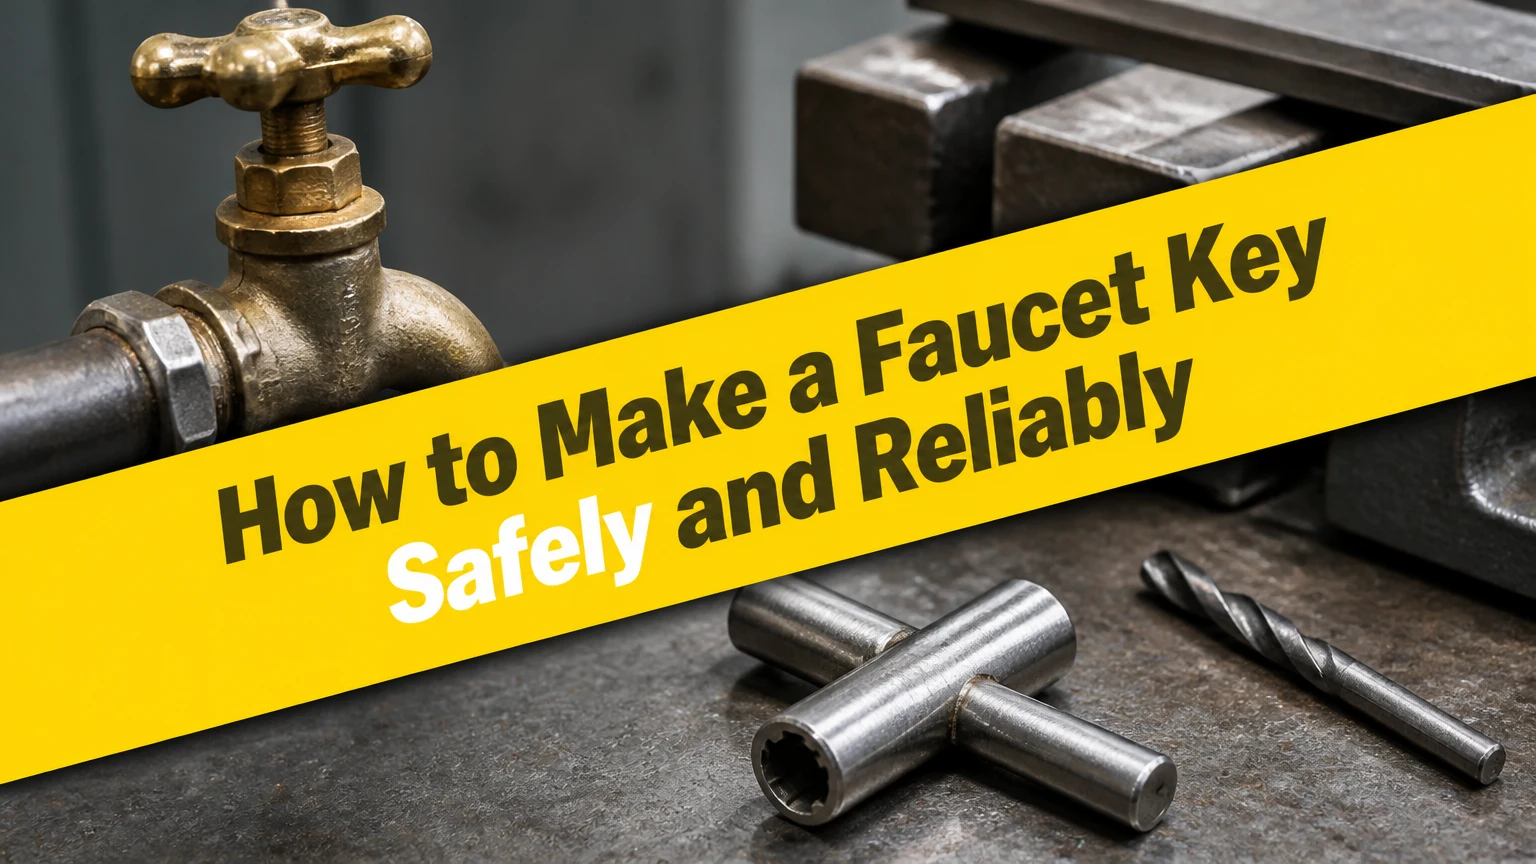
To make a faucet key, measure the valve stem, machine a matching socket into steel, attach a cross handle, and test engagement before applying torque. A practical single-size key usually takes 2-4 hours and costs $10-$35 in materials, but buying a $5-$20 forged sillcock key is safer when you lack metalworking equipment.
Key Facts
A faucet key, sillcock key, water key, or spigot key operates handleless outdoor valves.
The socket must match the valve stem’s shape and flat-to-flat size, not merely look close.
A 5/16-inch square socket is common, but 1/4-inch, 9/32-inch, 11/32-inch, triangular, and spline profiles also exist.
A homemade key needs a socket depth of roughly 1/2-3/4 inch and enough handle length to apply controlled torque.
Unknown steel should not be oil-quenched using a generic recipe because the resulting hardness and cracking risk are unpredictable.
A commercial drop-forged key normally costs less than the tooling, abrasives, and time required to fabricate one.
What Is a Faucet Key?
A faucet key is a hand tool with a female socket that turns a recessed or handleless water-valve stem. The names sillcock key, spigot key, and water key commonly describe the same tool, while “utility key” may also refer to larger or differently shaped municipal valve tools.
Exterior wall hydrants often remove the normal operating handle to restrict casual use. Commercial equipment, janitorial basins, water-service boxes, gas shutoffs, and some radiator or HVAC valves can use related shapes. The tool itself does not defeat a lock or security system. It only operates a valve for which the user has authorization and the correct profile.
A standard hose-bib key often has a square socket. Some valves use a triangle, pentagon, star, or manufacturer-specific spline. A square key therefore cannot be assumed to fit every handleless faucet.
How Does a Faucet Key Operate a Valve?
A faucet key transfers hand torque through its internal socket to a projecting valve stem. On a traditional compression sillcock, counterclockwise rotation normally retracts the stem and opens the valve, while clockwise rotation presses the washer against the seat and closes the water passage.
Ball valves behave differently because a quarter-turn rotates a drilled ball rather than moving a washer along threads. Many ball-type valves open or close in approximately 90 degrees. Some manufacturers use nonstandard rotation directions or stops, so the valve label or installation manual takes priority over a general rule.
A correctly fitted socket should slide fully over the stem with minimal side play. If the key rocks, contacts only two corners, or bottoms out before reaching the stem shoulder, stop before turning. Poor engagement rounds brass or zinc stems rapidly.
Before You Make the Key
Fabricating a faucet key requires accurate measurement, stable metalworking equipment, and a safe plan for cutting, drilling, heating, and joining steel. The most important prerequisite is identifying the actual valve profile before selecting stock dimensions.
Materials, Tools, and Typical Requirements
| Item | Practical specification | Typical quantity or cost |
|---|---|---|
| Socket stock | 1/2-inch or 5/8-inch steel round bar, 5-7 inches long | $5-$15 |
| Handle rod | 1/4-inch steel rod, 4-6 inches long | $2-$6 |
| Measuring tool | Digital caliper with 0.001-inch resolution | $15-$35 |
| Cutting equipment | Hacksaw, angle grinder, or metal bandsaw | Existing tool or $25-$120 |
| Drilling equipment | Drill press preferred, 1/8-inch and larger bits | Existing tool or $100-$300 |
| Socket-forming equipment | Square broach, milling cutter, or hardened square mandrel | $10-$60 |
| Joining equipment | Welder, cross-pin, or peening setup | $0-$300 |
| Personal protection | Safety glasses, face shield, hearing protection, gloves | $20-$60 |
A bench vise must hold the work without allowing rotation. A drill press is strongly preferable to a handheld drill because socket alignment controls how evenly the tool loads the valve stem.
Measure Before Making the Socket
Measure the valve stem across its flats with calipers, then record its shape, exposed length, and distance from surrounding walls. Take a photograph and make a cardboard or modeling-clay impression if the stem is difficult to access.
For a square stem, the finished socket should be only slightly larger than the measured flat-to-flat dimension. A typical working clearance is about 0.010-0.020 inch for a clean steel key, although corrosion, paint, and manufacturing variation may require more clearance. Excess clearance causes corner loading and accelerates rounding.
Do not copy a nominal size from a website without checking the valve. A listed 5/16-inch key may refer to a nominal socket dimension, a stem dimension, or a product-specific measurement convention.
How to Make a Faucet Key
The following method produces a single-size steel T-handle key for a square-stem valve. The project normally takes 2-4 hours for a competent hobby machinist, excluding time spent buying tools or correcting an inaccurate socket.
Step 1: Confirm the Valve Profile
Identify whether the stem is square, triangular, pentagonal, hexagonal, star, or spline-shaped. Measure the largest usable depth and confirm that a straight tool can reach the stem without striking the wall box, escutcheon, or valve body.
Success checkpoint: The measured profile and the intended socket are written down before steel is cut.
Common mistake: Starting with a 5/16-inch square socket because it is common. A common size is not proof of compatibility.
Step 2: Cut and Face the Steel Stock
Cut the round bar to approximately 6 inches, then file or machine both ends square to the bar axis. Remove burrs and mark the socket end clearly.
The socket end needs enough wall thickness to resist spreading. For a 5/16-inch square socket, 1/2-inch round stock provides a workable starting point, but a larger bar may be needed when the valve requires a deeper or larger profile.
Success checkpoint: The end face is flat, and the bar does not wobble when placed vertically on a known-flat surface.
Common mistake: Drilling into an angled face. The resulting socket axis will not align with the valve stem.
Step 3: Drill a Concentric Pilot Hole
Secure the bar vertically in a vise or drill-press fixture. Center-punch the end, drill a 1/8-inch pilot hole at a moderate speed, and use cutting fluid while clearing chips.
Enlarge the hole gradually rather than forcing a large bit through solid steel. For a 5/16-inch square socket, a 5/16-inch round core hole can be a useful starting point for broaching, but the correct pilot diameter depends on the broach design and the desired corner depth.
Drill approximately 1/2-3/4 inch deep. A depth stop prevents accidental breakthrough and preserves the solid section needed for the handle.
Success checkpoint: A square or broach test piece enters straight and reaches the planned depth without binding.
Common mistake: Using a handheld drill and producing an off-center hole. A visibly eccentric socket should be remade rather than trusted under load.
Step 4: Form the Square Socket
Cold-broach the hole with a hardened square broach if the steel and equipment permit. A broach creates more predictable corners and avoids the scale, distortion, and fire risk associated with heating the entire socket end.
If hot forming is necessary, use steel known to be suitable for the process, heat only the socket end in a controlled area, and use a properly sized hardened mandrel. Do not strike an unknown cold chisel in glowing steel without verifying its hardness and intended use.
The commonly repeated “cherry red” instruction is not a reliable temperature specification. Lighting conditions change the apparent color, and different steels require different forming and heat-treatment temperatures. Use the steel manufacturer’s data or a qualified metalworker’s process instead.
Success checkpoint: The square mandrel enters at least 1/2 inch, the socket walls remain intact, and the tool does not rock noticeably on the valve stem.
Common mistake: Forcing a nearly correct socket onto the stem. File or broach the socket to fit; do not rely on deformation during first use.
Step 5: Deburr and Test the Engagement
File the socket mouth lightly, removing sharp burrs without enlarging the flats. Clean out chips, paint the handle if desired, and test the socket on the valve with the water supply in a controllable state.
The socket should fully cover the usable stem length. Apply hand pressure only at first, then turn slowly through the expected operating range. Compression faucets may require several turns, while ball valves commonly use a quarter-turn.
Success checkpoint: The key turns the valve without visible slipping, corner damage, or contact with the surrounding fixture.
Common mistake: Testing with a long pipe for extra leverage. The first test should reveal fit, not maximum strength.
Step 6: Add the T-Handle
Drill a 1/4-inch cross-hole through the solid end of the bar, leaving enough metal between the hole and the socket cavity to avoid weakening the tool. Insert a 4-6-inch steel rod and center it.
Weld the rod on both sides, or use a fitted cross-pin and peen the exposed ends. A pinned handle avoids welding heat near the socket and can be repaired, but the hole must fit the rod closely enough to prevent rattling and impact loading.
For narrow wall boxes, a straight T-handle may be too wide. A removable cross-pin or a single-sided sliding bar can improve access, provided the handle cannot pull out under torque.
Success checkpoint: The handle remains perpendicular to the shaft and cannot rotate independently of the bar.
Common mistake: Placing the cross-hole too close to the socket. This leaves a thin web that can split when the tool is twisted.
Step 7: Heat-Treat Only Known Steel
Heat treatment is optional for a low-torque homeowner tool and should be performed only when the steel grade is known. O1 tool steel, mild steel, and unidentified hardware-store round stock do not share the same hardening schedule.
Do not copy a generic motor-oil quench procedure. Hot oil can ignite, produce hazardous smoke, and give unpredictable results; an incorrect quench can leave the socket brittle or too soft. The manufacturer’s technical data for the exact alloy should specify austenitizing temperature, quenchant, quench severity, and tempering temperature.
For a basic faucet key, accurate geometry and adequate wall thickness matter more than extreme hardness. A slightly ductile socket is preferable to a brittle tool that fractures beside a user’s hand.
Success checkpoint: The finished tool shows no cracks, deep scale separation, weld defects, or distorted socket corners.
Common mistake: Heating the entire bar and quenching it without a temperature-controlled furnace. Unknown hardness is not a quality test.
Which Faucet Key Design Fits the Job?
A single-size T-handle is the simplest homemade design, while a 4-way key is usually the most useful purchased design. Proprietary spline and pentagonal keys require an exact profile and are poor candidates for improvisation.
| Key design | Socket profile | Typical price | Best access condition | Main limitation |
|---|---|---|---|---|
| Single-size T-handle | One square socket, 1/4-3/8 inch | $4-$12 | Deep, narrow wall box | Fits one nominal size |
| 4-way cross key | 1/4, 9/32, 5/16, 11/32 inch squares | $6-$15 | Mixed commercial hose bibs | Bulky in confined spaces |
| Triangle utility key | Triangle, commonly 8-10 mm | $5-$15 | Utility and service cabinets | No square-stem compatibility |
| Star or spline key | 5-12 point proprietary profile | $10-$30 | Manufacturer-specific hydrants | Exact pattern required |
| Heavy-duty forged key | Reinforced square or mixed sockets | $15-$40 | Corroded commercial valves | More weight and cost |
| Homemade socket key | Profile made to measurement | $10-$35 materials | One known valve | Requires tools and fabrication skill |
A 4-way key is not “universal.” The four square sockets cover several common dimensions, but they do not fit triangular, pentagonal, or spline stems. A forged steel model also outperforms die-cast zinc when a valve needs controlled breakaway torque.
Is a Homemade Key Better Than Buying One?
A homemade faucet key makes sense when the valve has an unusual but simple profile, the tool must reach a custom depth, or a metalworker already owns the required equipment. Buying is the better decision when the valve uses a common square size, the project is urgent, or safe heat treatment and drilling equipment are unavailable.
| Decision factor | Homemade key | Purchased forged key |
|---|---|---|
| Typical cash cost | $10-$35 | $5-$40 |
| First-project time | 2-4 hours | 5-15 minutes |
| Fit control | Exact custom profile | Limited to listed sizes |
| Failure risk | Socket misalignment or weld defect | Product quality varies by alloy and casting |
| Replacement effort | Repeat fabrication | Buy a replacement |
| Best user | Machinist with equipment | Homeowner, maintenance worker, plumber |
The hidden cost of fabrication is setup. A $15 purchased key usually wins if a drill press, broach, welder, and stock are not already available.
Can You Make a Faucet Key Without Welding?
You can make a faucet key without welding by drilling a cross-hole and retaining a steel rod with a tight fit, a removable pin, or peened ends. The no-weld design must prevent the handle from sliding out and must leave sufficient shaft material around the handle hole.
Three practical options are:
- Cross-pin handle: Drill the bar and insert a steel rod, then peen both ends.
- Removable bar: Use a close-fitting rod that passes through the shaft and remove it for storage.
- Flattened handle end: Forge or machine the upper end into a short slot for a separate steel bar.
The removable-bar design is useful in narrow utility boxes because the crossbar can be inserted after the socket reaches the stem. The handle should still be long enough for controlled hand torque, normally 4-6 inches for a small hose bib.
A no-weld handle is not automatically stronger. A loose hole produces impact loads, and a thin shaft section can tear even when the rod itself is strong.
How Much Time and Money Does Fabrication Require?
A basic homemade faucet key typically requires $10-$35 in raw materials and 2-4 hours of fabrication, while a commercial key commonly costs $5-$40 and works immediately. Fabrication becomes economically reasonable only when the required profile or reach is unavailable as a standard product.
| Project level | Material cost | Tooling assumption | Typical time | Result |
|---|---|---|---|---|
| Basic square key | $10-$20 | Existing vise, drill, files | 1.5-3 hours | Single-size T-handle |
| Broached steel key | $20-$60 | Drill press and broach | 2-4 hours | Cleaner socket geometry |
| Custom deep-reach key | $20-$50 | Cutting, drilling, joining tools | 3-6 hours | Extended shaft |
| Proprietary spline key | $30-$100 | Mill, EDM, or exact mandrel | 4-10 hours | Manufacturer-specific fit |
| Purchased 4-way key | $6-$15 | No fabrication equipment | 5-15 minutes | Several square sizes |
| Purchased forged key | $15-$40 | No fabrication equipment | 5-15 minutes | Higher torque margin |
Prices are typical United States retail ranges and vary by steel grade, brand, shipping, and region. A local hardware store may stock a four-way key, while a Woodford-style replacement socket may require a plumbing supplier or manufacturer-specific part.
What Are the Safe Alternatives in an Emergency?
An emergency alternative can operate a valve only when the stem shape, authorization, and available clearance are known. A correctly sized adjustable wrench may turn a prominent square stem, but pliers are a poor substitute because they crush corners and slip unpredictably.
Use this order of preference:
- Borrow or purchase the correct sillcock key.
- Use a properly sized socket or adjustable wrench on an accessible square stem.
- Apply penetrating oil to an exposed threaded stem and wait 10-15 minutes.
- Call the property manager, water utility, plumber, or emergency maintenance service.
- Shut off the upstream isolation valve if the objective is flood control and the valve is accessible.
Do not hammer a wrench onto a recessed stem, force a locked utility valve, or use a cheater pipe on a thin cast key. A broken stem can turn a $10 access problem into a valve replacement behind masonry.
Common Mistakes and How to Fix Them
Why Does the Key Slip on the Stem?
A faucet key slips when the socket is oversized, shallow, off-center, or the stem corners are already rounded. Stop turning immediately, clean the stem, measure it again, and inspect whether the key reaches the stem shoulder.
A slight file adjustment can improve a steel socket. A severely rounded brass stem usually needs stem replacement or professional repair rather than more torque.
Why Do Cast Keys Break?
Cast zinc keys fracture because brittle material tolerates less bending and impact than forged or machined steel. Never use a cheater pipe on a low-cost die-cast cross key, especially when corrosion has seized the valve.
Replace the tool with a forged steel model and use penetrating lubricant around the exposed stem threads where appropriate. Lubricant cannot repair a damaged valve seat or internal cartridge.
What If the Faucet Is Seized?
A seized faucet should be treated as a valve-maintenance problem, not a test of tool strength. Confirm that the key fits fully, apply suitable penetrating oil to accessible threads, wait 10-15 minutes, and try short, controlled movements in both directions.
Stop if the stem twists, the valve body moves in the wall, or the key begins to deform. A compression valve may need packing adjustment or stem replacement, while a ball valve may have internal corrosion or a damaged stop.
How Tight Should You Close the Valve?
Close a compression faucet until flow stops, then apply only a small additional movement, approximately 1/16 turn. Excessive clockwise force can crush the bibb washer, score the brass seat, or damage the stem threads.
Ball valves normally stop at their designed quarter-turn. Do not continue rotating against the stop because the handleless stem and internal stop are not intended to accept unlimited torque.
What If the Key Fits but the Valve Still Does Not Open?
A fitting key may fail because the valve is frozen, the internal washer is detached, the stem is stripped, or the water supply is already isolated upstream. Check for a separate shutoff, observe whether the stem rotates without resistance, and listen for water movement after a controlled turn.
A stem that spins freely without changing flow often indicates stripped internal threads or a broken connection. Replacing the homemade key will not solve that failure.
Applications and Limitations
A homemade square faucet key is suitable for one known residential hose bib, a replacement tool for a workshop, or a custom-length access tool for a nonproprietary valve. It is not a substitute for a certified municipal hydrant wrench, a locked utility key, or a manufacturer-specific security tool.
Commercial facilities should keep a forged four-way key, a flashlight, calipers, penetrating oil, and a spare in a labeled maintenance kit. Plumbers benefit from carrying both a four-way square key and the proprietary spline tools used by the hydrant brands they service.
Property owners should label a single-size key with the measured stem size and valve location. Storage near the shutoff panel reduces the chance that an improvised tool will damage the valve during a leak.
Expert Rules That Prevent Expensive Damage
- Fit beats hardness: A perfectly heat-treated key with 0.060 inch of side clearance can damage a brass stem faster than a softer key with close, full-depth engagement.
- Torque is not the cure for corrosion: If a valve needs a pipe extension, the likely failure point has moved from the tool to the valve body, stem, wall connection, or internal washer.
- Socket depth matters as much as width: A key that fits the first 1/8 inch can still slip when the stem loads against a recessed shoulder.
- Unknown steel should remain untreated: A ductile, accurately machined key is safer than a mystery alloy hardened by an unverified torch-and-oil recipe.
- The first turn is diagnostic: Check direction, resistance, stem movement, and water response before completing a full opening or closing cycle.
Frequently Asked Questions
Is a faucet key the same as a sillcock key?
A faucet key and sillcock key usually describe the same small tool for handleless outdoor faucets. “Water key” and “spigot key” are additional common names. The terms do not guarantee identical socket geometry, because products may contain square, triangular, pentagonal, or spline openings.
What is the most common faucet key size?
A 5/16-inch square socket is a common residential and commercial size, but 1/4-inch, 9/32-inch, and 11/32-inch square profiles also appear. Measuring the stem across its flats is more reliable than selecting a size from a general list.
Can I use a socket wrench instead of a faucet key?
A socket wrench can operate an accessible square valve stem if the socket fits fully and the wrench has enough clearance. A deep socket may work better than a shallow socket, but excessive ratchet leverage increases the chance of stripping a brass stem or breaking a seized valve.
How do I identify a proprietary faucet key?
Identify a proprietary faucet key by photographing the valve, counting spline points, measuring the opening, and checking the faucet or hydrant manufacturer. Woodford-style and other anti-vandal valves may use brand-specific profiles that a standard four-way square key cannot operate.
Should I harden a homemade faucet key?
You should harden a homemade faucet key only when the steel grade and heat-treatment process are known. Accurate fit, adequate wall thickness, and a sound handle matter more for ordinary hose-bib use than maximum hardness, while incorrect quenching can create hidden cracks.
Where should I store the finished key?
Store the finished key in a labeled, dry location beside the plumbing shutoff or maintenance kit. Record the valve location, socket size, and opening direction, and keep a second commercial key if the property depends on that valve for irrigation or emergency access.
The Bottom Line
To make a faucet key successfully, measure the actual stem first, choose a socket profile with minimal clearance, form it concentrically in adequate steel, attach a secure handle, and test with controlled torque. For a common square sillcock, a purchased forged key usually costs less and carries less risk than fabrication. Build one when custom reach, unusual dimensions, or existing metalworking capability justify the project.