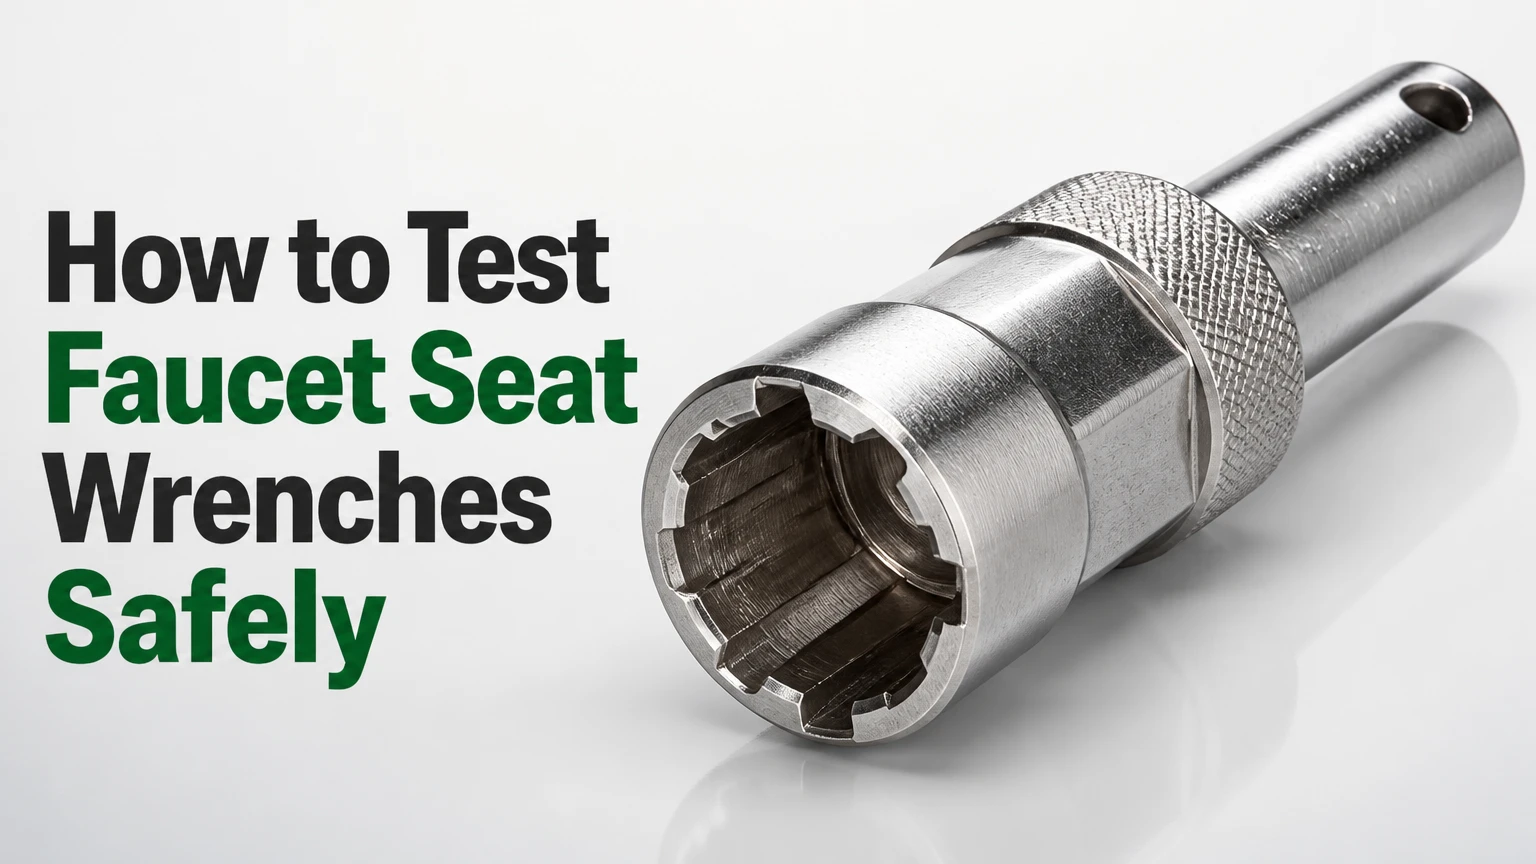
To test faucet seat wrenches, isolate the water, expose and clean the valve opening, then verify the wrench profile and size before applying leverage. The correct wrench enters the seat’s square or hex recess fully, stays centered under light downward pressure, and resists gentle hand rotation without rocking, rising, or spinning freely.
Key Facts at a Glance
A faucet seat wrench fits the internal square or hexagonal recess of a removable brass valve seat.
A correct fit reaches full engagement before the handle receives turning force.
A replacement seat is the best external reference, but an old corroded seat may no longer show its original size accurately.
Test counterclockwise removal only after confirming the tool remains fully seated and the faucet manufacturer provides no special instruction.
Typical testing takes 5-10 minutes; a complete seat replacement commonly takes 15-30 minutes.
Typical individual seat wrenches cost $6-$10, while multi-bit or T-handle kits commonly cost $11-$25.
What Does a Faucet Seat Wrench Engage?
A faucet seat wrench engages the machined recess inside a removable valve seat, not the seat’s visible outer rim. Traditional compression faucets use a rubber washer on the valve stem; when the handle closes, the washer presses against the brass seat and stops water flow. A pitted seat can leak even after a new washer is installed.
The recess usually has a square or hexagonal shape. Seat-wrench kits may combine tapered square and hex ends, stepped profiles, or interchangeable bits. The tool must transfer turning force through the recess walls while the operator keeps the bit pressed downward.
A faucet seat wrench is not the correct tool for every faucet. Many single-handle faucets use cartridges or ceramic discs rather than removable compression seats. Forcing a seat wrench into a cartridge housing can damage the valve body without solving the leak.
How can you identify a removable valve seat?
Remove the handle and valve stem according to the faucet design, then inspect the bottom of the open valve chamber with a flashlight. A removable seat usually appears as a circular brass insert with a central square or hex recess; a smooth molded cartridge opening indicates a different repair system.
Use the faucet brand, model, stem shape, and replacement-part diagram to confirm the design. Home Depot’s valve-seat replacement guidance also distinguishes removable seats from other faucet repair components, so a parts diagram is more reliable than guessing from the handle style.
What Should You Do Before Testing the Wrench?
Before testing faucet seat wrenches, shut off both supply lines or the building’s main valve, open the faucet, and remove residual pressure. Protect the drain with a stopper or cloth, place a tray under the faucet, and keep the removed stem and screws in order.
Before-you-start checklist
| Requirement | Typical value | Why it matters |
|---|---|---|
| Water isolation | 2 fixture shutoffs or 1 main valve | Prevents flooding during stem removal |
| Pressure release | 30-60 seconds with handle open | Removes trapped water from the chamber |
| Inspection light | 300-1,000 lumens | Reveals square, hex, debris, and corrosion |
| Test time | 5-10 minutes | Allows cleaning and low-force engagement checks |
| Total seat job | 15-30 minutes typical | Excludes severely seized or stripped seats |
| Basic cost | $6-$15 for a wrench or simple kit | Typical consumer purchase range |
Remove the decorative cap, handle screw, handle, packing nut, and valve stem only as far as the faucet instructions require. Use a correctly sized wrench on the packing nut. Pliers on decorative chrome can leave permanent marks.
Clean loose mineral scale from the chamber with a nylon brush, wooden pick, or cloth. Do not hammer a steel tool into a visibly fragile seat during the fit test. Cleaning matters because grit can prevent the wrench from reaching the recess floor and can create a false impression of a wrong size.
How to Test Faucet Seat Wrenches Step by Step
The safest sequence has four stages: inspect the tool, match the profile externally, test engagement inside the valve, and apply only enough torque to confirm stability. The most important success factor is full-depth engagement, because a partially seated wrench concentrates force on a few soft brass corners.
Step 1: Inspect and identify the wrench end
Select the square or hex end that appears closest to the seat opening. Examine the steel for bent shafts, rounded corners, damaged steps, heavy plating flakes, or a taper worn smooth from previous use.
Read the tool markings rather than relying on color or package position. Common stepped sizes include 3/8 inch, 7/16 inch, and 1/2 inch, but brand-specific profiles and metric tools may differ.
Success checkpoint: The selected end has sharp, intact corners and a shaft long enough to reach the seat without the elbow touching the faucet body.
Common mistake: Choosing the largest-looking end because it seems more capable. An oversized tool can enter only partway and wedge against the seat entrance.
Step 2: Perform the external replacement-seat match
If you have a new replacement seat, insert the wrench into that seat before placing it in the faucet. Push the wrench straight down by hand. The end should enter completely or to the same depth shown by the seat’s design, with no visible rocking.
Try a gentle hand twist while holding the seat stationary. A correct match feels positive in both directions. A loose fit, corner-to-corner contact, or visible gap means the wrench is not a reliable match.
Success checkpoint: The wrench remains centered when you lift the replacement seat by the tool or rotate the seat lightly by hand.
Common mistake: Treating any seat that accepts a tapered wrench as a perfect match. A taper can feel tight near the opening while touching only a small area deep inside the recess.
A replacement seat provides the best external reference only when it matches the faucet’s brand, model, thread, and profile. A universal replacement seat from a different faucet can have a different recess even when its outside diameter looks identical.
Step 3: Perform the blind engagement test
Lower the selected wrench vertically into the cleaned valve chamber. Keep the tool aligned with the valve axis instead of angling it toward the nearest wall. A flashlight positioned beside the shaft can help reveal whether the end has reached the recess.
Apply light downward pressure and rotate the wrench approximately 5 degrees in each direction. The tool should contact firm, clean walls almost immediately. It should not spin freely, scrape upward, or require side-to-side rocking.
Success checkpoint: The wrench stays at the same depth during the small rotation and returns to the same centered position without lifting.
Common mistake: Testing by swinging the long handle through a large arc. A broad movement creates torque before fit has been established and can round the recess.
If the wrench stops high in the chamber, remove it and inspect for debris, a mismatched profile, or a seat that is not removable. Do not force the bit deeper with a hammer during this stage.
Step 4: Conduct the low-force stability test
Hold the wrench elbow or handle downward so the bit cannot climb out of the recess. Apply only light hand torque in the expected removal direction, normally counterclockwise when viewed from above the seat.
The test is not intended to break a seized seat free. Its purpose is to determine whether the tool stays engaged as force begins. Stop immediately if the shaft flexes, rises, clicks over a corner, or rotates without moving the seat.
Success checkpoint: The tool remains fully inserted and the seat shows the first small movement, or the wrench remains stable without any slipping.
Common mistake: Adding a cheater bar after a marginal fit. Extra leverage can strip the brass recess or break the seat’s internal walls before the operator feels the failure.
A universal “10% of full strength” value is not a dependable torque specification. Faucet seats vary by material, corrosion, thread condition, and manufacturer. Use the least force that confirms engagement, then reassess the fit if the seat does not move.
Which Seat Wrench Design Is Safer?
Stepped wrenches generally provide the most predictable fit when the seat matches a listed size, while tapered L-shaped tools accommodate worn or slightly irregular recesses but can climb out under torque. T-handle kits improve downward control and reach, especially in deep tub and shower valves.
| Wrench design | Typical profile | Typical price | Best access condition |
|---|---|---|---|
| Tapered L-wrench | Square and hex ends | $6-$10 | Open sink faucet with uncertain wear |
| Six-step wrench | 3/8, 7/16, 1/2-inch steps | $7-$15 | Standard removable seat with known size |
| Straight stepped wrench | Multiple fixed flats | $8-$16 | Vertical valve chamber with overhead clearance |
| T-handle kit | Interchangeable square and hex bits | $11-$25 | Deep tub or shower valve |
| Extractor kit | Spiral steel extractor bits | $10-$30 | Rounded or stripped recess |
A stepped tool contacts a defined flat section rather than wedging gradually along a taper. That design can reduce climbing, but only if the selected step reaches the correct depth and matches the recess width.
A tapered wrench is useful for light corrosion and uncertain sizing. It is a poor choice for high-force removal when the taper contacts only the mouth of a rounded seat. A T-handle improves alignment but may not fit around a cramped sink backsplash.
What size seat wrench should you choose?
Choose the size that reaches the bottom of the seat recess while contacting opposing walls across the full working depth. Common residential seat-wrench sets cover 3/8 inch, 7/16 inch, and 1/2 inch profiles, but those dimensions are not universal identification codes.
| Observed condition | First test | Reject the tool when |
|---|---|---|
| Clean square recess | Matching square step | Corners touch but flats remain loose |
| Clean hex recess | Matching hex step | Bit enters less than full depth |
| Corroded square recess | Slightly smaller tapered square | Tool climbs during 5-degree test |
| Corroded hex recess | Matching hex step, then taper | Bit spins without wall contact |
| Unknown profile | Smallest suitable square or hex | Neither profile reaches stable depth |
Measure a clean replacement seat with calipers if the manufacturer does not identify the size. Do not measure the outside diameter and assume it equals the wrench dimension; the wrench engages the internal recess, while the seat’s external diameter controls the faucet-body thread.
How Do Sink and Tub Valve Tests Differ?
Sink faucets usually offer a short, visible valve chamber and enough access for an L-shaped wrench. Tub and shower valves often place the seat deeper behind a wall escutcheon, so a straight shaft or T-handle can maintain alignment better than a compact elbow.
| Application | Typical reach issue | Preferred tool | Extra preparation |
|---|---|---|---|
| Bathroom sink | 2-4 inches of open access | L-shaped stepped wrench | Remove basin handle and packing nut |
| Kitchen sink | Backsplash or cabinet interference | Short L-wrench | Protect finish and clear cabinet space |
| Tub deck faucet | Narrow vertical opening | Straight stepped wrench | Remove trim without scratching deck |
| Shower valve | 4-8 inches of recessed access | T-handle or long shaft | Protect wall opening and use a light |
| Corroded vintage valve | Irregular recess and scale | Tapered plus extractor backup | Photograph parts before removal |
Deep access creates a second risk: the operator may feel the handle turning while the bit is actually flexing. Keep the shaft vertical, use downward pressure, and inspect the tool after each small movement.
Do not use a long extension merely to compensate for poor engagement. A longer handle increases torque without improving the contact area inside the brass seat.
What If the Wrench Slips, Spins, or Will Not Enter?
A slipping faucet seat wrench usually indicates an incorrect profile, incomplete insertion, debris, corrosion, or a recess already rounded by earlier force. Remove the tool, clean and inspect the cavity, then repeat the fit test with the alternative square or hex end before applying more torque.
The wrench spins freely
A freely spinning bit is too small, the wrong shape, or no longer contacting intact recess walls. Stop turning. Shine a light into the seat and compare the visible geometry with the tool end.
If the recess is damaged, a tapered extractor may grip the interior, but extractor use is a recovery operation rather than a fit test. Drive it only as directed by its manufacturer, keep the tool centered, and recognize that removal may destroy the seat.
The wrench rises out of the seat
A rising tool is climbing a taper or entering at an angle. Re-seat it vertically, clean the opening, and try a stepped profile if the size is known. If the bit still lifts under light torque, stop because the recess is not transferring force safely.
The seat is frozen
Mineral deposits, thread sealant, and galvanic corrosion can bind a brass seat to the faucet body. Apply a plumbing-compatible penetrating product around the seat if the faucet manufacturer permits it, allow the label-specified dwell time, and keep the product away from drinking-water passages when the label excludes potable plumbing.
Heat requires caution. A torch can damage washers, chrome, cabinet materials, soldered joints, and nearby wall components. Do not heat an enclosed or water-filled valve chamber.
If removal remains impossible, a valve-seat dresser can resurface the sealing face without extracting the threaded insert. A dresser repairs the sealing surface; it does not repair damaged internal threads or replace a seat with a broken recess.
The seat turns but will not come out
A seat may rotate while its threads remain engaged because of damaged threads, cross-threading, or debris. Continue only if the seat rises steadily. If it turns in place, stop and inspect the threads after removing the stem, because continued force can damage the faucet body.
When Should You Stop and Use an Alternative?
Stop testing when the valve body moves, the seat recess deforms, the tool bends, water cannot be isolated, or the faucet body is inaccessible for inspection. The correct alternative depends on whether the problem is a wrong tool, a damaged seat, a damaged thread, or a faucet that does not use a removable seat.
| Failure condition | Suitable alternative | Typical consequence | Escalation point |
|---|---|---|---|
| Wrong profile | Correct square or hex wrench | No component damage | Re-test before torque |
| Rounded recess | Spiral extractor | Seat may be destroyed | Stop if extractor slips |
| Pitted sealing face | Valve-seat dresser | Seat remains installed | Replace seat if pitting persists |
| Damaged body threads | Faucet-body repair or replacement | Leak may continue | Plumber often appropriate |
| Cartridge valve | Cartridge-specific tool | Seat wrench is unsuitable | Identify model first |
| No water shutoff | Main shutoff or plumbing repair | Flood risk | Do not disassemble live plumbing |
A seat dresser is not a substitute for a seat wrench when the insert itself must be replaced. Conversely, an extractor is not a normal first-choice tool because it can permanently alter the recess and make future servicing harder.
Typical Cost, Time, and Tool Selection
A basic faucet seat-wrench test normally costs $6-$15 and takes 5-10 minutes, excluding the time needed to disassemble a corroded faucet. A complete clean seat replacement commonly takes 15-30 minutes, while seized or stripped seats can extend the work to 1-2 hours.
| Job condition | Tool cost | Test time | Likely total time |
|---|---|---|---|
| Clean sink seat | $6-$10 | 5 minutes | 15-25 minutes |
| Unknown square or hex seat | $7-$15 | 10 minutes | 20-35 minutes |
| Deep shower valve | $11-$25 | 10 minutes | 30-60 minutes |
| Frozen brass seat | $10-$30 backup extractor | 15-30 minutes | 1-2 hours |
| Damaged or inaccessible valve | $0 initial tool purchase | 10 minutes inspection | Professional diagnosis |
Buy a six-step wrench when the faucet is a conventional residential compression model and the seat appears standardized. Choose a T-handle kit when depth and downward alignment matter more than compact access. Carry an extractor only when working on older fixtures with visible corrosion or a history of failed repairs.
Expert rules that prevent damage
- A tool that fits the replacement seat may still fail in the faucet. The old recess can be packed with scale or eroded beyond its original dimensions, so confirm engagement in the installed valve.
- Downward pressure is a safety control, not a force multiplier. Pressing the bit into the recess prevents climb-out, but it cannot compensate for the wrong profile or a rounded seat.
- The outside seat diameter does not select the wrench. The wrench size follows the internal drive recess; the outside diameter and thread determine compatibility with the faucet body.
- A leak after washer replacement does not prove the seat must be removed. A seat dresser may correct a rough sealing face, while extraction introduces thread and body risks.
Common Mistakes and How to Fix Them
- Testing with the water on: Close the fixture shutoffs and verify that flow stops before removing the stem. If water continues, use the main shutoff or repair the isolation valve first.
- Using a hex tool in a square recess: Withdraw the tool and compare the profile under a light. A near match is not safe because the corners carry concentrated load.
- Applying a pipe wrench to the seat wrench: Remove the handle and re-test engagement instead of increasing leverage. A pipe wrench can twist the tool out of alignment.
- Ignoring seat debris: Brush and vacuum loose scale, then inspect the recess again. Debris can hold the bit high and create false contact.
- Turning without downward control: Keep the wrench seated while using low hand force. Stop if the shaft rises or flexes.
- Assuming every faucet has removable seats: Confirm a compression stem and threaded seat before buying a wrench. Cartridge, ceramic-disc, and ball faucets use different repair methods.
Frequently Asked Questions
Can you test a faucet seat wrench without removing the valve seat?
Yes. After removing the stem and isolating the water, insert the wrench into the installed seat and perform a flashlight inspection followed by a 5-degree hand-rotation test. The wrench should remain centered and fully seated. Do not apply full removal force until the bit passes this stability check.
Should a faucet seat wrench turn clockwise or counterclockwise?
A conventional removable faucet seat normally loosens counterclockwise when viewed from above the seat. Verify the faucet documentation before turning because unusual or reverse-threaded components can differ. If the seat does not respond to low force, investigate corrosion and fit rather than assuming more torque is needed.
Can I use an Allen key instead of a seat wrench?
Usually no. An Allen key has a fixed hex size and a short working profile, while faucet seat wrenches provide long reach and often include square ends or stepped dimensions. An Allen key can round a soft brass recess if it does not reach full depth and maintain firm wall contact.
Why does a new faucet washer still leak?
A new washer can leak when the brass valve seat is pitted, scored, dirty, incorrectly sized, or installed with damaged threads. Remove and inspect the seat when appropriate, or use a valve-seat dresser for a repairable sealing face. A cartridge faucet requires a different diagnosis.
How do I know whether the faucet uses a square or hex seat?
Look into the open valve chamber with a flashlight after removing the stem, then compare the central recess with the wrench profiles. A square recess has four flat sides and four corners; a hex recess has six flats. Mineral scale can obscure the shape, so clean gently before deciding.
Is a tapered or stepped seat wrench better?
A stepped wrench is preferable when one step matches the recess across its full depth because it provides more predictable flat-wall contact. A tapered wrench is useful for uncertain or slightly worn profiles, but it is more likely to climb out when high torque is applied to a seized seat.
The Bottom Line
Testing faucet seat wrenches means confirming profile, size, depth, alignment, and stability before attempting removal. Isolate the faucet, clean the valve chamber, match the square or hex end to a replacement seat when available, then perform a centered 5-degree engagement test with light downward pressure. Stop at the first sign of slipping, rising, or deformation. The correct wrench is the one that transfers low hand force through full-depth contact, not the one that feels tight only at the opening. Include how to test faucet seat wrenches in your repair sequence before choosing leverage, an extractor, or a seat dresser.