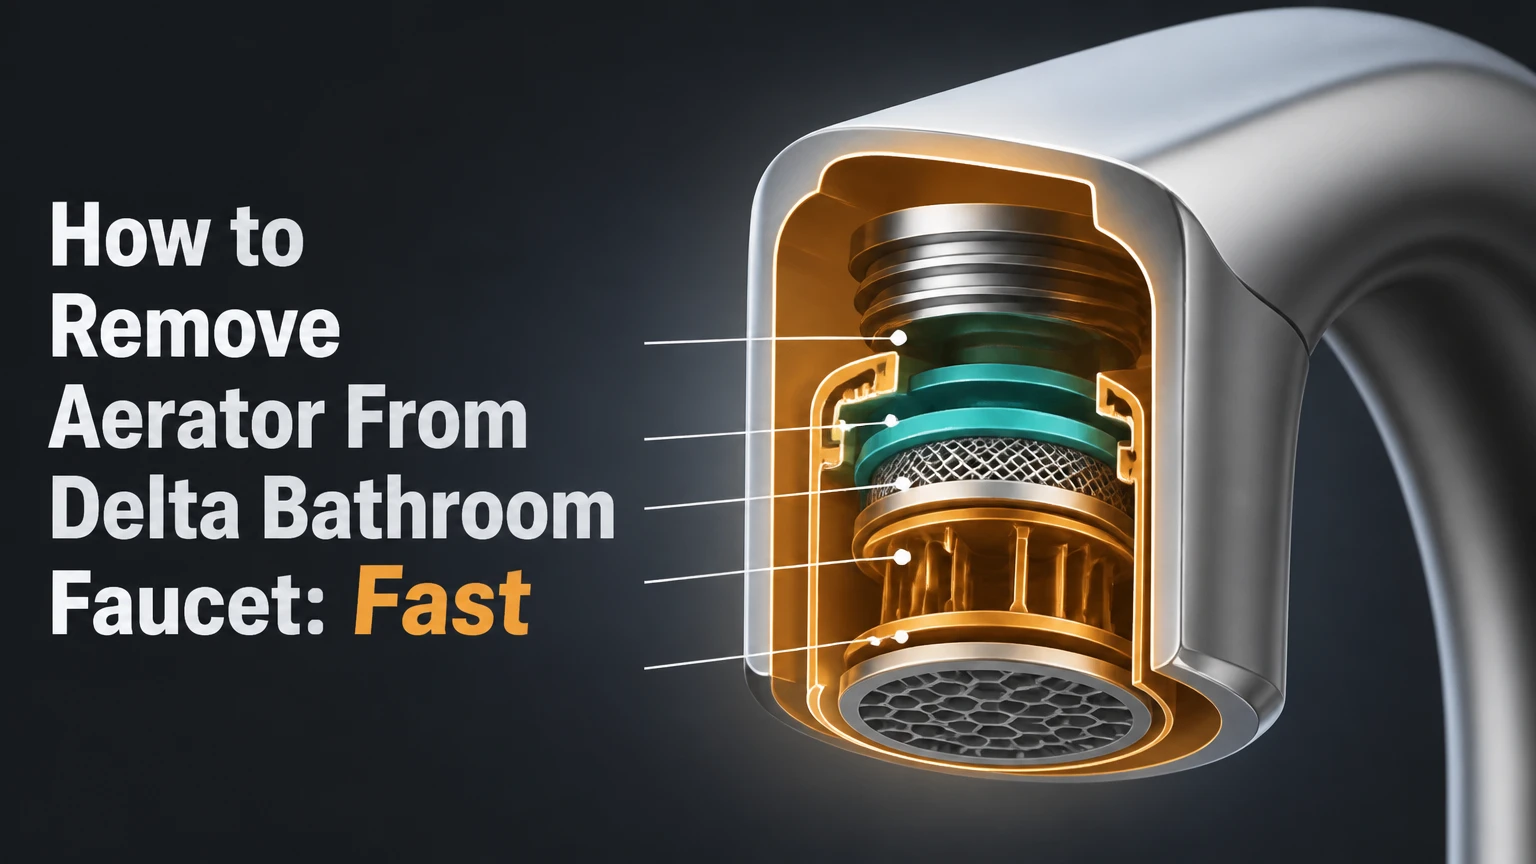
To remove an aerator from a Delta bathroom faucet, first determine whether the tip has a visible threaded collar or a flush, recessed opening. Unscrew an external aerator counter-clockwise by hand or with a protected wrench; remove a hidden cache aerator with the matching Delta key, then clean or replace the insert and reinstall it clockwise.
Key Facts at a Glance
A visible collar usually indicates an external aerator; a flush opening usually indicates a cache aerator.
Delta cache aerators commonly use Regular, Junior, Tiny Junior, or Tom Thumb key sizes.
Typical removal takes 5-20 minutes and costs $0-$15 if the aerator is not seized.
A rubber strap, cloth, or painter’s tape protects chrome and other decorative finishes from tool marks.
Clean a removable aerator in white vinegar for 1-2 hours, then rinse every part before reassembly.
Hand-tightening is normally sufficient because plastic cache threads can crack or strip under wrench force.
Before You Remove the Delta Aerator
Prepare the sink, tools, and water supply before touching the faucet tip. The drain is the main loss point for small screens, washers, and plastic keys, while an uncovered basin can hide a dropped part in the trap.
Time, difficulty, and materials
The job is usually an easy homeowner repair, but mineral scale can turn a two-minute hand-removal task into a 20-minute extraction. Shutoff valves are not normally required for aerator removal, although closing them prevents an accidental spray while the aerator is off.
| Item | Typical requirement | Why it matters |
|---|---|---|
| Project time | 5-20 minutes | Includes removal, cleaning, and testing |
| Replacement aerator | $3-$10 | Price varies by flow rate and Delta model |
| Cache key kit | $5-$8 | Often includes four common key profiles |
| White vinegar | 120-240 mL | Enough for a small removable insert |
| Toothbrush | 1 old brush | Removes softened mineral deposits |
| Adjustable wrench | 1, 150-200 mm wrench | Used only on protected external collars |
Gather a towel, a shallow cup, rubber gloves, painter’s tape, an adjustable wrench, and the correct cache key if the opening is recessed. A flashlight helps identify the internal teeth without forcing a tool into the faucet.
Turn off the faucet handle. Cover the drain with its stopper or place a folded towel across the basin. If the faucet has a pull-out or electronic feature, close the under-sink stops before beginning.
Which Delta Aerator Do You Have?
The faucet tip determines the removal method: a visible metal collar accepts hand force or a wrench, while a recessed cache aerator requires a keyed tool that engages internal slots. Delta models vary, so the faucet model number or removed insert provides a more reliable replacement match than appearance alone.
External versus cache aerators
Look directly at the end of the spout. An external aerator has a visible housing that projects from, or visibly surrounds, the spout outlet. A cache aerator sits inside the spout and often appears as a flat screen several millimeters behind the rim.
| Feature | External aerator | Cache aerator |
|---|---|---|
| Position | Visible at spout tip | Recessed inside spout |
| Removal tool | Hand, wrench, or strap wrench | Matching cache key |
| Gripping surface | Outer collar or flat sides | Internal teeth or slots |
| Common failure | Chrome damage or cross-threading | Stripped plastic teeth |
| Replacement clue | Collar diameter and thread | Key profile, diameter, flow rating |
Do not assume every flat-looking Delta faucet uses the same insert. Some spouts contain a flow regulator, screen, spray insert, or special laminar-flow component rather than a conventional aerator.
Common Delta cache sizes
Delta and aftermarket cache keys commonly correspond to four industry size names. The dimensions below are approximate nominal references, not a substitute for matching the original insert or Delta model documentation.
| Cache size | Approximate diameter | Coin-size comparison |
|---|---|---|
| Regular or standard | 24 mm | Approximately a US quarter |
| Junior | 21 mm | Approximately a US nickel |
| Tiny Junior | 18.5 mm | Approximately a US dime |
| Tom Thumb | 16.5 mm | Approximately a US penny |
A coin comparison is useful for a first estimate, but coins do not engage the removal teeth. Measure the insert or use a multi-size key kit instead. For a model-specific repair, search the Delta model number printed on the faucet documentation, packaging, or replacement parts record.
How to Remove Aerator From Delta Bathroom Faucet
Remove the aerator by turning the correct component counter-clockwise while keeping force aligned with the faucet opening. External aerators use the collar; hidden Delta aerators use an internal key. Do not pry against the finished rim, because a sideways tool can chip plating or deform the spout.
Step 1: Inspect and protect the faucet
Clean loose grit from the faucet tip with a damp cloth. Wrap the external collar with painter’s tape or a thick cloth before using pliers, and keep the tool square to the collar.
You will know the faucet is ready when the collar is clean, the drain is covered, and the tool can engage without touching the visible finish. A common mistake is placing bare channel-lock jaws on polished chrome, brushed nickel, or matte black coating.
Step 2: Try hand removal first
Grip an external aerator with a rubber glove or a wide rubber band and turn it counter-clockwise. Use steady pressure rather than repeated jerks, because a short, controlled movement is less likely to twist the faucet body or damage the threads.
You will know hand removal worked when the collar rotates smoothly and the aerator can be spun off with your fingers. Stop if the faucet itself begins moving, particularly on a narrow single-hole lavatory faucet whose mounting hardware may be loose.
Step 3: Use a protected wrench on an external aerator
Place an adjustable wrench or padded pliers on the aerator’s flat sides, not on the thin outlet screen. Turn counter-clockwise with moderate force, holding the faucet spout with your free hand so the plumbing connection does not receive unnecessary torque.
You will know the collar is releasing when mineral scale cracks or the first quarter-turn becomes easier. A common mistake is tightening the wrench until the finish visibly compresses; loosen, reposition, and add a longer protective cloth rather than increasing jaw pressure.
Step 4: Fit the Delta key into a cache aerator
Insert the matching cache key fully into the recessed aerator. The key teeth must seat in the aerator’s internal slots before you apply counter-clockwise force.
You will know the key fits when it sits level and does not wobble under light finger pressure. If the key turns without engaging, withdraw it and try the next size. A loose key can round the plastic teeth before the aerator moves.
Step 5: Turn and extract the hidden insert
Turn the cache key counter-clockwise, usually one-quarter to one-half turn to break the seal, then continue by hand or with the key until the insert comes out. Keep the key centered so force remains rotational rather than upward against the spout rim.
You will know the hidden aerator is removed when the insert, screen, and sealing washer can be lifted from the opening. Catch the assembly with your fingers or a towel. Do not let it fall into the drain.
Step 6: Record the assembly order
Place the parts on a clean towel in the order removed. Photograph the screen direction, rubber washer position, and any flow-control disk before separating the components.
You will know the assembly is documented when you can identify the water-entry side and outlet side. A frequent mistake is reinstalling a washer behind the wrong component, which can produce a leak or a weak, uneven stream even after cleaning.
Step 7: Flush the faucet body briefly
With the aerator removed and the sink drain protected, open the faucet for only 2-5 seconds. Use low flow if possible, because sediment may discharge suddenly and splash against the basin.
You will know flushing helped when visible grit leaves the spout and the water runs clear. This step clears loose debris near the outlet, but it cannot repair a clogged cartridge, shutoff valve, supply line, or faucet hose.
Can You Clean the Aerator Instead of Replacing It?
A Delta aerator can usually be cleaned when the screen is intact and the plastic housing is not cracked. Soak the removable parts in white vinegar for 1-2 hours, brush softened deposits away, rinse thoroughly, and replace the insert when mineral scale has permanently distorted the screen.
Cleaning procedure
Separate the screen, housing, washer, and flow-control components only if they come apart without force. Put the removable pieces in a small cup of vinegar, keeping the faucet finish out of the solution.
After soaking, brush both sides of the screen with an old toothbrush. Rinse under running water, hold the screen toward a light, and check whether the openings are clear across the entire surface. A clogged central section can still restrict flow after the outer rim looks clean.
Do not use vinegar on the faucet body for prolonged periods. Acid can dull some finishes, affect unlacquered metals, or damage nearby stone surfaces. Wipe any spill immediately and rinse the basin.
| Condition after cleaning | Action | Expected result |
|---|---|---|
| Screen clear, housing intact | Reinstall original | Normal stream restored |
| Screen partly blocked after soak | Repeat 30-60 minutes | Additional scale softening |
| Plastic insert cracked | Replace insert | No reliable seal from old part |
| Screen permanently bent | Replace insert | Spray pattern remains uneven |
| Washer flattened or brittle | Replace washer or aerator | Reduced leak risk |
How Do You Reinstall a Delta Aerator?
Reinstall a Delta aerator by placing the washer and screen in their original order, threading the assembly clockwise by hand, and testing for leaks. The aerator should start smoothly without cross-threading; plastic cache inserts rarely need a wrench.
Reinstallation steps
- Rinse the faucet outlet and wipe the threads clean.
- Position the rubber washer exactly as photographed.
- Start an external aerator or cache insert clockwise by hand.
- Stop immediately if the threads feel rough or the part sits crooked.
- Hand-tighten until snug, then open the faucet slowly.
- Check the joint and screen for leaks, distortion, or side spray.
A successful installation produces a centered stream with no water escaping around the collar. If water leaks from the threads, remove the aerator and inspect the washer rather than adding excessive force.
Do not use thread sealant or plumber’s tape on a standard aerator unless the specific Delta instructions call for it. The washer normally creates the seal. Tape can prevent the aerator from seating at the correct depth and can shed material into the screen.
What Tool Removes a Delta Cache Aerator?
A Delta cache aerator key is the correct tool for a recessed Delta insert, and a multi-size plastic key kit typically costs $5-$8. The key must match the internal tooth pattern and diameter; a flat screwdriver or needle-nose pliers is a last-resort extraction method, not the preferred tool.
Tool choices and risks
| Tool or method | Typical cost | Best use | Main risk |
|---|---|---|---|
| Delta cache key | $5-$8 | Correct recessed insert | Wrong size will slip |
| Multi-size key kit | $5-$15 | Unknown cache size | Cheap teeth may deform |
| Rubber glove | $0-$5 | Loose external collar | Insufficient for scale |
| Adjustable wrench | $10-$25 | External metal collar | Finish damage without padding |
| Needle-nose pliers | $8-$20 | Emergency internal engagement | Stripped plastic teeth |
| Small screwdriver | $3-$10 | Only when slots permit | Spout or insert damage |
Delta’s support guidance for cache aerators favors the purpose-made removal key. The often-repeated advice to wedge a screwdriver into any recessed aerator is unreliable because many inserts have delicate plastic teeth that a flat blade cannot engage evenly.
What If the Aerator Will Not Turn?
A stuck Delta aerator usually releases after mineral deposits are softened and turning force is applied through the correct tool. Wrap a cloth around the external collar or a vinegar-moistened rag around the spout tip for 30-60 minutes, then try again with steady, centered force.
Recovery sequence for a seized aerator
- Dry the faucet and identify whether the obstruction is external scale or an internal cache insert.
- Apply a warm vinegar-soaked cloth around the collar or spout tip.
- Leave the cloth in place for 30-60 minutes.
- Remove the cloth, wipe away softened deposits, and retry the correct tool.
- Increase force gradually while supporting the faucet body.
- Stop if the spout, collar, or plastic teeth begin deforming.
Warm vinegar is a descaling aid, not a guarantee. Heavy calcium deposits can extend into the faucet body, and aggressive force may break a thin decorative collar or loosen the faucet’s mounting connection.
Avoid open flames, boiling water on a finished faucet, and oil-based penetrating fluids near drinking-water components. Chemical residue can remain in the outlet, and high heat can damage seals or surface coatings.
If the cache teeth strip
When cache teeth strip, first try a new key of the correct size because the original key may have rounded rather than the insert. If the insert still will not move, a plumber may use an internal extractor designed for aerators.
A screwdriver or knife can sometimes catch the remaining plastic, but forcing a blade against the faucet’s inner wall can permanently damage the spout. Replace the insert after extraction. A damaged cache aerator is not a dependable part to clean and reuse.
When Is Low Flow Caused by Something Else?
Low bathroom-faucet flow is not always an aerator problem. If the stream remains weak with the aerator removed, inspect the supply stops, flexible hoses, cartridge, faucet inlet screens, and household water pressure before buying another aerator.
Diagnostic test
Remove the aerator and briefly run the faucet into a covered basin. Compare the flow with another cold-water fixture. Strong flow without the aerator confirms an outlet restriction; weak flow without it points upstream.
| Test result | Likely location | Next inspection |
|---|---|---|
| Strong flow without aerator | Aerator screen or insert | Clean or replace aerator |
| Weak hot and cold flow | Supply or cartridge | Stops, hoses, cartridge |
| Weak cold flow only | Cold-side inlet | Cold stop and hose |
| Weak hot flow only | Hot-side inlet | Hot stop, hose, heater |
| Normal flow but poor spray | Screen orientation | Washer and screen seating |
A partially closed shutoff valve can imitate a clogged aerator. Flexible supply hoses can also kink inside the vanity, particularly after storage items push against them.
Delta faucets with cartridge-based controls may restrict flow through the cartridge or inlet screens. Aerator removal cannot correct those failures, and repeated aerator replacement will not improve the result.
How Do You Choose a Replacement Aerator?
Choose a replacement Delta aerator by matching the model, physical diameter, thread or cache profile, washer arrangement, and flow rate. A 1.2 gallons-per-minute insert is not automatically interchangeable with a 1.5 GPM or 2.2 GPM insert merely because the opening looks similar.
Flow rate and fit
Bathroom lavatory faucets commonly use low-flow aerators, but the original Delta specification controls the correct choice. A lower-flow replacement can reduce the amount of water delivered during handwashing, while an incorrect insert can create a weak stream, excessive splash, or poor temperature response.
| Replacement characteristic | Typical value | Why it matters |
|---|---|---|
| Low-flow bathroom option | 1.2 GPM | Conserves water and may feel slower |
| Moderate bathroom option | 1.5 GPM | Common balance of flow and comfort |
| Older or specialty option | 2.2 GPM | May match older model specifications |
| Cache diameter | 16.5-24 mm | Determines key and housing fit |
| Cleaning interval in hard water | About 12 months | Reduces recurring mineral restriction |
Use the removed aerator as the primary reference. Photograph both sides, measure the diameter in millimeters, and record any flow marking before discarding it. Delta’s model-specific parts information is more reliable than a generic “fits Delta” marketplace listing.
An aerator marked with a flow rate may still fail to fit if its housing, thread, or washer differs. Flow performance and physical compatibility are separate specifications.
What Changes for Renters and Hard-Water Homes?
Renters should use hand removal, a correct cache key, and finish protection before attempting stronger extraction. Homes with hard water should inspect the aerator about once a year, or sooner when the stream becomes uneven, because calcium deposits can return after cleaning.
Low-risk renter procedure
Use a rubber glove first, then a cloth-wrapped wrench only on a clearly external collar. Photograph the faucet and removed parts, avoid modifying the spout, and keep the original aerator if a replacement is installed.
Ask the landlord or property manager before replacing a model-specific flow regulator or using an extractor. A stuck aerator can be attached to a faucet with a damaged or corroded body, and that repair may exceed a renter’s reasonable maintenance task.
Hard-water maintenance
Hard-water deposits are typically white, chalky, or pale gray and may form a ring around the outlet. Clean the removable insert in vinegar, rinse it completely, and inspect the faucet tip for scale before reinstalling it.
Annual cleaning is a practical starting point, not a universal schedule. A home with severe mineral buildup may need inspection every 3-6 months, while a treated-water home may go several years without a restriction.
Common Mistakes and How to Fix Them
Most failed Delta aerator removals result from using the wrong gripping point, applying force before softening scale, or reinstalling parts in the wrong order. The safest repair preserves the faucet finish first and increases extraction force only after tool fit and direction are confirmed.
- Using bare metal pliers on the finish: Add painter’s tape, leather, or a thick cloth between the jaws and collar.
- Turning a cache key without full engagement: Remove it, select the correct size, and seat every tooth before turning.
- Over-tightening plastic threads: Remove the insert and inspect for cracks; reinstall by hand only.
- Cross-threading the replacement: Start the part counter-clockwise until the threads drop into alignment, then turn clockwise.
- Soaking the entire faucet in vinegar: Soak only removable parts and wipe the faucet body promptly.
- Assuming the aerator caused every flow problem: Test flow with the aerator removed before replacing upstream plumbing components.
One practitioner rule is especially useful: if the tool slips twice, stop increasing force. Tool slippage usually indicates a mismatch, not a need for more torque.
How Much Time and Money Does the Job Take?
A straightforward Delta aerator removal costs $0-$10 and takes 5-10 minutes; a stuck or model-specific repair can cost $5-$15 in tools and take 20-60 minutes. Professional service becomes reasonable when the faucet body moves, the cache insert breaks inside the spout, or the correct model cannot be identified.
| Situation | Typical time | Typical direct cost |
|---|---|---|
| Loose external aerator | 5-10 minutes | $0 |
| Loose cache aerator | 5-10 minutes | $0-$8 |
| Cleaning mineral buildup | 15-30 minutes | $0-$5 |
| Seized external collar | 30-60 minutes | $0-$15 |
| Stripped or broken insert | 30-90 minutes | $5-$25 |
| Professional extraction | 30-60 minutes | Local service rate |
These are typical homeowner ranges, not guaranteed quotes. Local labor, faucet accessibility, finish type, and replacement-part availability change the final cost.
FAQ
Do Delta bathroom faucets all use the same aerator key?
No. Delta bathroom faucets use multiple aerator designs, and cache inserts can differ by diameter, tooth profile, flow rate, and model. Common cache sizes include Regular, Junior, Tiny Junior, and Tom Thumb, but the removed part or model number should determine the final key and replacement.
Can I remove a Delta aerator without a key?
An external Delta aerator can usually be removed without a dedicated key by hand or with a protected wrench. A hidden cache aerator technically may be turned with needle-nose pliers if the slots allow secure engagement, but that method can strip plastic teeth and damage the faucet, so a cache key is safer.
Should the water be turned off before removing the aerator?
Under-sink shutoff valves are not normally necessary because the faucet handle controls the water path. Turning the valves off is still a sensible precaution when the faucet handle leaks, the plumbing is unstable, or other people may accidentally operate the faucet during the repair.
Why does my Delta faucet still splash after cleaning?
Splashing can continue when the aerator screen is installed backward, the washer is displaced, the insert is damaged, or the replacement flow rate does not match the faucet. Remove the part, compare its orientation with your photograph, inspect the screen for distortion, and verify the replacement specification.
How often should a bathroom faucet aerator be replaced?
Replace a Delta aerator when cleaning does not restore flow, the screen is bent, the housing is cracked, or the plastic teeth are stripped. In hard-water homes, inspection every 3-12 months is practical; an intact insert can remain in service longer when its stream stays even and leak-free.
When should I call a plumber?
Call a plumber when the faucet body rotates in the countertop, the spout finish begins separating, the cache insert breaks below the rim, or low flow continues with the aerator removed. Those symptoms indicate mounting, faucet-body, cartridge, or supply-line problems rather than routine screen maintenance.
The Bottom Line
To remove an aerator from a Delta bathroom faucet, identify the design first, protect the finish, and turn the correct component counter-clockwise. Use a cache key for a recessed insert and a hand grip or padded wrench for an external collar. Clean intact parts for 1-2 hours in vinegar, flush the outlet briefly, then reinstall clockwise by hand. If the stream remains weak with the aerator removed, investigate the supply valves, hoses, cartridge, or inlet screens instead of forcing the faucet tip.