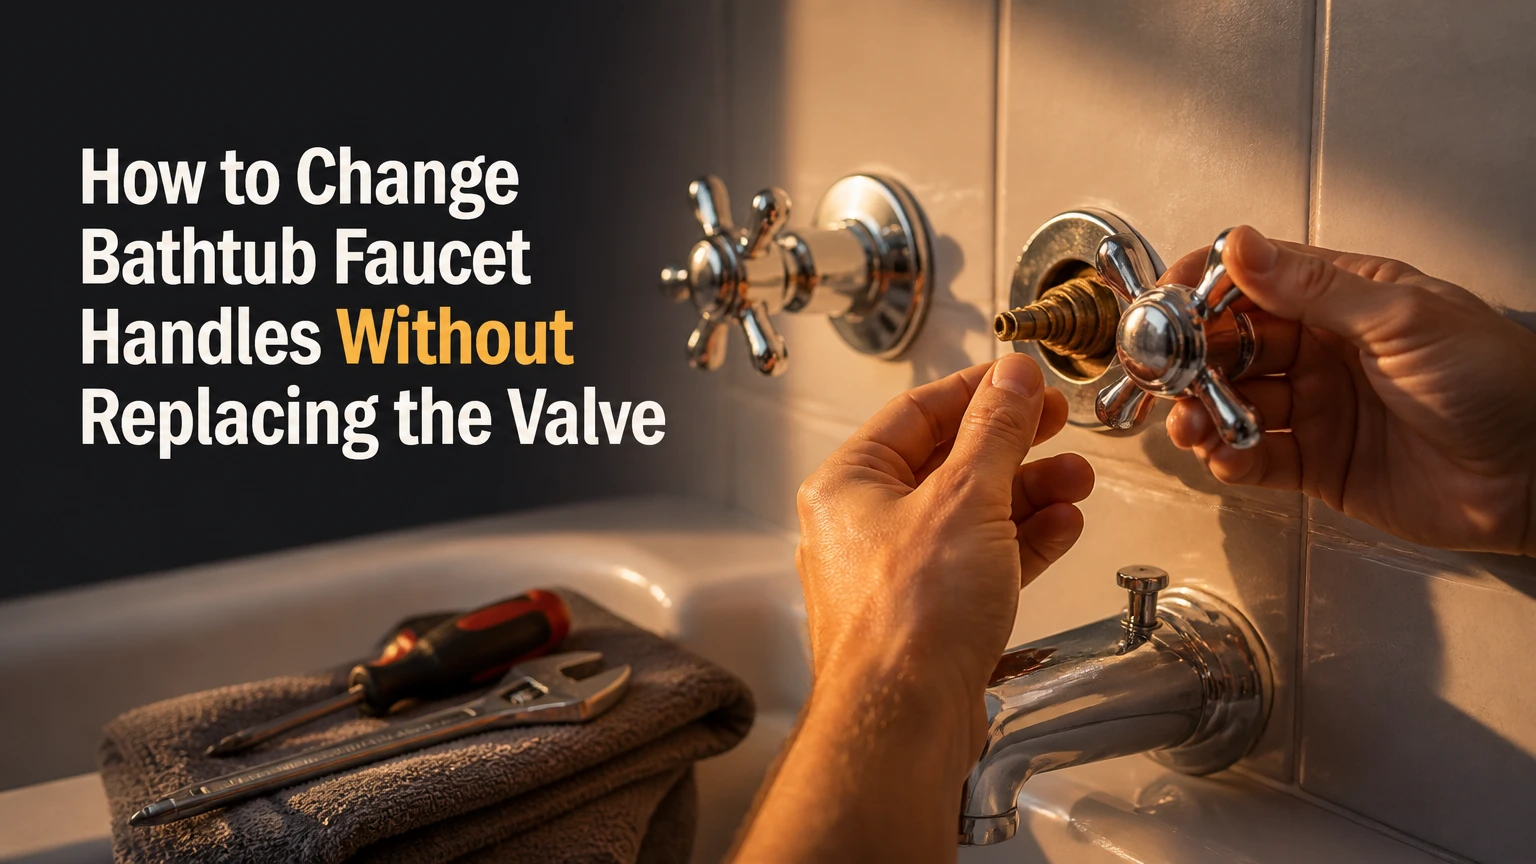
Changing bathtub faucet handles usually takes 15-45 minutes and requires only a screwdriver, hex key, replacement handles, and a towel. Turn off the water, remove the retaining fastener, pull the old handle from the valve stem, match the new handle’s broach or adapter, and test for smooth operation. Brand compatibility determines success.
Key Facts at a Glance
- Bathtub faucet handle replacement is usually a trim swap, not an in-wall valve replacement.
- The replacement handle must match the valve stem’s spline pattern, shape, manufacturer, or adapter system.
- A center screw commonly secures two-handle knobs, while a side set screw commonly secures lever handles.
- A handle that spins without controlling water usually has a stripped broach, incorrect adapter, or damaged valve stem.
- Continuous water leaking from the handle base usually indicates a worn cartridge, stem seal, washer, or O-ring.
- Typical US retail cost is $4-$15 for a basic handle, $30-$120 for a premium set, and $50-$250 for a complete trim kit.
What You Are Replacing
Bathtub faucet handles are the visible controls attached to valve stems or cartridges behind the wall. Replacing only those controls changes the bathroom’s appearance and restores a broken grip or stripped handle without opening the wall, provided the existing valve mechanism still operates correctly.
The visible assembly is commonly called faucet trim. A trim set may include handles, escutcheon plates, indicator caps, and sometimes a tub spout or showerhead. The valve body and cartridge remain inside the wall.
A handle replacement is therefore different from replacing a bathtub faucet assembly. A faucet assembly may require disconnecting supply connections or replacing the spout. A cartridge repair involves shutting off water, removing retaining hardware, and extracting an internal valve component.
The distinction matters when diagnosing a leak. A cracked handle can be replaced. Water that continues to emerge around the stem after the handle is removed points toward an internal seal or cartridge problem.
How does the handle control water?
The handle transfers movement to the valve stem or cartridge through an internal recess called a broach. A broach may contain gear-like splines, flat sections, or a proprietary shape that fits the stem.
Two-handle valves normally rotate separate hot and cold stems. Single-handle cartridge valves may rotate, tilt, lift, or combine those movements to regulate temperature and volume. Three-handle systems add a diverter that directs water between the tub spout and showerhead.
A center screw, side set screw, or concealed retaining clip holds the handle against the stem. The fastener is small, but the fit between broach and stem carries the operating force. A visually identical handle can fail immediately if its internal geometry differs.
Before You Start
Prepare the replacement, tools, water shutoff, and work area before removing the original handle. The project is low difficulty when the handle slides off and the replacement is made for the existing valve; corroded fasteners and unknown valves increase the risk substantially.
Cover the tub drain with a stopper or folded towel. Place a second towel over the tub surface to prevent a dropped screwdriver or screw from chipping porcelain or scratching acrylic.
If the bathroom has individual fixture shutoffs, close them. Otherwise, close the home’s main shutoff, open the tub faucet, and wait until the flow stops. A pressure test is safer than assuming a partially closed valve has isolated the fixture.
| Item | Typical quantity | Purpose or specification |
|---|---|---|
| Phillips screwdriver | 1 | Removes common center retaining screws |
| Flathead screwdriver | 1 | Lifts an index cap using light pressure |
| Hex key set | 1 set | Covers common 1/16-inch to 3/16-inch set screws |
| Replacement handle | 1-3 | Must match valve brand, stem, and configuration |
| Penetrating oil | 1 small can | Loosens corrosion, used sparingly away from finishes |
| Faucet handle puller | 1 optional | Removes seized handles without levering against tile |
| Silicone sealant | 1 tube | Seals an escutcheon when the manufacturer requires it |
Have a flashlight, small parts tray, clean rag, and adjustable wrench available. Do not use a power driver on the retaining screw. Low-speed tools can strip a soft screw head or crack an acrylic handle before you feel the resistance.
How to Choose a Compatible Replacement
Choose a replacement by valve manufacturer and stem pattern first, then select the visible style and finish. Moen, Delta, Kohler, Pfister, American Standard, and older regional brands may use different spline counts, stem lengths, broach shapes, and retaining hardware.
Do not identify compatibility from finish or silhouette alone. A brushed-nickel Delta handle and a brushed-nickel Moen handle may look interchangeable while fitting entirely different valve stems.
How do you identify the valve brand?
Look for a logo on the handle cap, escutcheon plate, tub spout, or showerhead. Photograph the entire trim assembly before disassembly, then photograph the exposed stem after removing the handle.
Manufacturer clues include the shape of the index cap, the number of visible screws, the escutcheon logo, and the valve’s cartridge orientation. A replacement-parts retailer or manufacturer diagram may identify the model from those details, but measure and compare the actual stem whenever possible.
Keep the old handle until the new one has been test-fitted. The old part can reveal the broach shape and screw location even when the finish is badly worn.
| Replacement approach | Typical price | Fit method | Best use |
|---|---|---|---|
| Brand-specific acrylic knob | $4-$15 | Direct broach or OEM insert | Budget repair and rental bathroom |
| Brand-specific metal handle | $15-$60 | Direct stem fit | Routine replacement with known valve |
| Universal handle kit | $10-$45 | Adapter sleeves and set screw | Unidentified or discontinued trim |
| Complete trim kit | $50-$250 | Matching handles and plates | Coordinated finish update |
| Premium solid-brass set | $30-$120 or more | Brand-specific broach | High-use or long-term renovation |
Universal kits are useful, but “universal” does not mean every handle fits every valve without adjustment. The kit may depend on a particular adapter sleeve, spacer, stem length, or set-screw position. OEM parts usually reduce wobble and alignment problems.
Which handle style should you choose?
Lever handles require less finger force than cross handles or small knobs, making them practical for arthritis, wet hands, and aging-in-place bathrooms. Knobs and cross handles often suit traditional trim but can become difficult to operate when mineral deposits increase resistance.
| Handle style | Typical footprint | Operating motion | Main limitation |
|---|---|---|---|
| Single lever | 2-3 inches wide | Rotate, tilt, or lift | Must match cartridge geometry |
| Round knob | 1.75-2.5 inches diameter | Rotate stem | Requires firm grip |
| Cross handle | 2-3 inches wide | Rotate stem | Prongs can catch towels |
| Acrylic knob | 1.75-2.5 inches diameter | Rotate stem | Can crack under excess torque |
Choose the same configuration unless you are replacing the entire compatible trim system. A two-handle valve cannot become a single-handle valve by installing a different exterior handle.
How to Change Bathtub Faucet Handles
Follow these eight steps in order. The most important checkpoint is the dry fit: the new handle must sit flush, align correctly, and turn the valve before you tighten its fastener.
Step 1: Shut Off the Water and Protect the Drain
Close the fixture shutoff valves or the home’s main water supply. Open the tub faucet to release pressure, then cover the drain and tub surface with towels.
Confirm that water has stopped before removing a handle. Residual water in the supply line may drip, but pressurized flow indicates the wrong shutoff or an incompletely closed valve.
You’ll know it worked when: the faucet produces no continuing stream after the handles are opened.
Common mistake: removing the handle before protecting the drain, then losing the small retaining screw inside the drain opening.
Step 2: Find the Retaining Fastener
Inspect the center of a knob or cross handle for a decorative index cap marked H, C, or a brand logo. Inspect the underside and side of a lever for a small access hole containing a set screw.
Lift a cap with a thin flathead screwdriver or plastic pry tool. Protect the finish with a folded cloth, and pry only at the cap’s edge rather than between the handle and wall plate.
You’ll know it worked when: the screw head or hex socket is fully visible and free of mineral scale.
Common mistake: forcing a decorative cap that is threaded. If the cap does not lift with light pressure, check the manufacturer’s parts diagram or try turning it gently by hand.
Step 3: Remove the Center Screw or Set Screw
Use the correctly sized Phillips screwdriver for a center screw or the correctly sized hex key for a side set screw. Turn counterclockwise while applying straight inward pressure to keep the tool seated.
Place the screw and cap in a tray. If the screw head is corroded, apply a small amount of penetrating oil to the fastener, wait 10-15 minutes, and keep the oil away from acrylic, painted finishes, and caulk.
You’ll know it worked when: the fastener backs out without rotating the valve stem or damaging the recess.
Common mistake: using an undersized screwdriver or hex key. A rounded fastener often requires extraction, not greater force.
Step 4: Pull the Old Handle Straight Out
Grip the handle near its hub and pull directly toward you. Wiggle it a few millimeters from side to side, but do not twist aggressively because the valve stem or cartridge may be damaged.
For a seized handle, apply a handle puller behind the hub and tighten its center screw gradually. A puller transfers force along the stem, unlike a screwdriver used as a lever, which can chip tile or bend the escutcheon.
You’ll know it worked when: the handle slides off and the stem remains straight, intact, and attached to the valve.
Common mistake: prying against the wall plate. Remove or protect the plate first if the puller’s arms cannot seat behind the handle.
Step 5: Clean and Inspect the Stem
Wipe the exposed stem with a damp rag. Remove loose scale with a nylon brush, then inspect the stem for stripped splines, corrosion, cracks, or abnormal looseness.
Do not file away the stem’s teeth to make an incompatible handle fit. Measure the stem length and compare its profile with the replacement’s adapter or broach.
You’ll know it worked when: the stem is clean enough for the new handle to slide on without grit preventing a flush fit.
Common mistake: confusing a damaged stem with a loose handle. If the stem itself turns independently of the valve or moves in and out excessively, the internal valve needs further service.
Step 6: Test-Fit and Align the New Handle
Slide the new handle onto the stem without tightening the screw. Rotate the handle slightly until the broach or adapter engages, then press it toward the wall.
For two-handle faucets, position the hot handle on the left and the cold handle on the right when viewed from the user’s position. Check the manufacturer’s instructions if the valve uses an unusual rotation or reversed installation.
You’ll know it worked when: the handle sits flush or at the manufacturer-specified spacing, feels stable, and turns the valve through its normal range.
Common mistake: tightening a handle that is only partially engaged. A shallow engagement concentrates force on a few spline teeth and causes rapid stripping.
Step 7: Secure the Handle and Seal the Escutcheon
Install the retaining screw or set screw and tighten it until snug. Stop when the handle is stable. Acrylic and plastic components can crack, while small brass or aluminum threads can strip under excessive torque.
Replace the indicator cap. If you installed a new escutcheon, apply a narrow bead of bathroom-grade silicone around the top and side edges when the manufacturer calls for sealing. Leave the bottom edge open unless the instructions specify otherwise, allowing trapped water to drain.
You’ll know it worked when: the cap stays in place, the handle does not wobble, and the wall plate remains secure without a thick visible bead.
Common mistake: sealing every edge of the escutcheon. Complete sealing can trap water behind the plate and hide a slow leak.
Step 8: Restore Water and Test the Installation
Reopen the fixture shutoffs or main supply slowly. Operate each handle from closed to open, then inspect the stem area, handle hub, escutcheon, and tub spout for leaks.
Run hot and cold water separately. Confirm that the indicators match the actual water temperature and that a three-handle diverter sends water to the intended outlet.
You’ll know it worked when: the handle operates smoothly, water flow responds immediately, and the handle base remains dry for several minutes.
Common mistake: testing only for visible dripping. A loose handle can control water initially but slip under normal operating force.
Identify Your Faucet Configuration
A single-handle faucet uses one control for temperature and volume, while a two-handle faucet uses separate hot and cold controls. A three-handle faucet adds a central diverter, which is a separate operating component and must be matched independently.
| Configuration | Visible controls | Internal mechanism | Replacement requirement |
|---|---|---|---|
| Single handle | 1 lever or knob | Cartridge or pressure-balance valve | Match cartridge brand and broach |
| Two handle | 2 hot/cold handles | Separate compression, ceramic, or cartridge stems | Match each stem and rotation |
| Three handle | 2 hot/cold handles plus diverter | Two supply valves and one diverter | Match handles and diverter type |
| Cross-style pair | 2 cross handles | Separate hot/cold stems | Match stem splines and screw depth |
Older three-handle systems frequently have compression stems or washer-based valves. Replacing the outside diverter handle will not correct a diverter that leaks or sends water to both the tub spout and showerhead.
Does a New Handle Stop a Leak?
A new handle stops a leak only when the old handle itself is cracked, loose, or unable to engage the valve. Water emerging from the handle base after installation usually requires a stem seal, cartridge, washer, or O-ring repair.
Remove the handle and dry the exposed area. Open the water briefly while observing the stem. Water rising around the stem identifies an internal sealing problem, not a cosmetic handle problem.
Replacing a cartridge is a separate repair. It may require a cartridge puller, bonnet-nut socket, replacement retaining clip, and the exact cartridge for the valve model. Do not remove a bonnet nut or cartridge retainer without confirming that the water is fully isolated.
Common Problems and How to Fix Them
| Symptom | Likely cause | Corrective action | Stop point |
|---|---|---|---|
| Handle will not pull off | Mineral buildup or corrosion | Use a puller after removing the fastener | Stop if tile or valve body flexes |
| New handle wobbles | Wrong broach depth or loose adapter | Recheck sleeve, spacer, and screw | Replace incompatible kit |
| Handle spins freely | Stripped broach or spline mismatch | Compare old and new stem interfaces | Repair stem or replace handle |
| Water leaks at handle base | Failed cartridge, washer, or O-ring | Replace internal seal or cartridge | Call a plumber if valve is inaccessible |
| Set screw will not turn | Rounded hex socket or corrosion | Use penetrating oil and correct key | Extract screw rather than drilling blindly |
| Hot and cold are reversed | Handles installed on wrong stems | Swap handles or correct stem orientation | Verify anti-scald settings |
What if the handle is frozen?
Use a faucet handle puller rather than levering against the tile. Apply penetrating oil only to the metal fastener or handle hub, protect surrounding finishes, wait 10-15 minutes, and increase puller pressure in small increments.
Calcium and lime removers can damage some plated finishes, natural stone, and grout. Follow the product label and rinse residue completely. Heat from a torch is inappropriate near waterproofing, plastic cartridges, acrylic tubs, and finished wall surfaces.
If the valve body begins moving inside the wall, stop immediately. Movement may break a supply connection or damage a concealed fitting.
What if the new handle spins without turning water?
A spinning handle usually indicates a mismatched broach, missing adapter, stripped internal teeth, or a damaged valve stem. Remove the handle and compare the adapter sleeve with the kit instructions before tightening anything further.
A set screw bearing against a round section instead of the stem’s flat may also allow slipping. Correct the adapter orientation if the manufacturer specifies one, but do not use tape, glue, or excessive torque as a substitute for proper fit.
What if the screw head is stripped?
Press the correctly sized driver firmly into the screw while turning slowly. If the head is already rounded, try a manual screw extractor or replace the handle if the screw can be sacrificed safely.
Do not drill into a concealed valve without a plan for removing metal fragments and protecting the stem. A professional can often extract a corroded fastener without damaging the cartridge or wall fitting.
Which Material Fits Your Bathroom?
Acrylic is the lowest-cost and most corrosion-resistant option, while solid brass provides the best long-term mechanical durability. Zinc alloy offers a metal appearance at moderate cost but can pit or lose its plating in persistent bathroom humidity.
| Material | Typical handle price | Expected service context | Main weakness |
|---|---|---|---|
| Acrylic or plastic | $4-$15 | Rental or low-cost refresh | Cracks when overtightened |
| Zinc alloy | $15-$50 | Mid-range decorative update | Plating can pit or peel |
| Solid brass | $30-$120 or more | High-use or long-term installation | Higher cost and strict fit |
| Stainless steel | $25-$90 | Humid or coastal bathroom | Limited style and model availability |
Material does not solve a compatibility problem. A beautifully machined brass handle still fails if the broach does not match the valve stem.
Time, Cost, and Professional Help
A standard handle-only replacement takes 15-45 minutes. Typical US retail pricing is $4-$15 for a basic knob, $30-$120 or more for a premium handle set, and $50-$250 for a complete trim kit.
Labor commonly costs $150-$550 for a straightforward professional visit, although local rates, access, emergency timing, and regional pricing vary. Work involving a seized valve, concealed leak, cartridge extraction, or wall access can exceed $600.
| Project condition | DIY time | Typical materials | Likely professional scope |
|---|---|---|---|
| Loose two-handle replacement | 15-30 minutes | $8-$60 | Handle installation |
| Single lever with adapter | 20-45 minutes | $15-$75 | Trim and adapter fit |
| Seized handle | 1-2 hours | $20-$100 | Puller and fastener extraction |
| Handle plus cartridge | 1-3 hours | $40-$180 | Trim and internal valve repair |
| Concealed valve replacement | 4-8 hours or more | $150-$600 | Wall access and plumbing alteration |
Prices are typical planning ranges, not fixed quotations. A complete trim kit may cost less than buying several discontinued individual pieces, but it may still be incompatible with the existing valve.
Variations for Common Situations
Replacing only one damaged handle
Replace one handle when the matching part remains available and the other handle has a similar finish and wear level. Photograph the intact handle and use it to identify the model before ordering.
If the pair has significant finish loss, replacing both handles usually produces a more consistent result and reduces the chance that one handle has a different broach or screw depth.
Updating all visible trim
Choose a complete trim kit only when the manufacturer confirms compatibility with the existing valve body. A trim kit can update handles and escutcheons without opening the wall, but it does not convert one valve platform into another.
Check the kit’s stated valve compatibility, required cartridge, minimum wall thickness, and included adapters. Tub spouts may use slip-fit or threaded connections, so a complete kit can introduce a separate fit issue.
Working without local shutoff valves
Use the home’s main shutoff and verify that the tub faucet stops flowing before loosening the retaining screw. If the main shutoff does not close fully, postpone the work until a plumber can isolate the supply.
Never rely on a closed handle as a water shutoff. The handle controls the valve; it does not isolate pressure from the fastener or cartridge area.
Expert Rules That Prevent Expensive Mistakes
- Photograph before disassembly. A clear image of the handle, escutcheon, cap, and exposed stem often identifies a discontinued model faster than a verbal description.
- Test-fit before tightening. The retaining screw should hold a correctly seated handle, not force an incorrect handle onto the stem.
- Keep the bottom of a sealed escutcheon open when permitted. This small drainage path can reveal and release water before it enters the wall cavity.
- Replace the cartridge when the leak source is internal. A new handle cannot repair a worn stem seal, cartridge, washer, or O-ring.
- Treat a moving valve body as a stop condition. Concealed plumbing connections can fail when an installer applies force through a seized handle.
FAQ
Are bathtub faucet handles interchangeable between brands?
Bathtub faucet handles are not reliably interchangeable between brands because manufacturers use different spline counts, broach shapes, stem lengths, screw locations, and cartridge interfaces. An adapter-based universal kit may work, but the correct sleeve and stem depth must be verified before installation.
Can I replace bathtub handles without turning off the water?
Do not remove bathtub faucet handles with the water supply pressurized. Although the handle fastener is outside the water path, a damaged stem seal or loose cartridge can release water when the handle is disturbed. Close fixture shutoffs or the main supply first.
How do I know whether I need a cartridge or a handle?
You need a handle when the visible control is cracked, stripped, loose, or cosmetically damaged but the valve operates without leaking. You likely need a cartridge, stem seal, washer, or O-ring when water leaks around the handle base or the faucet continues dripping while closed.
What size Allen key removes a tub faucet handle?
Common bathtub faucet set screws use hex keys between 1/16 inch and 3/16 inch, but no single size is universal. Insert the key fully into the socket before turning, because a partially engaged key can round the small screw head.
Should I replace the handles and escutcheon plates together?
Replace handles and escutcheon plates together when the finish is worn, the plates are corroded, or the replacement handles have a different footprint. Handle-only replacement is more economical when the existing plates are sound and the new handles are confirmed to fit.
When should a plumber replace the valve?
Hire a plumber when the valve body moves inside the wall, the shutoff cannot isolate the fixture, the cartridge is seized, the wall must be opened, or a concealed connection leaks. A handle swap is suitable for DIY work only when the existing valve remains stable and accessible.
The Bottom Line
To change bathtub faucet handles, shut off the water, protect the drain, expose and remove the retaining fastener, pull the old handle straight off, clean the valve stem, and test-fit a compatible replacement. Match the manufacturer and broach before buying. A new handle solves a damaged control, but it cannot cure an internal valve leak.