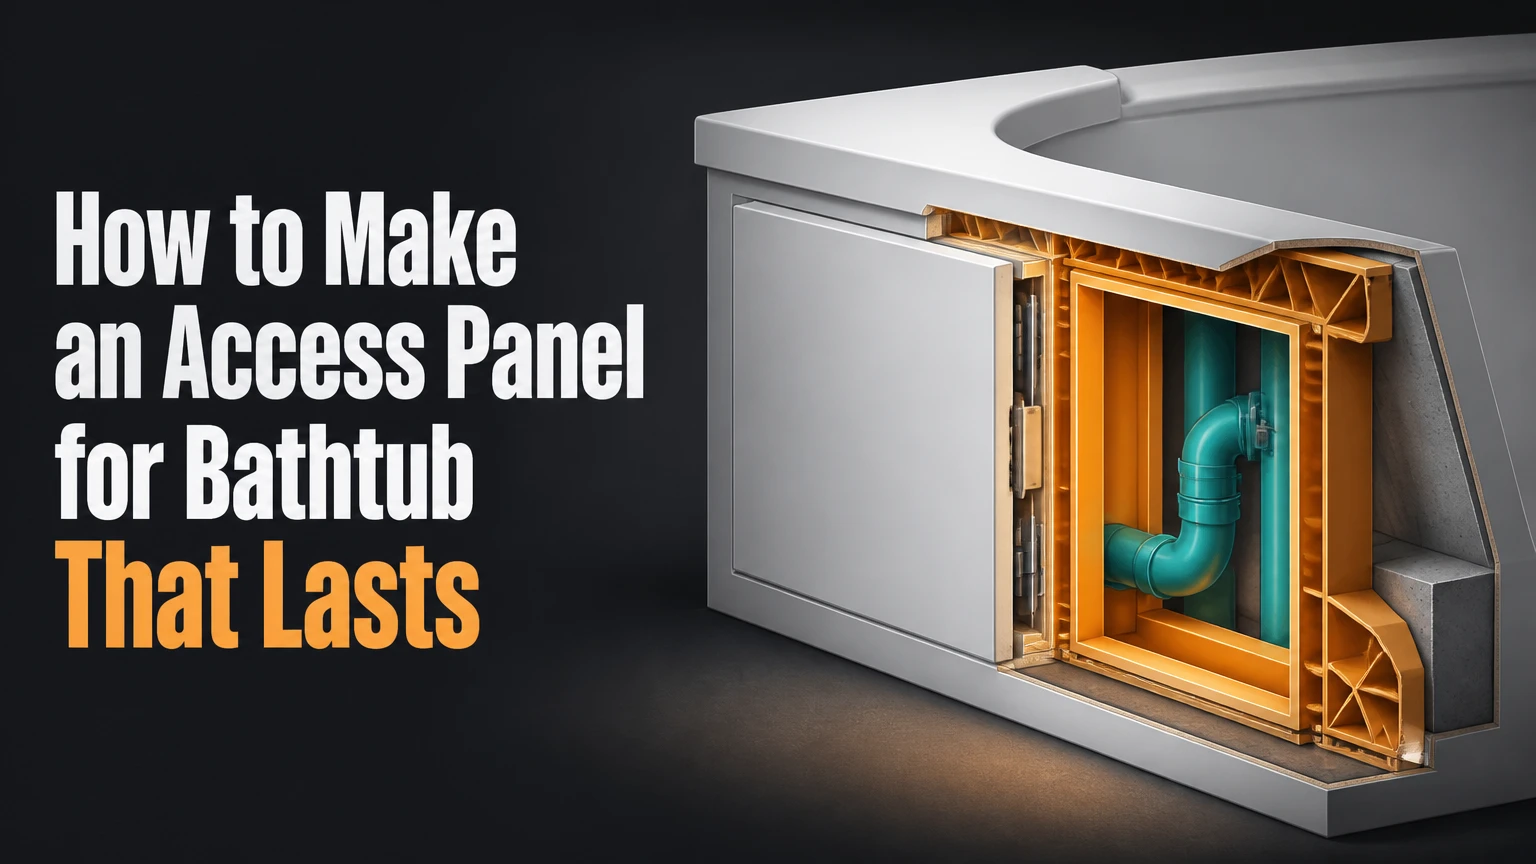
To make an access panel for a bathtub, create a removable opening aligned with the drain, waste-and-overflow fitting, valves, or whirlpool pump, then secure a moisture-resistant door with screws, catches, or magnets. A 12 x 12-inch opening suits most drain repairs, while a pump usually needs at least 16 x 16 inches or the manufacturer’s specified clearance.
Key Facts at a Glance
- A bathtub access panel should expose the component that requires service, not merely provide a view into the cavity.
- A 12 x 12-inch opening is a practical general-purpose size; an 8 x 8-inch panel is usually restrictive for two-handed repairs.
- A whirlpool pump access opening must follow the pump manufacturer’s service and removal dimensions.
- A removable wood or beadboard panel works well on a tub apron, while plastic or metal panels suit adjacent drywall.
- Tile-in doors should use a cuttable silicone perimeter joint, never hard grout that prevents removal.
- Inspect the cavity for pipes, wiring, blocking, insulation, and structural framing before cutting.
What Does a Bathtub Access Panel Provide?
A bathtub access panel provides a removable route to hidden plumbing and equipment without demolishing drywall, tile, or the tub surround. The opening commonly serves the trap, drain shoe, waste-and-overflow assembly, mixing valve, shutoff connections, or a whirlpool motor and pump.
The panel is not a repair itself. It is a planned service point. A well-made panel lets a person see the fitting, place both hands near it, use a wrench, and remove the failed part later.
Bathtub plumbing access usually belongs in one of two locations:
- An adjacent wall: The panel faces a closet, hallway, bedroom, or unfinished service area behind the tub.
- The tub apron: A removable front or side panel opens the cavity beneath a freestanding or enclosed bathtub.
An access door on an adjacent wall is easier to seal and finish. A removable apron offers better access when the bathtub has no accessible room behind it, but the panel must match the bathroom finish and resist movement from the floor or tub structure.
Where Should You Place the Panel?
Place the bathtub access panel on the side that gives the shortest, clearest route to the serviceable component. The ideal location is directly behind the drain and overflow fittings, but the panel may need to shift sideways to avoid a stud, electrical cable, or supply pipe.
Mark the center of the drain, the overflow opening, and the valve body before choosing the final rectangle. A panel placed below the drain may expose the trap but leave the waste-and-overflow connection unreachable. A panel placed near the valve may allow cartridge replacement while failing to provide access to the drain.
Allow enough depth for the frame and door. A typical access-panel frame needs roughly 2-3 inches of clear cavity depth, although the product’s installation instructions control.
Which Panel Material Fits the Project?
Plastic is usually the simplest choice for a painted wall, metal is stronger for commercial or high-abuse areas, tile-in systems suit finished tiled walls, and wood or beadboard works best for a custom bathtub apron. The material should match the panel’s exposure, required opening size, finish, and removal frequency.
| Panel type | Typical opening sizes | Typical material cost | Best location |
|---|---|---|---|
| ABS plastic snap-in | 6 x 6 to 14 x 14 in | $10-$25 | Painted drywall or closet |
| Steel or aluminum hinged | 8 x 8 to 24 x 24 in | $20-$70 | Heavy-use wall or service area |
| Tile-in aluminum frame | 12 x 12 to 24 x 24 in | $80-$250+ | Ceramic or porcelain tile |
| Plywood or beadboard door | Custom, commonly 12 x 18 in | $40-$120 | Tub apron or furniture-style surround |
Plastic and Metal Access Doors
ABS plastic panels resist rust and install quickly, but thin plastic can crack if struck by a vacuum, storage item, or tool. Plastic doors are appropriate when appearance is secondary and the panel remains outside the direct splash zone.
Metal doors tolerate impacts better and can accept a lock or screwdriver latch. Galvanized steel may corrode where its coating is scratched, while aluminum avoids rust but generally costs more. A fire-rated or smoke-rated wall requires a listed panel that matches the wall assembly; an ordinary plastic door is not an acceptable substitute.
Custom Wood or Beadboard Doors
A custom wood panel can match painted trim, wainscoting, or a beadboard tub apron more convincingly than a white plastic door. Use exterior-grade or marine-grade plywood for the core, seal every exposed edge, and keep the panel above standing water.
Untreated MDF is a poor choice near a bathtub. MDF swells after repeated wetting, and edge swelling can jam a previously removable door. Solid wood also needs finish on all faces and edges because bathroom humidity can cause seasonal movement.
Hidden Tile-In Doors
A tile-in access door uses an aluminum frame and a removable carrier that receives backer board and matching tile. The finished door can disappear into the wall, but the tile layout must be planned before the surrounding tiles are installed.
The perimeter should be closed with color-matched silicone, not grout. Silicone can be cut with a utility knife when service is needed, while rigid grout transfers force into the tile and may crack the door or surrounding installation.
How Large Should the Opening Be?
Use an 8 x 8-inch opening only for inspection or a single small connection, choose 12 x 12 inches for most bathtub drain and valve work, and use 16 x 16 inches or more for a whirlpool pump when the manufacturer requires it. The rough opening must follow the panel manufacturer’s dimensions, not merely the nominal door size.
| Service target | Minimum practical opening | Preferred opening | Reason |
|---|---|---|---|
| Visual leak inspection | 6 x 6 in | 8 x 8 in | Flashlight and one-hand viewing |
| Tub drain or P-trap | 8 x 8 in | 12 x 12 in | Wrench movement and hand clearance |
| Waste-and-overflow assembly | 10 x 10 in | 12 x 16 in | Access to vertical and horizontal joints |
| Mixing valve or cartridge | 8 x 8 in | 12 x 12 in | Cartridge and retaining-clip access |
| Whirlpool pump | 16 x 16 in | Manufacturer specification | Motor removal and service clearance |
The critical test is physical, not visual. Before fastening the frame, place the actual wrench or replacement cartridge through the proposed opening. If a hand cannot reach the rear nut without twisting against the wall, enlarge the opening.
Do not assume the door’s advertised 12 x 12-inch size equals the cutout. Many products have a slightly smaller or larger rough opening. Measure the frame’s installation template and preserve the manufacturer’s reveal around the door.
What Tools and Materials Do You Need?
A basic drywall panel requires an access-door kit, measuring tools, a level, a stud finder, a flashlight, a drywall saw or oscillating tool, fasteners, and a compatible sealant. A custom apron adds plywood, cleats, hinges or catches, primer, paint, and edge-sealing materials.
Before You Start
| Requirement | Typical value |
|---|---|
| Planning and layout time | 20-45 minutes |
| Installation time, plastic or metal | 1-2 hours |
| Custom wood-panel time | 3-5 hours |
| Tile-in-panel time | 4-8 hours, excluding curing |
| Basic material cost | $25-$70 |
| Custom or tiled material cost | $60-$250+ |
| Skill level | Basic DIY for drywall, intermediate for tile |
Prepare these items:
- One access panel sized for the service task
- One tape measure, pencil, level, and stud finder
- One flashlight or inspection camera
- One drywall saw or oscillating multi-tool
- Four to eight corrosion-resistant screws, if the panel requires them
- One tube of paintable acrylic caulk or bathroom-grade silicone
- Two-by-four blocking, if the frame lacks solid support
- Primer and bathroom paint for a wood or paintable panel
Turn off nearby electrical circuits if cutting near wiring is possible. Shut off the tub’s water supply when the panel exposes pressurized connections.
How to Make an Access Panel for Bathtub Plumbing
The reliable process has eight stages: identify the service zone, inspect the cavity, size the opening, build support, cut carefully, dry-fit the frame, fasten it correctly, and install a removable door. Most drywall installations take 1-2 hours after the location and product have been selected.
Step 1: Identify the Service Zone
Map the drain, overflow, valve, and pump positions from the tub side and the accessible wall or apron side. Use the tub manufacturer’s installation drawing if the bathtub is acrylic, fiberglass, or a whirlpool model.
Draw a rectangle that covers the complete repair zone. Include the direction a fitting must move during removal. A P-trap that can be loosened but cannot be pulled through the opening is not genuinely accessible.
Success checkpoint: The proposed rectangle exposes every nut, union, retaining clip, and pump mounting point.
Common mistake: Centering the panel on the tub instead of the plumbing. Symmetry does not guarantee service access.
Step 2: Inspect Behind the Wall
Make a small exploratory hole inside the proposed opening, or use an inspection camera through a drilled pilot hole. Look for electrical cable, copper or PEX pipe, drain lines, blocking, insulation, and the far side of the wall.
Use shallow cuts, especially during the first pass. A drywall saw driven deeply can puncture a pipe or cable directly behind the gypsum board.
Success checkpoint: You can identify the cavity boundaries and a safe cutting path before enlarging the hole.
Common mistake: Trusting a stud finder alone. A stud finder may not locate loose wiring, plastic pipe, or a metal protective plate.
Step 3: Mark the Rough Opening
Use the access-panel frame or supplied template to mark the rough opening, not the visible door face. Check the lines with a level and keep the frame clear of the stud edge.
If the opening falls across a stud, do not cut the stud casually. Shift the panel, select a narrower frame, or ask a qualified contractor whether the stud can be modified safely.
Success checkpoint: The marked rectangle fits between supports and leaves enough wall material for the frame flange.
Common mistake: Cutting the finished-door dimensions. The frame may then fall through the wall or fail to seat flush.
Step 4: Cut the Wall Carefully
Drill a 3/8-inch pilot hole inside one corner, then cut toward the marked lines with the tool held shallow. Stop frequently and inspect the cavity rather than forcing the blade through unseen material.
Support loose drywall as the final cuts are made. Save the cutout if you plan to create a custom removable door from the same wallboard.
Success checkpoint: The opening has clean edges, no damaged services, and enough material for the frame to sit flat.
Common mistake: Cutting through a wire or pipe. Stop immediately, shut off water or power as appropriate, and arrange professional repair before installing the panel.
Step 5: Add Blocking if Needed
Install horizontal or vertical blocking when the access-panel frame cannot grip the wall securely. Use two-by-four lumber or the support specified by the panel manufacturer, fastening it to existing framing with appropriate structural screws.
Blocking should sit behind the wall surface without forcing the panel outward. Test the frame against the blocking before applying adhesive or screws.
Success checkpoint: The frame remains square and supported when pressed at each corner.
Common mistake: Using drywall anchors for a large, frequently removed door. Anchors can loosen after repeated servicing; solid blocking is more durable.
Step 6: Dry-Fit and Square the Frame
Insert the frame without sealant and check the reveal on all four sides. Trim small drywall irregularities with a utility knife, but do not enlarge the opening enough to expose the frame gap.
Measure the diagonals. Equal diagonals indicate a square opening, which helps hinged doors latch without binding.
Success checkpoint: The door opens fully, closes evenly, and sits flush with the finished wall.
Common mistake: Overtightening screws. Excess force can bow a thin metal frame or distort a plastic frame so the latch no longer engages.
Step 7: Fasten and Seal the Frame
Apply the sealant recommended by the product instructions. Use screws into blocking or studs where provided; use adhesive only when the panel is designed for adhesive mounting.
A panel outside the splash zone generally needs a neat perimeter seal. A panel in a wet or splash-prone location needs a compatible gasket or a manufacturer-approved waterproof assembly, not ordinary interior caulk alone.
Success checkpoint: The frame is rigid, level, flush, and sealed without obstructing the door or latch.
Common mistake: Sealing the removable door itself. Seal the fixed frame perimeter, but preserve the door’s opening mechanism.
Step 8: Install and Test the Door
Fit the hinged, snap-in, screwed, or magnetic door. Open it several times and confirm that a tool can pass through at the angle required for repair.
Label the panel discreetly if it is hidden in a closet or behind furniture. Photograph the plumbing before closing the door so future repairs have a reference.
Success checkpoint: The door can be removed without damaging tile, paint, drywall, or the latch.
Common mistake: Storing items in front of the panel. A blocked access door becomes equivalent to no access door during an emergency leak.
How Do You Build a Custom Bathtub Apron Panel?
Build a custom bathtub apron panel from sealed plywood or beadboard, support it with cleats, and attach it using removable catches or screws. The panel should be independent of the tub’s weight and should lift or swing away without disturbing the tub, waste pipe, or finished floor.
Measure the apron opening at its narrowest point. Subtract approximately 1/8 inch from each side for movement and installation clearance, then confirm the gap remains visually acceptable.
Cut a 1/2-inch exterior-grade plywood panel or a beadboard panel backed by plywood. Seal all six faces and edges with primer or polyurethane before final installation. Install two horizontal cleats or a perimeter frame behind the opening, keeping the cleats away from the pipe route.
Use magnetic cabinet catches for a lightweight decorative panel, or corrosion-resistant screws for a larger panel that needs stronger retention. Add a finger pull, recessed pull, or removable trim piece so the panel can be opened without prying against the tub.
A tub apron is not suitable for every bathtub. Do not use the panel to support the tub rim, conceal an unsealed wet cavity, or cover a pump that needs a larger manufacturer-specified opening.
How Do You Make a Tile-In Bathtub Panel?
Make a tile-in bathtub panel by fitting an aluminum access frame into a supported opening, bonding backer board to the removable carrier, matching the tile grid, and sealing the perimeter with flexible silicone. Tile-in construction should be planned before wall tile because the panel dimensions affect grout lines and cut locations.
Frame the opening between studs with treated or suitable dry lumber, then install the tile-panel frame according to its instructions. Bond a matching cement-board or approved backer-board piece to the removable door carrier.
Dry-lay the surrounding tiles and the door tiles together. Keep grout joints aligned, and avoid placing a narrow sliver of tile at the frame edge. Apply thinset and tile the carrier without exceeding the door’s weight limit.
Grout the fixed wall normally. Leave the door perimeter as a controlled joint and apply color-matched silicone after the grout cures. Cut that silicone line with a sharp knife whenever the panel needs removal.
A tile-in door is a poor choice for a retrofit where the finished tile already ignores a usable grid. In that situation, a framed surface panel may be less attractive but more reliable and easier to service.
Which Alternative Is Better Than a New Panel?
A new panel is usually the best solution when the wall is still open or the plumbing needs recurring access, but a removable tub apron, a neighboring closet panel, or a hinged cabinet door can be better in specific layouts. The correct alternative preserves access while minimizing finish disruption.
| Situation | Preferred solution | Typical labor time | Main limitation |
|---|---|---|---|
| Open wall during renovation | Framed wall panel | 1-2 hours | Must be planned before finish work |
| Finished painted drywall | Surface-mount plastic door | 1-2 hours | Visible perimeter and door |
| Freestanding tub with open apron | Custom plywood panel | 3-5 hours | Requires careful edge sealing |
| Existing tiled wall | Tile-in retrofit panel | 4-8 hours | Tile may need removal or cuts |
| Closet behind tub | Closet-side metal door | 1-2 hours | Door occupies storage-wall space |
What Does a DIY Bathtub Panel Cost?
A DIY bathtub access panel typically costs $25-$70 for a plastic or metal wall door, $60-$120 for a custom wood apron, and $100-$300 or more for a tile-in assembly with backer board, tile, trim, and finishing materials. Labor costs rise sharply when tile or structural framing must be reconstructed.
| Project type | Materials | Typical DIY time | Typical contractor labor |
|---|---|---|---|
| Plastic drywall panel | $25-$45 | 1-2 hours | $150-$350 |
| Metal framed panel | $40-$90 | 1-3 hours | $200-$450 |
| Custom wood apron | $60-$150 | 3-5 hours | $300-$700 |
| Tile-in panel | $100-$300+ | 4-8 hours | $500-$1,200+ |
Prices vary by region, finish, access difficulty, and whether plumbing must be moved. A plumber may charge more when the panel reveals a failed fitting that requires immediate repair.
Common Mistakes and How to Fix Them
The Opening Is Too Small
A small opening may expose the trap but prevent removal of the P-trap, overflow shoe, valve cartridge, or pump. Enlarge the opening before installing the frame, maintaining support and checking for hidden services.
The Panel Crosses a Stud
A stud can block the frame or affect wall strength. Move the opening when possible; never cut structural framing without understanding the wall’s role and installing approved reinforcement.
The Frame Is Not Square
A twisted opening causes a hinged door to rub or a magnetic door to spring open. Remove the frame, correct the blocking, and verify equal diagonals before refastening.
The Door Will Not Latch
A warped frame, excessive screw torque, misaligned magnets, or thick finish can prevent latching. Loosen fasteners slightly, trim the opening, or reposition the catch while keeping the door flush.
Water Enters the Cavity
A panel within the tub’s splash zone needs a gasketed, waterproof-rated design. Ordinary drywall access doors should be moved outside the wet zone or replaced with a manufacturer-approved waterproof access system.
Grout Locks the Tile Door
Remove the grout mechanically and replace the perimeter with flexible silicone. Do not lever against neighboring tiles because the force can crack the tile or loosen waterproofing.
How Can You Keep the Panel Serviceable?
Keep at least 12 inches of working clearance in front of a general plumbing panel and avoid placing permanent cabinets, trim, or flooring over the door. Photograph the cavity, record the valve and pump model, and test removal after every finish coat.
A service opening should permit replacement, not only inspection. Before finishing, simulate the likely repair with the actual tool, replacement part, and hand position.
One practitioner rule matters more than appearance: if a component cannot be removed through the opening without cutting another material, the opening is undersized. A larger, visible panel is cheaper than a second demolition project.
Another counterintuitive rule concerns magnets. Magnetic catches make a panel visually clean, but strong magnets do not compensate for a warped or poorly supported frame. Square construction determines reliability; latch strength only retains the door.
FAQ
Can I Use a 6 x 6-Inch Panel Behind a Bathtub?
A 6 x 6-inch panel can support visual inspection or access to one small shutoff connection, but it is usually inadequate for a bathtub drain, P-trap, waste-and-overflow assembly, or mixing-valve cartridge. Choose at least 12 x 12 inches when two-handed tool access or future component replacement is possible.
Do Bathtubs Need Access Panels by Code?
Building requirements vary by jurisdiction, bathtub type, and manufacturer instructions. Some jurisdictions do not require a panel for every standard tub, while whirlpool manufacturers commonly require pump access for warranty service. Check the local plumbing authority and the bathtub installation manual before closing the wall.
Can an Access Panel Be Installed Inside the Tub Surround?
An access panel can be installed inside a tub surround only when the product is approved for that wet location and the waterproofing system remains continuous. A standard drywall or plastic inspection door is generally better placed on the dry side of an adjacent wall.
Should the Panel Be Behind the Drain or the Faucet?
Place the panel where the most failure-prone or least replaceable component requires access. The drain and waste-and-overflow assembly often need a larger opening, while a valve cartridge may require a separate opening near the faucet. One oversized, well-positioned panel can sometimes serve both zones.
How Do You Hide a Bathtub Access Door?
Hide a bathtub access door by placing it in a closet, matching a painted wall, using a removable beadboard apron, or installing a tile-in carrier aligned with the grout grid. Keep the perimeter removable with silicone or a designed latch system rather than permanent grout.
Can I Make a Panel From Drywall?
You can make a removable panel from drywall when the opening is in a dry, painted wall and the cutout has a supported frame. Seal the edges, use a proper trim or frame, and avoid drywall as the exposed face of a splash-zone door because repeated moisture damages the gypsum core.
The Bottom Line
To make an access panel for bathtub plumbing, locate the actual service components, inspect for hidden utilities, choose an opening large enough for removal, support the frame, and install a door that can be removed without damaging the finish. Use 12 x 12 inches for most plumbing access, 16 x 16 inches or the manufacturer’s specification for a whirlpool pump, and a sealed custom apron when the tub has no accessible wall. A correctly sized, square, removable panel is more valuable than an invisible panel that cannot support the next repair.