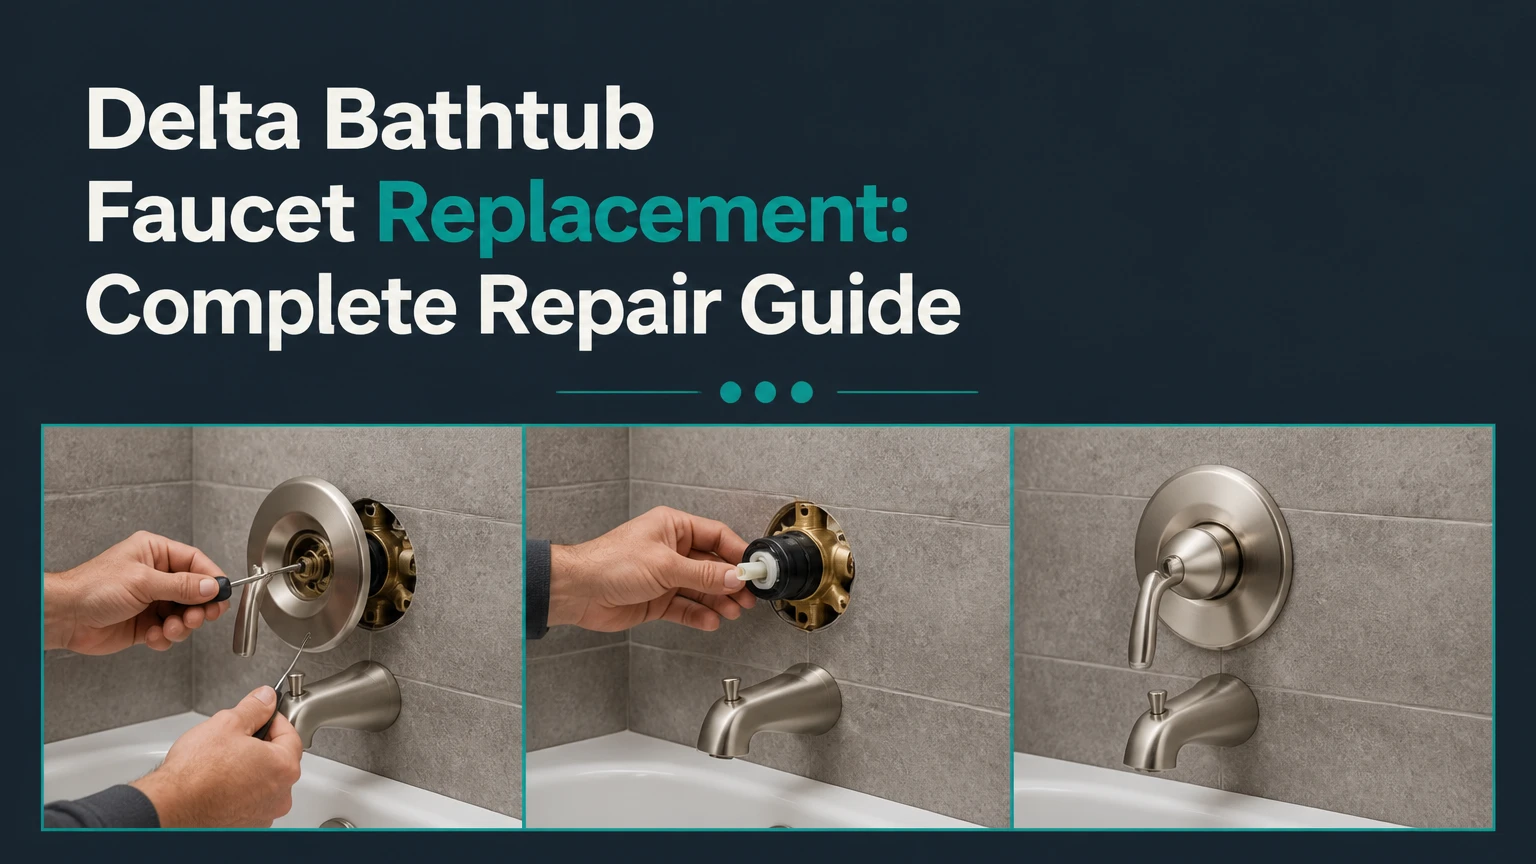
Delta bathtub faucet replacement usually means changing the visible trim, tub spout, internal cartridge, or the entire valve body. A cartridge or trim replacement commonly takes 30-90 minutes without opening the wall, while a rough-in valve replacement requires wall access, new connections, and often a licensed plumber.
Key Facts
A Delta R10000 MultiChoice valve accepts compatible Delta trim without replacing the brass valve body.
Delta Monitor 13/14, Monitor 17, and TempAssure 17T systems use different control designs and cartridges.
RP46074 is commonly used in newer Monitor 13/14 valves; RP19804 is associated with many older Monitor 13/14 installations.
A tub spout that leaks water to the showerhead usually needs a spout or diverter repair, not a cartridge.
A cartridge replacement normally costs $20-$80 for parts; a concealed valve replacement commonly costs $600-$1,500 or more.
The safest temperature check is measured at the tub outlet after reassembly, not inferred from handle position.
What Does Delta Bathtub Faucet Replacement Include?
Delta bathtub faucet replacement includes four different jobs: replacing exterior trim, replacing the cartridge, replacing the tub spout, or replacing the concealed rough-in valve. The correct job depends on where water leaks, whether the handle operates correctly, and whether the existing valve matches the replacement trim.
The visible trim normally includes the handle, escutcheon plate, sleeve, and sometimes the tub spout. The cartridge sits behind the handle and controls water mixing. The rough-in valve is the brass body connected to the home’s hot and cold water lines. These parts do not have the same replacement method or compatibility rules.
A faucet that drips from the tub spout while fully off usually points to the cartridge or valve seals. Water leaking around the handle can indicate cartridge seals, a bonnet problem, or a damaged valve face. Water flowing from the showerhead while the tub is filling usually points to the tub-spout diverter or an incorrectly sized spout.
Which Part Actually Needs Replacing?
| Symptom or goal | Likely part | Wall opening usually needed? | Typical parts cost |
|---|---|---|---|
| Tub spout drips when off | Cartridge or valve seals | No | $20-$80 |
| Water leaks around handle | Cartridge, O-rings, or bonnet seal | No | $15-$80 |
| Handle or plate looks dated | Compatible trim kit | No | $60-$300 |
| Showerhead receives water during tub filling | Tub spout diverter | No | $25-$100 |
| Valve body leaks behind wall | Rough-in valve or supply connection | Usually yes | $100-$400 |
| Want a different control location | New valve and plumbing | Yes | $600-$1,500+ installed |
Replacing only a cartridge will not repair a cracked brass valve body or a failed tub-spout diverter. Diagnosis prevents buying an expensive trim kit for a mechanical problem that the trim cannot fix.
How the Delta System Works
A Delta bathtub faucet mixes hot and cold water inside a cartridge installed in a rough-in valve, while the external handle controls the cartridge and the tub spout directs water to the tub or shower. Pressure-balancing models also react to changes in household pressure to reduce sudden temperature changes.
The R10000 MultiChoice Universal valve is a common Delta rough-in body. Delta describes the MultiChoice system as a way to change compatible trim styles without replacing the valve, but compatibility still depends on the valve generation, cartridge type, and trim series.
The cartridge’s hot and cold ports align with corresponding passages in the valve. In Monitor pressure-balancing designs, a spool responds to pressure differences. In thermostatic designs, the control uses temperature response to maintain a selected outlet temperature more precisely.
What Are the Four Main Components?
- Rough-in valve: The concealed brass housing connected to hot, cold, tub-spout, and shower piping.
- Cartridge: The removable internal assembly that mixes water and controls temperature, volume, or both.
- Trim kit: The handle, escutcheon, sleeve, screws, and decorative cover installed over the valve.
- Tub spout: The lower outlet, often containing a pull-up, pull-down, or front diverter.
The R10000 valve is not the same as an R11000 diverter valve. An R11000 is an additional diverter body used in systems with multiple shower outlets. Confusing those two parts can produce an incorrect purchase and unnecessary wall work.
Which Delta Cartridge or Trim Fits?
The correct Delta cartridge depends on the valve generation and control series, not on the finish or the external handle shape alone. Confirm the model through the old cartridge, trim model number, valve markings, installation date, or Delta’s model-identification resources before ordering.
| Delta series | Control behavior | Common cartridge reference | Main identification clue |
|---|---|---|---|
| Monitor 13/14 | Single handle controls temperature by rotation | RP46074 or RP19804, depending on generation | One lever or knob, no separate volume control |
| Monitor 17 | Separate volume and temperature controls | RP46463 | Large outer handle plus smaller temperature knob |
| TempAssure 17T | Thermostatic temperature control with separate volume | RP47201 | 17T marking or thermostatic trim documentation |
| Older Monitor or ball valve | Earlier mechanical design | Model-specific ball or cartridge parts | Older trim, ball assembly, or non-MultiChoice valve |
RP46074 is widely associated with newer Delta Monitor 13/14 cartridges. RP19804 appears in many older Monitor 13/14 valves and is not interchangeable with every RP46074 installation. The year of installation helps, but the valve and cartridge geometry provide stronger evidence than a date estimate.
A Delta 13/14 trim kit generally cannot be installed on a Monitor 17 or TempAssure 17T valve because those systems require different control interfaces. Finish does not determine compatibility. A chrome trim kit and a brushed-nickel trim kit can fit the same valve if their series and generation match.
Can You Replace Delta Trim Without Replacing the Valve?
You can replace Delta trim without replacing the valve when the existing concealed valve is a compatible MultiChoice body and the new trim belongs to the same supported series. The escutcheon screw pattern, cartridge interface, sleeve depth, and handle connection must all align.
Universal trim claims do not mean every Delta trim fits every Delta valve. Older pre-MultiChoice valves, ball-valve systems, and some pre-2006 installations may require a model-specific trim or a new rough-in valve. Remove the handle and plate, photograph the valve and cartridge, and compare the manufacturer’s installation sheet before purchase.
Before You Start Delta Bathtub Faucet Replacement
Prepare the replacement part, shutoff plan, tools, and temperature-testing method before disassembling the faucet. Most failed DIY repairs begin with an incorrect cartridge, an inaccessible water shutoff, or a stuck part that is forced hard enough to damage concealed piping.
| Preparation item | Typical requirement | Why it matters |
|---|---|---|
| Working time | 30-90 minutes for cartridge or trim | Stuck cartridges can extend the job to 2-3 hours |
| Replacement cartridge | 1 manufacturer-matched unit | Similar-looking Delta cartridges are not universally interchangeable |
| Allen wrench | 3/32-inch or 1/8-inch, model-dependent | Removes many Delta handle set screws |
| Screwdriver | #2 Phillips or flat-head | Removes escutcheon and limit-stop components |
| Wrench or pliers | Smooth-jaw adjustable wrench and tongue-and-groove pliers | Removes bonnet and tub-spout hardware |
| Lubricant | Small amount of silicone plumber’s grease | Protects rubber seals during insertion |
| Safety supplies | Towel, eye protection, bucket, rag | Catches water and protects the tub finish |
Do not use petroleum jelly on faucet O-rings. Petroleum products can damage certain rubber compounds. Do not use a torch near an acrylic tub, waterproofing membrane, or finished wall.
How Do You Replace a Delta Cartridge and Trim?
Replace a Delta cartridge and trim by shutting off water, removing the handle and plate, extracting the retaining hardware and cartridge, installing the new cartridge in the correct orientation, setting the temperature limit, and testing the assembly. The most important success factor is keeping the valve body supported while loosening a seized bonnet.
Step 1: Shut Off Water and Protect the Tub
Close the local service stops if the valve has them; otherwise close the home’s main shutoff. Open the bathtub faucet and a lower faucet to release pressure, then cover the drain with a dense towel.
Confirm that water has stopped before removing the cartridge. Keep screws in a magnetic tray or labeled cup rather than on the tub ledge.
You will know it worked when: the tub outlet stops flowing after the handle is opened.
Common mistake: assuming the bathroom stop valves control the shower valve when the home has only a main shutoff.
Step 2: Remove the Handle and Escutcheon
Loosen the handle’s set screw with the correct Allen wrench, then pull the handle straight off. Remove the escutcheon screws and slide the plate and sleeve away from the wall.
Score paint or old caulk around the plate with a utility knife before pulling. Avoid prying against tile because a replacement plate may not cover chipped edges.
You will know it worked when: the cartridge stem and bonnet nut are fully exposed.
Common mistake: using an oversized hex key that rounds the set screw.
Step 3: Remove the Bonnet or Retaining Clip
Identify the retaining method. Many Delta MultiChoice valves use a threaded brass bonnet nut, while some cartridge arrangements use a retaining clip. Remove the clip with pliers or loosen the bonnet counterclockwise with a smooth-jaw wrench.
Support the valve body with your other hand if the bonnet resists. The support matters because twisting the valve can stress copper, PEX, or threaded connections behind the wall.
You will know it worked when: the cartridge has no retaining hardware holding it in place.
Common mistake: gripping the finished valve body with serrated pliers and damaging its sealing surface.
Step 4: Extract the Old Cartridge
Pull the cartridge straight outward while rocking it gently from side to side. If mineral scale has seized the cartridge, use a Delta-compatible cartridge puller rather than applying increasing force to the stem.
After removal, inspect the brass chamber with a flashlight. Remove loose scale and fragments with a soft cloth, then flush briefly only after covering exposed surfaces so debris does not enter the tub-spout or shower piping.
You will know it worked when: the old cartridge comes out without gouging the valve bore.
Common mistake: levering against the valve body with a screwdriver, which can damage the brass sealing surface.
Step 5: Install the New Cartridge
Apply a thin film of silicone plumber’s grease to the cartridge’s exterior O-rings. Align the cartridge keys with the valve grooves and orient the hot-side marking according to the manufacturer’s instructions, commonly with the “H” toward the left when facing the valve.
Do not force a cartridge that stops halfway. Remove it, check O-ring position and debris, and try again. A displaced O-ring can cause a leak or make the retaining bonnet impossible to seat.
You will know it worked when: the cartridge sits flush and the retaining hardware threads by hand.
Common mistake: installing the cartridge backward, which reverses hot and cold operation.
Step 6: Reinstall Hardware and Set the Temperature Limit
Thread the bonnet by hand first, then tighten it only enough to secure the cartridge. Reinstall the limit-stop ring, sleeve, escutcheon, and handle according to the trim instructions.
The rotational limit stop restricts handle travel toward hot water. Set it conservatively, restore water, and measure the tub outlet with a thermometer after several minutes of flow. Local plumbing rules often limit residential hot-water delivery to approximately 120°F, but the applicable authority and manufacturer instructions control.
You will know it worked when: the handle turns smoothly, the faucet shuts off, and the water temperature changes predictably.
Common mistake: overtightening the bonnet, which can compress the cartridge and create a stiff handle.
Step 7: Replace the Delta Tub Spout if Needed
Identify the spout connection before buying its replacement. A slip-on spout has a set screw underneath and slides over a smooth copper stub; a threaded spout rotates off a male threaded nipple or adapter.
Measure the exposed pipe length and verify the new spout’s connection depth. Apply the sealant specified by the manufacturer, avoiding excessive tape that can enter the piping. Test the diverter in both positions.
You will know it worked when: water exits the tub spout with the diverter open and reaches the showerhead only when the diverter is engaged.
Common mistake: forcing a slip-on spout onto a threaded nipple or shortening the pipe so the new spout cannot seal.
Which Replacement Approach Is Right?
Trim-and-cartridge replacement is the better choice when the concealed valve is sound, the control location is acceptable, and compatible parts remain available. Rough-in valve replacement is justified when the body leaks, the old valve lacks suitable replacement parts, or the remodel requires a different configuration.
| Project scope | DIY suitability | Typical duration | Typical installed cost | Wall access |
|---|---|---|---|---|
| Cartridge only | Moderate | 30-120 minutes | $100-$350 | Usually none |
| Trim kit only | Moderate | 30-90 minutes | $150-$500 | Usually none |
| Tub spout only | High | 20-60 minutes | $75-$250 | None |
| Cartridge plus trim and spout | Moderate | 1-3 hours | $200-$650 | Usually none |
| Rough-in valve replacement | Low to moderate | 4-8 hours | $600-$1,500+ | Usually required |
The low-cost repair is not always the durable repair. A badly scored valve bore can damage a replacement cartridge quickly, while a concealed pipe connection that moves during bonnet removal may create a leak that is more expensive than the original drip.
When Is a Full Valve Replacement Necessary?
A full valve replacement is necessary when the brass valve body is cracked, its internal sealing surfaces are permanently damaged, its connections leak behind the wall, or no compatible cartridge and trim remain available. It is also necessary when the homeowner wants to relocate the control or add a different plumbing arrangement.
A new rough-in valve usually requires cutting drywall or tile, disconnecting water lines, securing the body at the manufacturer’s specified depth, and pressure-testing before closing the wall. Copper soldering, PEX connections, waterproofing, and local permit rules can change the project’s risk substantially.
How Much Does Delta Bathtub Faucet Replacement Cost?
Delta bathtub faucet replacement costs typically range from $20-$80 for a cartridge, $60-$300 for trim, $25-$100 for a tub spout, and $600-$1,500 or more for a concealed valve replacement with professional labor. Regional labor rates, wall repair, finish selection, and access determine the final price.
| Replacement item | Typical parts range | Typical labor range | Main cost variable |
|---|---|---|---|
| Monitor cartridge | $20-$80 | $80-$250 | Seized cartridge and service access |
| Monitor 13/14 trim | $60-$200 | $100-$300 | Finish and series compatibility |
| Monitor 17 or 17T trim | $150-$500 | $150-$400 | Separate volume and temperature controls |
| Tub spout | $25-$100 | $50-$150 | Threaded versus slip-on connection |
| R10000 valve replacement | $100-$400 | $400-$1,100+ | Wall opening and pipe material |
Manufacturer parts can cost more than generic substitutes, but exact fit and seal geometry matter inside a pressure-balancing valve. A generic cartridge that appears similar may produce poor temperature control, a stiff handle, or persistent dripping.
What Problems Appear After Replacement?
Most post-replacement problems come from incorrect cartridge orientation, debris in the valve, an over-tightened bonnet, or a tub-spout connection that does not match the pipe. Diagnose the location and timing of the water before removing newly installed parts.
| Problem | Probable cause | Corrective action |
|---|---|---|
| Tub spout drips when off | Cartridge seal, debris, or damaged valve bore | Shut off water, inspect cartridge seating, replace if needed |
| Handle is stiff | Bonnet too tight, scale, or dry O-rings | Loosen slightly, remove and lubricate cartridge correctly |
| Hot and cold are reversed | Cartridge orientation is wrong | Reinstall according to the H-side instruction |
| Showerhead flows during tub filling | Spout diverter or restricted spout | Replace or inspect tub spout |
| Leak around escutcheon | Stem seal, bonnet, or valve-face problem | Remove plate, identify leak path, reseat or replace parts |
| Handle will not align | Wrong trim generation or stem adapter | Verify series, cartridge, and handle adapter |
A dripping tub spout immediately after installation does not always mean the new cartridge is defective. Dirt left in the valve chamber can lodge against the new seals, and an O-ring can roll during insertion.
What Should You Do if the Cartridge Is Stuck?
Use a cartridge puller after removing the retaining hardware, and stop if the valve body begins to move. Penetrating oil is not a suitable substitute for faucet-safe lubricant inside the water passage, and excessive heat can damage wall materials and valve components.
For severe scale, repeated gentle movement, a purpose-made extractor, and careful cleaning are safer than twisting the stem until it breaks. If the valve rotates inside the wall, close the main water supply and inspect the opposite side of the wall for moisture before continuing.
When Should You Call a Plumber?
Call a plumber when the valve body moves, a concealed connection leaks, the wall must be opened, the cartridge breaks during extraction, or soldering and water-line alterations are required. A professional is also appropriate when the home lacks a reliable shutoff or the repair occurs in a condominium with shared plumbing.
A straightforward cartridge replacement is within many homeowners’ abilities, but the risk changes when the faucet is installed behind finished tile or an acrylic surround. A small access panel on the opposite side of the wall can reduce future repair cost, provided the opening remains serviceable and protected from moisture.
Expert Rules That Prevent Expensive Repairs
- Support before torque: Hold the valve body while loosening a stubborn bonnet. The hidden piping is often less replaceable than the visible faucet.
- Treat the cartridge bore as a sealing surface: Scale fragments and scratches matter because the cartridge depends on close-fitting seals, not only on the retaining nut.
- Test temperature after flow stabilizes: Run the faucet for several minutes before measuring. A brief temperature reading can misrepresent the water heater and pressure-balancing behavior.
- Buy the cartridge after identification: The trim finish is a poor predictor of internal parts. Photograph the old cartridge and valve before visiting a supplier.
- Do not use the spout as a valve repair: A diverter controls outlet direction, while the cartridge controls water shutoff and mixing. They solve different failures.
Delta’s installation materials and support documentation should take precedence over general instructions when model-specific details conflict. Delta’s published product literature also distinguishes pressure-balancing Monitor controls from TempAssure thermostatic controls, so replacing one series with another requires more than matching the decorative finish.
Frequently Asked Questions
Can I replace a Delta bathtub faucet with another brand?
You can replace the tub spout with another brand if the connection type, pipe length, and diverter design match. Replacing the wall trim with another brand is more restrictive because the handle and escutcheon must interface with the existing valve. A universal-looking trim kit is not automatically compatible with a Delta R10000 valve.
How do I identify my Delta bathtub faucet model?
Identify a Delta faucet by checking the handle, escutcheon, cartridge, valve markings, installation paperwork, and replacement-part diagrams. The number of handles helps narrow the series, but it does not prove compatibility. Remove the trim only after shutting off water, then photograph the cartridge and retaining method for comparison.
Does Delta offer replacement parts for older faucets?
Delta continues to support many older faucets, but availability varies by series and production generation. Older ball-valve systems and pre-MultiChoice valves may use parts that differ from current Monitor cartridges. If the original cartridge is unavailable, a compatible repair kit or rough-in replacement may be more practical than forcing current trim onto the old valve.
Can a bad cartridge reduce water pressure?
A failed or obstructed cartridge can reduce flow through the tub spout or showerhead, especially when debris blocks an inlet screen or passage. Low pressure throughout the home indicates a supply problem instead. Check the aerators, showerhead, service stops, spout diverter, and cartridge separately before replacing the valve.
Should I replace the cartridge or the entire faucet?
Replace the cartridge when the handle, trim, valve body, and tub spout remain serviceable. Replace the trim when appearance or handle damage is the main issue. Replace the complete valve when the concealed body leaks, the valve is incompatible with available parts, or the renovation requires a new control layout.
The Bottom Line
Delta bathtub faucet replacement is usually a cartridge, trim, or tub-spout project rather than a complete wall-opening renovation. Identify the Delta series first, match the cartridge and trim to the valve generation, support the rough-in body during removal, and test both shutoff performance and outlet temperature before finishing the job. When the valve body or concealed piping leaks, stop and use a qualified plumber.