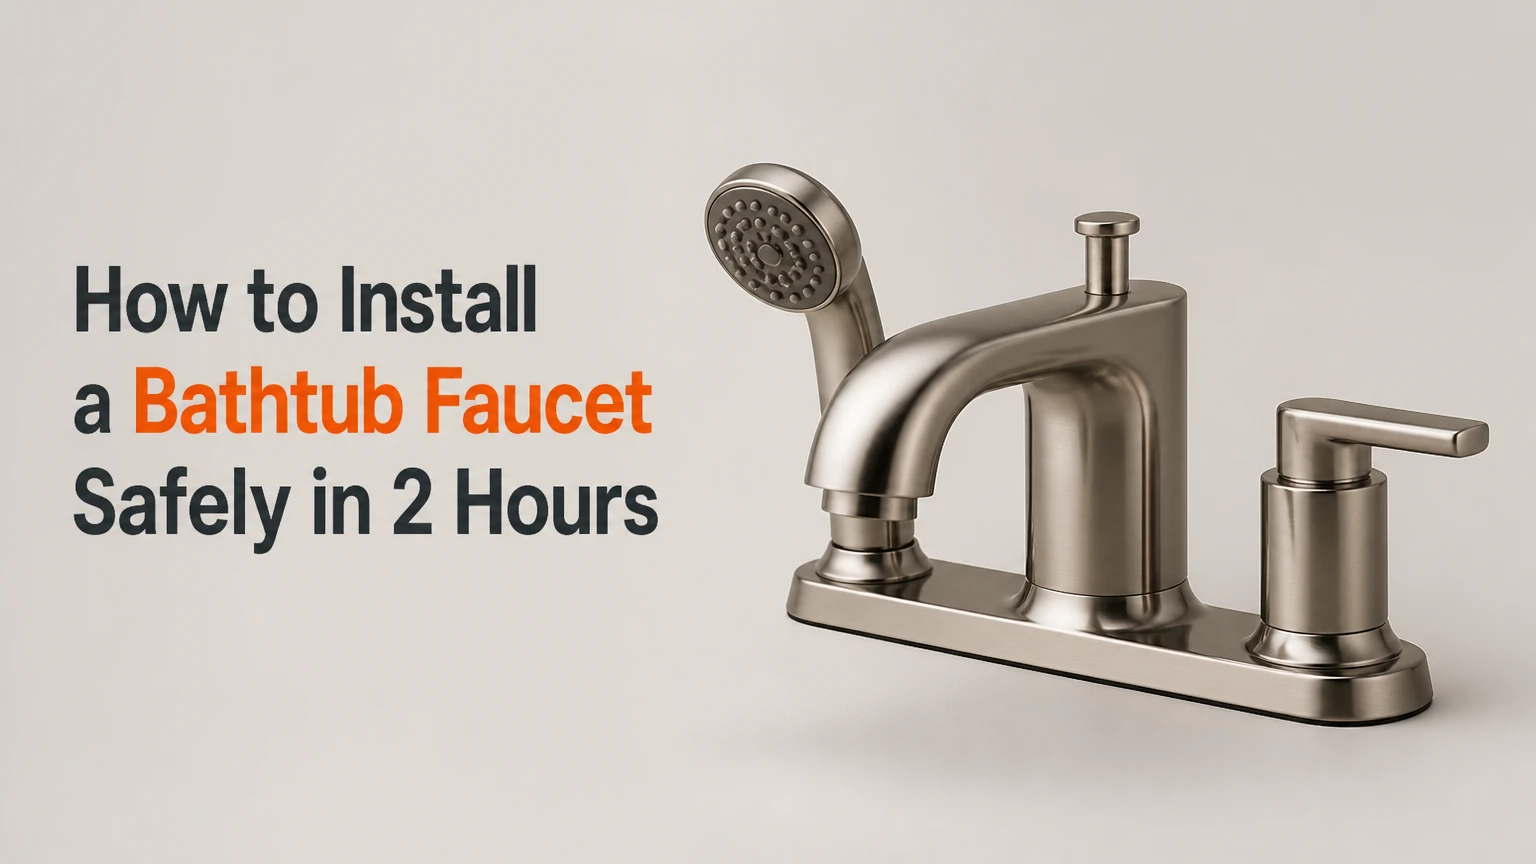
To install a bathtub faucet, shut off and drain the water, remove the old trim, connect a compatible valve and supply lines, flush and pressure-test the plumbing, then install the spout and trim. A simple faucet replacement usually takes 1-3 hours; a new concealed valve installation takes 4-8 hours because wall access and rough-in accuracy determine success.
Key Facts at a Glance
- A wall-mounted tub faucet valve normally uses 1/2-inch water connections, but the faucet manufacturer determines the required port type and spacing.
- Hot water conventionally connects on the left and cold water on the right when facing the valve.
- A slip-on tub spout uses a set screw, while a threaded spout uses a threaded pipe nipple; the two connection methods are not interchangeable.
- A concealed valve must be firmly attached to blocking before the wall is closed, or the trim and spout can move during use.
- Flush the hot and cold supply lines before installing the cartridge because solder, pipe scale, and construction debris can damage seals.
- Never close the wall until every accessible and concealed connection has passed a leak or pressure test.
Before You Start: Identify the Installation
Bathtub faucet installation falls into two different projects: replacing exposed trim and spout, or installing a new valve and plumbing rough-in. A replacement can often be completed from the bathroom side, while a new installation requires access behind the wall or an opened tile or drywall surface.
The faucet type determines the sequence. An alcove tub with a shower usually has a wall-mounted valve, a drop-in tub commonly uses a deck-mounted Roman filler, and a clawfoot or freestanding tub may use a floor-mounted filler or a tub-mounted supply set.
At-a-Glance Project Requirements
| Project type | Typical time | Typical DIY cost | Required access |
|---|---|---|---|
| Tub spout replacement | 30-60 minutes | $25-$120 | Bathroom side |
| Trim and cartridge replacement | 1-2 hours | $75-$300 | Bathroom side |
| Wall valve replacement | 4-8 hours | $150-$600 | Open wall or rear access |
| Deck-mounted Roman faucet | 2-4 hours | $150-$900 | Cabinet or access panel |
| Freestanding floor filler | 4-8 hours | $300-$1,500 | Subfloor and finished-floor access |
These are typical North American ranges for materials and DIY work, excluding tile repair, permits, and regional labor differences. Product prices vary sharply by finish, valve type, brand, and whether a hand shower is included.
Which Bathtub Faucet Type Fits Your Tub?
The correct bathtub faucet type is the one that matches the tub’s mounting surface and existing water connections. Wall-mounted faucets suit alcove tubs, deck-mounted faucets suit drilled rims or platforms, and freestanding fillers require plumbing through the floor.
| Faucet type | Mounting location | Common supply size | Best installation situation |
|---|---|---|---|
| Wall-mounted mixer | Finished wall above tub | 1/2-inch typical | Alcove tub and shower combination |
| Deck-mounted Roman filler | Tub rim or platform | 1/2-inch or 3/4-inch typical | Drop-in tub with service access |
| Floor-mounted filler | Finished floor beside tub | 1/2-inch or 3/4-inch typical | Freestanding or clawfoot tub |
| Tub-mounted clawfoot set | Tub end holes | 3/4-inch or model-specific | Vintage-style exposed plumbing |
A wall-mounted replacement is the most practical DIY project when the existing valve body remains compatible with the new trim. Trim kits are not universally interchangeable. A new handle or escutcheon may fit only the valve family specified by the manufacturer.
What Measurements Matter?
Measure the existing center-to-center spacing, connection type, spout projection, wall thickness, and distance from the finished wall to the tub rim. Common shower-valve spreads include 4 inches, 6 inches, and 8 inches, so an 8-inch assumption can create an unusable replacement.
| Measurement | Typical value | Why it matters |
|---|---|---|
| Valve connection | 1/2-inch NPT, sweat, PEX, or CPVC | Determines adapters and joining method |
| Valve spread | 4, 6, or 8 inches | Controls trim compatibility |
| Tub spout pipe | 1/2-inch copper, brass, or iron pipe | Determines slip-on or threaded spout |
| Spout projection | Manufacturer-specific | Keeps the stream inside the tub |
| Showerhead height | About 72-78 inches above floor | A planning range, not a universal code rule |
Do not select a tub spout by reach alone. The outlet must clear the tub rim and direct water into the basin, while the connection must match the pipe extending from the wall. The faucet installation manual overrides generic dimensions.
What Tools and Materials Do You Need?
A typical wall-mounted replacement needs an adjustable wrench, hex keys, a tub-spout tool, screwdriver, flashlight, bucket, rags, silicone sealant, and replacement parts. A concealed valve installation additionally needs pipe cutters, a tubing deburring tool, supports or blocking, compatible fittings, and the correct joining equipment.
Tools and Materials Checklist
| Item | Quantity | Use |
|---|---|---|
| Adjustable wrench | 1 | Supply and valve connections |
| Basin or internal spout wrench | 1 | Removing recessed threaded spouts |
| Hex-key set | 1 set | Set screws and handles |
| Silicone bathroom sealant | 1 tube | Escutcheon and spout sealing |
| PTFE tape or approved thread sealant | 1 roll | Compatible tapered threaded joints |
| Bucket and absorbent towels | 1 each | Drainage and spill control |
| Pipe cutter | 1 | Copper, PEX, or CPVC preparation |
| Pipe supports or blocking | As required | Securing valve and risers |
| Test caps or manufacturer plugs | 2-4 | Flushing and pressure testing |
Use PTFE tape only on compatible tapered pipe threads. Do not apply tape to compression threads, union faces, cartridge seals, or slip-fit spout connections. Plumber’s putty is generally intended for drain and strainer work, not every faucet joint; follow the faucet instructions.
How to Install a Bathtub Faucet: Step-by-Step
The following procedure covers a wall-mounted faucet and valve. Steps 1-5 apply to many replacements; steps 6-10 apply when the valve or rough-in plumbing is also changing.
Step 1: Shut Off and Drain the Water
Close the bathroom isolation valves if the fixture has them; otherwise, close the home’s main water shutoff and open a lower-level faucet to relieve pressure. Open the tub faucet briefly, place a bucket below accessible connections, and confirm that no water continues entering the line.
You’ll know it worked when: the faucet produces no sustained flow and the pressure gauge, if used, falls to zero.
Common mistake: assuming a nearby sink shutoff controls the tub. Test the tub before loosening any fitting.
Step 2: Protect the Tub and Remove the Existing Trim
Cover the tub drain and floor with a cloth, then remove the handle, escutcheon, diverter trim, and tub spout. A slip-on spout has a small screw underneath; a threaded spout turns counterclockwise, although corrosion may require a strap wrench or internal spout wrench.
Remove the fastener before twisting a slip-on spout. Cutting a stuck spout can damage the copper stub-out, so stop if the pipe begins rotating inside the wall.
You’ll know it worked when: the pipe stub, valve stem, and wall opening are visible without damaged threads or a loose pipe.
Common mistake: prying against tile with metal tools. Protect finished surfaces with cardboard and use a plastic trim tool where possible.
Step 3: Inspect the Existing Valve and Pipe Stub
Determine whether the new trim fits the existing valve. Record the valve brand, model markings, handle orientation, port direction, spread, and distance from the finished wall to the valve face.
A trim-only replacement is appropriate when the valve is sound, the cartridge is available, and the new trim is specifically listed as compatible. Replace the valve when the body is corroded, the cartridge is obsolete, the connections leak, or the new trim requires a different valve.
You’ll know it worked when: the compatibility information matches the exact valve family, not merely the same brand.
Common mistake: buying a faucet trim kit based on appearance. Decorative similarity does not establish mechanical compatibility.
Step 4: Remove the Old Valve Only When Necessary
Open the wall from the bathroom side or use rear access before removing a concealed valve. Support nearby piping, disconnect the hot, cold, tub-spout, and shower-riser connections, and remove the valve from its blocking.
For soldered copper, protect framing and finished surfaces from heat, and remove combustible materials from the torch area. For PEX, use the manufacturer-approved transition fittings and crimp or clamp tools. For CPVC, use the cement system specified for that pipe.
You’ll know it worked when: each pipe end is clean, round, supported, and long enough for the replacement fitting.
Common mistake: twisting unsupported supply lines. Movement at a wall penetration can loosen a connection farther back.
Step 5: Install Solid Blocking Behind the Valve
Fasten the valve to wood or metal blocking at the depth specified by the manufacturer. The finished-wall reference mark must align with the valve body, because a valve set too deep or too far forward can prevent the escutcheon from sealing.
Keep the valve level and orient the marked hot, cold, tub, and shower ports correctly. Many valves label the tub outlet “TUB” and the shower outlet “SHOWER,” but port layouts vary.
You’ll know it worked when: the valve cannot rotate by hand, the trim depth falls within the manual’s range, and the outlets point toward their destinations.
Common mistake: attaching the valve to flexible pipe without structural support. Flexible connections carry water, not the mechanical load of a faucet assembly.
Step 6: Connect the Hot and Cold Supply Lines
Connect hot water to the valve’s hot inlet and cold water to the cold inlet, normally left and right when facing the valve. Use compatible adapters for copper sweat, PEX, CPVC, or threaded pipe, and keep the joints accessible until testing is complete.
A pressure-balancing or thermostatic valve may operate incorrectly if the supplies are reversed. Some valves include integral check stops or require separate service stops, so install those components exactly as specified.
You’ll know it worked when: each line reaches the correct labeled port, the valve remains level, and no pipe places sideways stress on the body.
Common mistake: mixing PEX fitting systems. PEX crimp, clamp, expansion, and push-to-connect components use different tools and compatibility requirements.
Step 7: Connect the Tub Spout and Shower Riser
Run the lower valve outlet to a drop-ear elbow for the tub spout and the upper outlet to the shower riser. Use a rigid, supported connection for the tub spout; unsupported PEX can flex when the diverter is operated and may cause a loose or leaking spout.
The tub-spout connection must match the selected spout. A threaded spout needs the correct threaded nipple length, while a slip-on spout needs a smooth, properly sized copper or brass stub and a clean set-screw surface.
You’ll know it worked when: the spout pipe is aligned, securely supported, and projects the length required by the spout instructions.
Common mistake: using PTFE tape on the smooth pipe of a slip-on spout. The set screw and internal O-ring create the seal, not tape.
Step 8: Flush the Supply Lines
Remove the cartridge or use the manufacturer’s flushing procedure before opening water through a new valve. Install temporary caps or plugs, open the supply slowly, and flush each line into a bucket until the water is clear.
Flushing removes metal filings, solder residue, pipe scale, and construction debris. Delta and other manufacturers commonly require flushing procedures that protect the cartridge from debris; the exact sequence differs by valve model.
You’ll know it worked when: water runs clear and the valve’s internal passages contain no visible particles.
Common mistake: flushing through the installed cartridge. Debris can score ceramic discs or lodge in pressure-balancing components before the faucet is used.
Step 9: Pressure-Test Every Connection
Open the shutoff slowly and inspect the hot, cold, tub, shower, and service-stop connections with dry tissue. Leave the system pressurized for at least 10 minutes, then repeat the inspection after operating the valve and diverter.
For new construction, follow the local plumbing code and the valve manufacturer’s test-pressure requirement. A typical residential water test may use the system’s normal pressure or a specified higher test pressure, but never exceed the lowest-rated component.
You’ll know it worked when: dry tissue remains dry around every joint and no pressure loss appears during the specified test.
Common mistake: testing only while water flows. A slow concealed leak may appear after the line remains pressurized.
Step 10: Install the Cartridge, Trim, Handle, and Spout
Install the cartridge in the orientation marked by the manufacturer, then fit the retaining clip, trim plate, handle, and diverter components. Apply a continuous bead of bathroom-grade silicone around the upper and side edges of the escutcheon, leaving the lower edge open when the instructions allow drainage.
Install the spout according to its connection type. Threaded spouts need the correct sealant on compatible pipe threads; slip-on spouts need a square pipe end and a firmly tightened set screw.
You’ll know it worked when: the handle rotates smoothly, the trim sits flush, the spout does not wobble, and water enters the tub without contacting the wall.
Common mistake: caulking every edge of the escutcheon. A fully sealed plate can trap water behind the trim if the valve area ever gets wet.
How Do Replacement and New Installations Differ?
A faucet-only replacement changes the visible hardware and sometimes the cartridge, while a new installation changes the valve, supply lines, blocking, spout connection, and shower riser. Replacement is usually a bathroom-side project; new rough-in work is a wall or floor plumbing project.
| Work item | Trim replacement | Valve replacement | New bathroom rough-in |
|---|---|---|---|
| Wall opening | Usually none | Often required | Required |
| Water shutoff | Required | Required | Required |
| Cartridge service | Possible | New cartridge | New cartridge |
| Pipe cutting | Rarely | Usually | Always likely |
| Pressure test | Fixture test | Required before closure | Required before closure |
| Tile repair risk | Low | Moderate to high | High |
Do not replace a concealed valve simply because the handle leaks. A replaceable cartridge may solve the problem without opening the wall, provided the valve body and stops remain sound.
What Changes for Deck-Mounted and Freestanding Faucets?
Deck-mounted and freestanding faucet installations require the same shutoff, connection, flushing, and leak-testing principles, but their rough-in location changes. Deck-mounted faucets use holes in the tub rim or platform, while freestanding fillers need accurately positioned floor supplies anchored below the finished surface.
Deck-Mounted Roman Faucet
Confirm the number of holes, hole diameter, faucet spread, deck thickness, and access-panel location before drilling. Install the faucet body with the supplied gasket, connect flexible supplies without kinks, and leave enough access to replace cartridges and hoses later.
A deck-mounted filler is a poor choice when the tub has no service access and the surrounding platform cannot be removed. A small leak beneath the deck can damage cabinetry before it becomes visible.
Freestanding or Clawfoot Filler
Set the tub in its final position before marking the floor supply location. Connect the floor-mounted filler to a properly anchored supply fitting, maintain the manufacturer’s clearance from the tub, and test the connection before installing decorative floor covers.
Freestanding fillers are unsuitable for a floor that cannot be opened or reinforced. Their tall bodies can also be knocked, so the supply connection needs rigid support rather than a flexible line alone.
Common Mistakes and How to Fix Them
| Failure | Likely cause | Corrective action |
|---|---|---|
| Spout leaks at wall | Wrong connection type or damaged O-ring | Replace with matching slip-on or threaded spout |
| Water leaks behind wall | Loose joint or unsupported pipe | Shut off water, expose connection, repair and retest |
| Shower runs while tub fills | Incorrect diverter or crossed ports | Verify valve port labels and diverter assembly |
| Handle turns opposite direction | Cartridge installed backward | Remove handle and reinstall cartridge correctly |
| Low flow after installation | Debris in cartridge or stop | Flush valve, clean stops, inspect cartridge |
| Valve moves with handle | Missing or weak blocking | Open wall and secure valve to structural support |
Why Do New Faucet Connections Leak?
New bathtub faucet connections usually leak because the joint type, sealant, or pipe support is wrong. Tapered pipe threads need compatible sealant, compression fittings need clean square tubing, and slip-on spouts need an undamaged O-ring and correctly tightened set screw.
Over-tightening is especially damaging on brass and plastic fittings. Tighten according to the manufacturer’s instructions; where no specification exists, hand-tight plus modest wrench adjustment is safer than forcing the joint.
Why Does a New Tub Spout Drip?
A tub spout can drip because the diverter is not sealing, the spout is loose, or the valve cartridge is allowing water through. A diverter spout may release a small amount of residual water after shower use, but continuous dripping after the valve is closed indicates a valve or diverter fault.
Remove mineral deposits from a removable spout with diluted vinegar only when the finish and manufacturer permit it. Replace a worn diverter or cartridge rather than repeatedly tightening the spout.
When Should You Hire a Plumber?
Hire a licensed plumber when the main shutoff does not stop flow, the wall contains inaccessible connections, the project requires torch work near finished materials, a drain or supply line is damaged, or local code requires a permit or licensed trade. A plumber is also the safer choice when a concealed leak has already damaged framing, insulation, or electrical wiring.
The job is usually within capable DIY reach when replacing a compatible trim kit or tub spout with working shutoffs and visible connections. New valve installation demands greater caution because one failed joint can release water inside a closed wall for hours.
What Does Professional Installation Cost?
Typical professional labor ranges from $150-$400 for a straightforward faucet or spout replacement and $500-$1,500 or more for a concealed valve, wall repair, or floor-mounted filler. Tile removal, soldering, difficult access, permit requirements, and drywall finishing increase the total.
| Installation scope | Typical labor | Typical duration | Main price variable |
|---|---|---|---|
| Tub spout replacement | $75-$200 | 30-90 minutes | Corrosion and access |
| Trim and cartridge | $150-$350 | 1-3 hours | Valve compatibility |
| Concealed wall valve | $400-$1,000 | 4-8 hours | Wall and tile repair |
| Deck-mounted filler | $250-$700 | 2-5 hours | Access-panel condition |
| Freestanding filler | $500-$1,500 | 4-8 hours | Subfloor and supply location |
Expert Installation Rules That Prevent Callbacks
Use the finished wall as the reference plane. Valve depth should be measured from the framing or temporary surface only after accounting for backer board, tile, mortar, and waterproofing. A valve that is 1/2 inch too deep can make the trim unusable even when every pipe connection is sound.
Treat the tub-spout line as a rigid assembly. The short run between the valve and spout experiences movement during diverter operation. A supported drop-ear elbow and rigid pipe reduce vibration, noise, and seal failure.
Test before cosmetic completion. Install temporary trim or test caps, pressurize the system, operate hot and cold water, and inspect again after ten minutes. Closing the wall first converts a $20 fitting repair into a wall and tile repair.
Do not assume a universal rough-in dimension. Generic heights such as four inches above the tub rim are planning references, not guaranteed requirements. The faucet manual, tub geometry, local code, and finished-wall thickness control the final position.
FAQ
Can You Replace a Bathtub Faucet Without Opening the Wall?
You can replace a tub spout, handle, escutcheon, or compatible cartridge without opening the wall when the existing valve and pipe stub are serviceable. Replacing a concealed valve usually requires bathroom-side access or a rear access panel, especially when the existing connections are soldered or the new valve has different spacing.
How Long Should Silicone Caulk Cure Before Using the Tub?
Bathroom silicone commonly needs about 24 hours to cure before prolonged water exposure, although temperature, humidity, bead thickness, and product instructions change the period. Keep the area dry for the sealant’s stated cure time, and do not substitute cure time for pressure-testing the plumbing.
Is PEX Acceptable for a Tub Faucet Installation?
PEX is commonly acceptable for supply lines when local code and the valve manufacturer permit it. The tub-spout branch usually needs rigid support and may require copper or another approved rigid material because flexible pipe can restrict diverter performance or allow the spout connection to move.
How Do You Know Whether a Tub Spout Is Slip-On or Threaded?
A slip-on spout usually has a set screw beneath the body and slides over a smooth 1/2-inch pipe stub. A threaded spout has internal threads and screws onto a threaded nipple. Remove the spout carefully, because forcing the wrong type can twist concealed piping or damage the wall connection.
Should the Tub Faucet Be Caulked Around the Spout?
Caulk the joint between the wall and spout when the manufacturer recommends it and when the spout design leaves a gap that can admit water. Do not block a required drain opening or use caulk to compensate for a loose pipe, incorrect nipple length, damaged O-ring, or failed threaded seal.
The Bottom Line
How to install bathtub faucet work safely depends primarily on identifying the mounting type, matching every connection to the manufacturer’s valve and spout requirements, and testing before the wall or access panel closes. A simple replacement may take 1-3 hours, while a new concealed valve commonly takes 4-8 hours. Shut off the water, support the plumbing, flush debris, pressure-test every joint, and call a plumber when access, code, heat, or concealed damage exceeds your tools and experience.