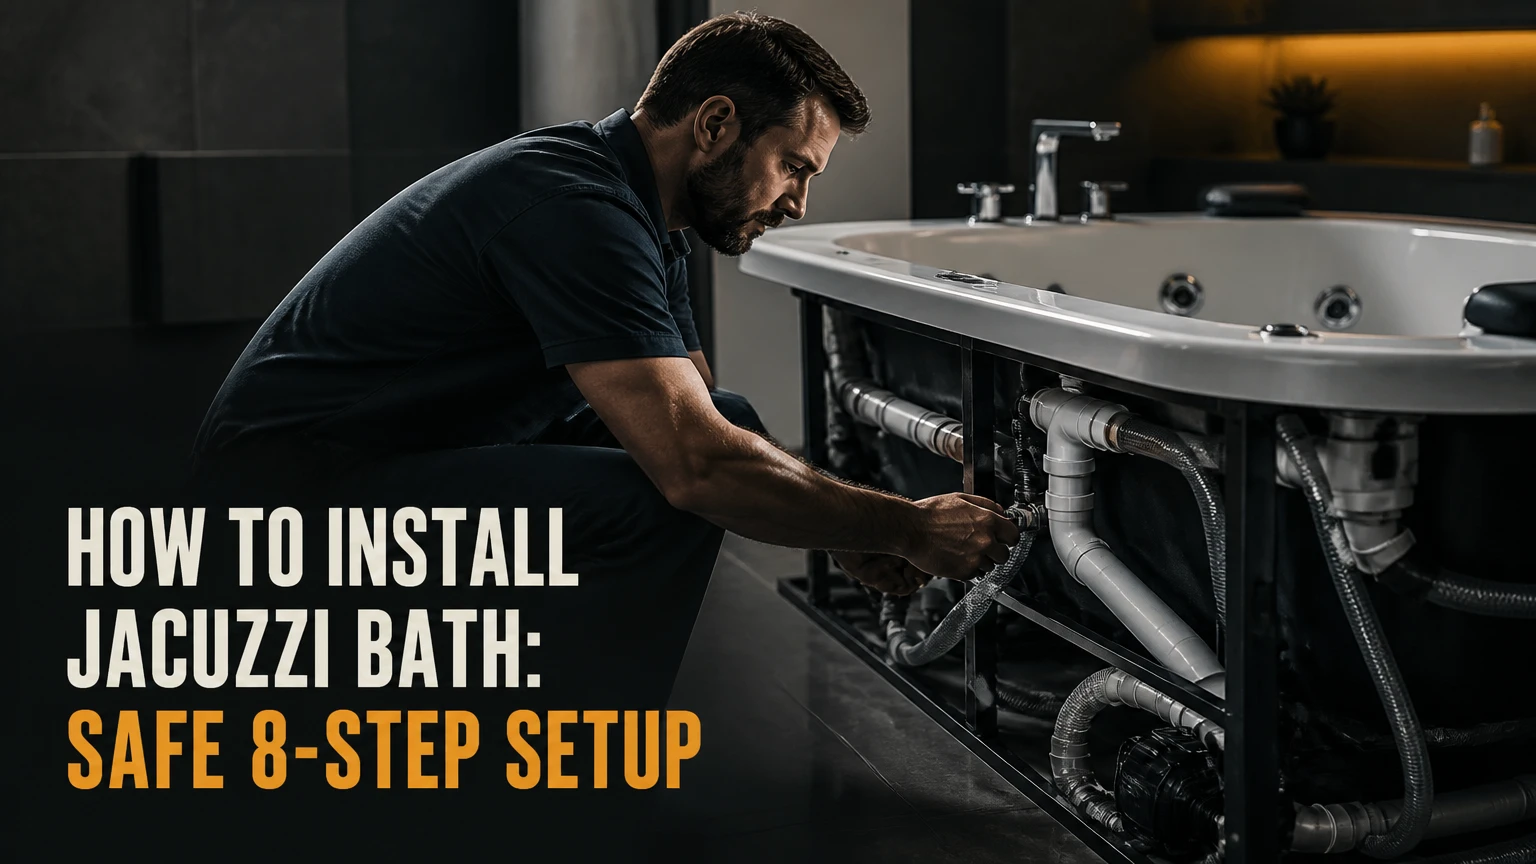
Installing a Jacuzzi bath, meaning a jetted or whirlpool bathtub, involves positioning the shell, connecting the waste and overflow, providing manufacturer-specified structural support, and wiring the pump through required GFCI protection. Allow 2-4 days for a straightforward replacement, but use a licensed electrician for fixed wiring and confirm the exact installation manual before closing any wall or access panel.
Key Facts at a Glance
A Jacuzzi bath must be supported according to its model instructions, because acrylic shells can crack when the rim or floor carries unintended loads.
A pump must never run without water covering the suction fitting and jets.
Electrical requirements vary by pump, heater, air blower, voltage, and local code; a dedicated GFCI-protected circuit is common, but the manual controls the design.
The pump, motor, drain, and electrical connections need permanent service access after the surround is finished.
Test the drain, overflow, pump, jets, and supply connections before waterproofing or tiling the enclosure.
A typical replacement costs $2,500-$7,500, while major electrical, structural, and tile work can raise the project above $10,000.
What Is a Jacuzzi Bath?
A Jacuzzi bath is a bathtub with a powered hydrotherapy system that circulates water or air through body jets. “Jacuzzi” is a registered brand name commonly used for jetted baths generally, so installation requirements come from the actual manufacturer, model, pump assembly, and local plumbing and electrical codes.
A water-jet whirlpool draws bathwater through a suction fitting, sends it through a pump, and returns it through directional jets. Many jets use an air-control line that mixes air with the water stream. An air bath uses a blower to push air through small injectors, usually in the tub floor or lower sidewalls. Combination units contain separate water and air systems.
The distinction matters during installation. A pump requires water-filled testing, a blower needs suitable ventilation and electrical capacity, and a combination bath may need more than one circuit or a larger service arrangement. Read the technical drawing before framing the room.
How Does the Hydrotherapy System Work?
The pump pulls water through a protected suction cover, pressurizes it, and distributes it through concealed hoses to adjustable jet nozzles. Air controls can increase the sensation at individual water jets, but they do not remove the need for correct pump priming, water depth, and unobstructed suction.
The pump’s location also affects noise and maintenance. A motor mounted directly against framing can transmit vibration through floors and walls, while rubber isolation mounts and flexible connections reduce structure-borne hum. Never modify jet plumbing, suction fittings, or pump orientation unless the manufacturer permits the change.
Which Tub Configuration Fits the Bathroom?
Alcove tubs suit three-wall recesses and usually simplify waterproofing, while drop-in and undermount tubs require a framed deck or platform. Freestanding jetted tubs can reduce wall framing but still need carefully planned drain, supply, electrical, and service routes.
| Configuration | Typical footprint | Installation requirement | Best practical use |
|---|---|---|---|
| Alcove | 60 x 30-32 inches | Three-wall framing, ledger, front apron | Replacement bathroom |
| Drop-in | 60-72 x 32-42 inches | Custom deck, removable service panel | Large remodel |
| Undermount | 60-72 x 32-42 inches | Waterproofed deck, finished rim support | Tile or stone surround |
| Freestanding | 59-72 x 29-40 inches | Stable floor, exposed or concealed services | Open bathroom layout |
| Walk-in jetted | 52-60 x 26-32 inches | Level entry planning, grab-bar backing | Accessibility-focused renovation |
Whirlpool, Air, or Combination: Which Is Easier?
An air bath is usually easier to maintain because air lines drain more completely, whereas water-jet plumbing can retain residue and requires regular flushing. A whirlpool provides a stronger, more concentrated massage, but it is less forgiving of poor cleaning and stagnant water.
| System | Typical power | Sensation | Cleaning implication | Main limitation |
|---|---|---|---|---|
| Water whirlpool | 5-15 amps at 120 V | Focused, stronger streams | Flush internal water lines | Residual water and biofilm |
| Air bath | 5-12 amps at 120 V | Fine, bubbling airflow | Dry lines after use | Air can cool bathwater |
| Combination | 10-30 amps total | Adjustable water and air | Maintain both systems | Higher wiring complexity |
| Heated whirlpool | Model-specific | Jets with temperature support | Heater-specific servicing | May require separate circuit |
Before You Start the Installation
A straightforward jetted-tub replacement typically takes 2-4 working days and costs $2,500-$7,500, excluding major service-panel work or extensive room reconstruction. The deciding prerequisites are a suitable floor, a drain that can align with the tub, a code-compliant electrical route, and uninterrupted access to the pump.
Installation Checklist
- Confirm the tub’s exact model, dimensions, filled weight, drain location, pump position, and electrical data plate.
- Measure doorways, stairways, hallways, and the bathroom opening before delivery.
- Verify the finished floor height, wall thickness, tile buildup, and rim clearance.
- Identify joist direction, plumbing below the floor, and the location of the main electrical panel.
- Check whether local permits or inspections apply to plumbing, electrical, structural, or waterproofing work.
- Arrange a licensed electrician for new circuits, disconnects, junction boxes, or panel alterations.
- Arrange a plumber if the waste line, trap, vent, water supplies, or overflow arrangement changes.
- Keep the manufacturer’s installation manual, wiring diagram, drain kit, overflow kit, and warranty terms onsite.
Tools and Materials
| Item | Typical quantity or specification | Purpose |
|---|---|---|
| Spirit level | 24-48 inches | Check floor, ledger, rim, and deck |
| P-trap and waste kit | 1 model-compatible set | Connect drain to sanitary waste |
| Cement mortar or approved support material | 1-3 bags, model-dependent | Support tub base where specified |
| 100% sanitary silicone | 1-2 cartridges | Seal rim and finished joints |
| GFCI protection | As required by model and code | Protect pump and bath circuit |
| Access panel | Manufacturer’s minimum size | Service pump, drain, and controls |
| Flexible supply lines | Model-appropriate lengths | Connect filler or valve assembly |
| Rubber isolation pads | Pump-specific quantity | Reduce motor vibration |
Step 1: Inspect and Reinforce the Floor
Inspect the bathroom floor before removing the old tub, then verify level, joist condition, subfloor thickness, and filled-load implications. A full bath can add hundreds of pounds, and a jetted tub concentrates that load across a smaller footprint than a room floor calculation may assume.
Do not use a generic “60 pounds per square foot” rule as a substitute for structural assessment. The correct capacity depends on tub weight, water volume, occupant weight, joist span, spacing, species, subfloor, and load path. A structural engineer or building official should review unusual cast-iron tubs, raised platforms, long joist spans, or visible deflection.
- Remove loose flooring, damaged subfloor, and old adhesive.
- Check the floor in both directions with a long level.
- Repair rot, soft spots, loose fasteners, or water-damaged framing.
- Confirm that the drain opening will not cut through a joist without an approved design.
- Reinforce joists only from an engineered or code-accepted detail, not by guessing lumber size.
You will know it worked when: the floor is solid, dry, level within the tub manufacturer’s tolerance, and ready to carry the filled assembly without movement.
Common mistake: Sistering joists without resolving the source of moisture. Structural reinforcement will not correct an active leak.
Step 2: Plan Electrical and Plumbing Rough-Ins
Plan the drain, overflow, filler, pump, controls, and electrical route from the manufacturer’s drawing before setting the shell. A jetted bath commonly uses a dedicated 120-volt GFCI-protected circuit, but a heater, blower, or specific Jacuzzi model may require additional circuits, different amperage, or another voltage.
The National Electrical Code and local amendments govern bathroom wiring in the United States; other countries use different standards. The installation manual specifies conductor size, overcurrent protection, bonding, disconnect location, cord use, and permitted junction-box placement. A 240-volt circuit is not automatically better, and running larger wire does not make an incorrectly designed circuit safe.
- Mark the pump and motor access zone.
- Position the trap and waste line to match the tub drain, allowing for floor thickness and fittings.
- Confirm the waste system has the required slope and vent arrangement.
- Route electrical wiring only through approved spaces and protection methods.
- Keep electrical components out of wet locations and above any required flood level.
- Install GFCI protection and disconnecting means exactly as the electrician and model documentation require.
You will know it worked when: the drain aligns without forcing the tub, the filler reaches its connection point, and the electrician confirms the circuit and disconnect arrangement before wall finishes begin.
Common mistake: Installing the P-trap directly under an assumed drain position. Many tubs place the drain several inches off-center.
Step 3: Build the Approved Support Base
Build the support base specified by the tub manufacturer, which may be a mortar bed, leveling compound, adjustable feet, a frame, a ledger, or a combination of these methods. Mortar is common for many acrylic tubs, but it is not universal; some models require the base to remain clear or use integrated feet that must carry the load.
A support bed prevents flexing that can stress the shell and drain. However, excess mortar can block the drain, trap moisture against sensitive components, or interfere with adjustable feet. Follow the drawing for mortar type, thickness, location, and curing requirements.
- Dry-position the tub and mark the actual base contact points.
- Protect the drain opening and any service route from mortar.
- Mix only the manufacturer-approved support material.
- Place the support in the specified areas, commonly as low mounds beneath the reinforced base.
- Install wall ledgers or framing supports where the rim drawing requires them.
- Leave the access opening unobstructed.
You will know it worked when: the shell settles evenly, the rim reaches the planned height, and no base, pipe, pump, or drain component is carrying an unintended load.
Common mistake: Using expanding foam as a structural substitute. Foam may fill voids, but it cannot replace a specified load-bearing base.
Step 4: Set, Level, and Secure the Tub
Set the tub onto its prepared supports without lifting or dragging it by jet hoses, pump plumbing, controls, or electrical cables. Level the rim in both directions, then secure the tub according to the installation manual using wall flanges, clips, feet, brackets, or approved fasteners.
The rim should not be forced into level by tightening one corner against a wall. That approach can twist the acrylic shell, change drain alignment, and create stress at the overflow. A small perimeter clearance may be required for movement and finishing materials, but the exact gap belongs to the model drawing.
- Carry the shell with enough people to control its weight and dimensions.
- Lower it vertically onto the base.
- Check the rim with a long level across the length and width.
- Adjust feet or support points without distorting the shell.
- Fasten the flange or brackets without overtightening.
- Install the compatible drain and overflow seals.
You will know it worked when: the rim is level, the shell does not rock, the drain threads engage cleanly, and the pump remains reachable through the planned panel.
Common mistake: Tightening the waste connection while the shell is unsupported. The fitting may appear sealed until the tub flexes under a filled load.
Step 5: Connect the Drain, Overflow, Filler, and Controls
Connect the drain and overflow with the supplied or model-approved components, keeping seals correctly oriented and avoiding cross-threaded plastic fittings. Hand-tighten plastic parts first, then apply only the tool tightening specified by the kit, because excessive force can distort gaskets or crack the waste body.
Water supply connections depend on the faucet and filler design. A deck-mounted filler may require access beneath the rim, while a wall-mounted valve requires blocking, pressure balancing, and waterproofing behind the finished surface. Electronic controls may require low-voltage connections, an air hose, or a dedicated control box.
You will know it worked when: the waste assembly sits squarely, the overflow gasket is compressed evenly, and every control hose or cable follows the manufacturer’s routing diagram.
Common mistake: Applying pipe thread tape to a compression or rubber-gasket joint. Tape cannot repair a misaligned seal and may prevent proper seating.
Step 6: Provide Permanent Service Access
Provide a removable access panel large enough to remove the pump, reach the drain connections, inspect wiring, and replace controls. The often-cited 12 x 12-inch opening is only a common minimum; the Jacuzzi installation manual may require a larger opening based on pump dimensions and removal path.
The access opening must remain accessible after tiling, cabinetry, or an apron is installed. A magnet-held panel, removable trim panel, or screwed hatch can work when it remains rigid, dry, and easy to remove. Do not permanently seal the pump compartment or place a fixed vanity over the only route.
| Component requiring service | Typical access concern | Planning response |
|---|---|---|
| Pump motor | Motor may need sideways removal | Match opening to removal path |
| Drain and overflow | Leaks occur below the shell | Keep fittings visible or reachable |
| GFCI connection | Electrical inspection and reset | Use an approved accessible location |
| Air blower | Intake and replacement clearance | Avoid sealed, overheated enclosure |
| Control panel | Cable and controller replacement | Do not bury connectors behind tile |
You will know it worked when: a technician can reach every serviceable component without removing tile, drywall, flooring, or the tub.
Common mistake: Measuring the panel against the pump face only. The pump may need clearance to rotate, disconnect, or slide out.
Step 7: Test Before Closing the Surround
Test the drain, overflow, supply connections, pump, jets, air controls, heater, and electrical protection before installing tile, drywall, trim, or a fixed apron. Fill the Jacuzzi bath above the highest water jets, inspect every connection, run the system according to the manual, and leave the water in place long enough to expose slow leaks.
Do not run the pump dry. Water must cover the suction fitting and meet the model’s minimum operating level. Some manuals specify a shorter operational test, while a practical renovation check often includes an overnight static test before the enclosure is closed.
- Clean construction debris from the tub and suction cover.
- Close the drain and fill above the highest jet.
- Inspect the underside, waste fittings, overflow, and pump connections.
- Run water jets, air blower, controls, and heater only as permitted.
- Check for drips, vibration, unusual noise, air locks, and GFCI operation.
- Drain the tub and inspect again.
You will know it worked when: the water level remains stable, all jets operate, the pump primes, the GFCI does not trip, and no fitting shows moisture after draining.
Common mistake: Testing only with a hose for five minutes. Static leaks, overflow leaks, and pump seals can appear only after the system warms or runs.
Step 8: Waterproof and Finish the Enclosure
Finish the surround only after the plumbing and electrical inspection requirements are complete and the leak test passes. Use a compatible waterproofing system behind tile, maintain movement joints where specified, and seal the tub-to-wall transition with 100% sanitary silicone rather than grout alone.
The tub rim is not automatically a waterproof barrier. Cement backer board, membrane transitions, flange details, fastener penetrations, and the filler area must follow the waterproofing system’s instructions. A removable apron or deck panel should remain removable after caulking and finishing.
You will know it worked when: the wall assembly directs water toward the tub, the rim joint is continuous, the access panel opens cleanly, and no finished surface prevents future service.
Common mistake: Grouting the tub-to-tile joint. Rigid grout commonly cracks as the tub moves slightly under load; flexible sealant is the appropriate movement joint.
What Does Installation Cost and How Long Does It Take?
A typical Jacuzzi bath installation costs $2,500-$7,500 for the tub, ordinary plumbing, electrical work, support, and basic finishing. A premium drop-in remodel with panel work, tile, circuit upgrades, structural repairs, or extensive relocation commonly reaches $11,000-$20,000.
| Cost category | Typical range | Main cost driver |
|---|---|---|
| Jetted tub shell | $1,500-$4,000 | Size, brand, jets, heater |
| Plumbing work | $600-$1,500 | Drain relocation and access |
| Electrical work | $800-$2,300 | Panel distance and new circuits |
| Framing and support | $500-$2,000 | Deck, ledger, floor repair |
| Tile and waterproofing | $1,000-$3,500 | Surface area and finish |
| Trade labor | $1,500-$4,000 | Regional rates and coordination |
A straightforward replacement may take four calendar days, although inspections, tile curing, delivery delays, and custom fabrication can extend the project.
| Phase | Typical duration | Completion checkpoint |
|---|---|---|
| Demolition and floor preparation | 0.5-1 day | Dry, sound, level substrate |
| Rough plumbing and electrical | 0.5-1.5 days | Inspected, aligned connections |
| Support and tub setting | 0.5-1 day | Stable, level shell |
| Leak and function testing | 4-24 hours | No leaks or electrical faults |
| Waterproofing and finishes | 1-3 days | Cured, sealed, serviceable surround |
Common Mistakes and How to Fix Them
| Failure | Likely cause | Corrective action |
|---|---|---|
| Pump runs but jets have weak pressure | Air lock, blocked suction, closed air control | Turn power off, verify water level, inspect suction, follow pump-priming instructions |
| GFCI trips immediately | Moisture, damaged cable, incorrect wiring, faulty motor | Isolate power and call an electrician; do not bypass GFCI |
| Tub rocks after setting | Uneven base or unsupported feet | Remove load, correct support, and reset before sealing |
| Drain leaks after first bath | Misaligned gasket or stressed waste fitting | Expose access, replace seal, realign, and retest |
| Loud motor vibration | Pump mounted against framing or loose hardware | Use approved isolation mounts and secure connections |
| Black flakes or odor | Residue or biofilm in water lines | Use the manufacturer-approved whirlpool cleaner and flush cycle |
| No access after finishing | Panel too small or incorrectly located | Stop finishing work and enlarge the service opening |
Dish soap is not a universal cleaning treatment for jetted plumbing. Some manufacturers prohibit household detergents because foam can enter the pump or leave residue. Use the cleaner and dilution specified for the particular Jacuzzi bath.
Variations for Different Installation Situations
Replacing a Standard Alcove Tub
A standard bathtub replacement is simplest when the new jetted tub has the same 60-inch length, drain side, rim height, and wall footprint. Expect additional work if the pump occupies the old plumbing chase, the tub is deeper, or the existing circuit cannot supply the motor.
Check the finished height before ordering. A deeper shell can raise the rim above the existing wall tile and alter shower-valve, spout, and waterproofing relationships.
Installing a Drop-In Tub
A drop-in installation requires a rigid, waterproofed deck designed around the actual shell template. The deck must support the rim as specified while leaving a removable front or side panel for the pump and drain.
Do not tile the deck before a dry fit. Tile thickness, adhesive, trim, and the tub’s rim overlap can reduce the opening enough to prevent the shell from seating.
Installing a Walk-In Jetted Tub
A walk-in tub requires a level entry strategy, correctly placed grab-bar blocking, an accessible control location, and a rapid drain where the model provides one. The user must remain inside while the tub fills and drains, so fill and drain times affect safety as much as jet performance.
A walk-in jetted tub is not a simple substitute for a conventional bath when the user cannot tolerate waiting in a seated position. Confirm transfer space, door swing, floor slip resistance, and emergency assistance arrangements before installation.
When Should You Hire a Professional?
Hire a licensed electrician for every new fixed circuit, panel modification, junction-box installation, or uncertain grounding condition. Hire a plumber when the trap, vent, waste line, water supplies, or building structure must change, and hire a qualified waterproofing installer when the bath forms part of a tiled wet room.
A capable DIYer can often handle demolition, dry fitting, trim, and some manufacturer-approved assembly. Electrical shock, hidden water damage, failed waterproofing, and structural alterations are not suitable areas for improvisation. Warranty terms may also require documented professional installation.
One practitioner rule is especially valuable: install for the future service visit, not only for today’s finished photograph. If a pump cannot be removed through the opening, the installation is incomplete regardless of how clean the tile looks.
FAQ
Can a Jacuzzi bath use a normal bathroom outlet?
Some small air baths or manufacturer-approved plug-in models can use a receptacle, but many whirlpool baths require a dedicated GFCI-protected circuit. The pump data plate and installation manual determine the amperage, voltage, cord or hardwire method, disconnect, and required circuit design. Never use an extension cord.
Does a jetted tub need a water heater upgrade?
A water-heater upgrade is not automatically required. A large tub filled with hot water can exceed the available hot-water storage, especially in a household with simultaneous demand, but the actual need depends on tub capacity, incoming water temperature, heater recovery, mixing-valve settings, and desired bath temperature.
Can bath salts or oils be used in a whirlpool tub?
Only use salts, oils, or additives when the manufacturer explicitly permits them. Water-jet plumbing can retain oils and organic residue, while some products damage seals or create difficult-to-remove biofilm. Air baths may tolerate more products, but the specific Jacuzzi bath manual still controls acceptable use.
How often should a jetted bath be cleaned?
Clean and flush a water-jet system at the frequency stated by the manufacturer, with more frequent cleaning in heavily used homes or when oils and additives enter the water. Wipe the suction cover and visible jets after use, and investigate odor or flakes rather than masking them with fragrance.
Why does the tub pump hum but not circulate water?
A humming pump may have an air lock, blocked suction, seized impeller, low voltage, or a failed capacitor. Turn off power before inspecting anything, confirm the bath is filled above the required level, and use the manufacturer’s priming procedure. Electrical diagnosis belongs with a qualified electrician.
The Bottom Line
To install a Jacuzzi bath safely, verify the model requirements, inspect the floor, coordinate code-compliant plumbing and GFCI-protected electrical work, build the specified support base, set the shell level, preserve service access, and complete a full water and function test before finishing the surround. The most important installation decision is not jet count. It is whether the structure, drain, circuit, waterproofing, and access panel work together for the life of the bath. Include the exact keyword in your project checklist: how to install jacuzzi bath correctly means planning the service path before the tile goes on.