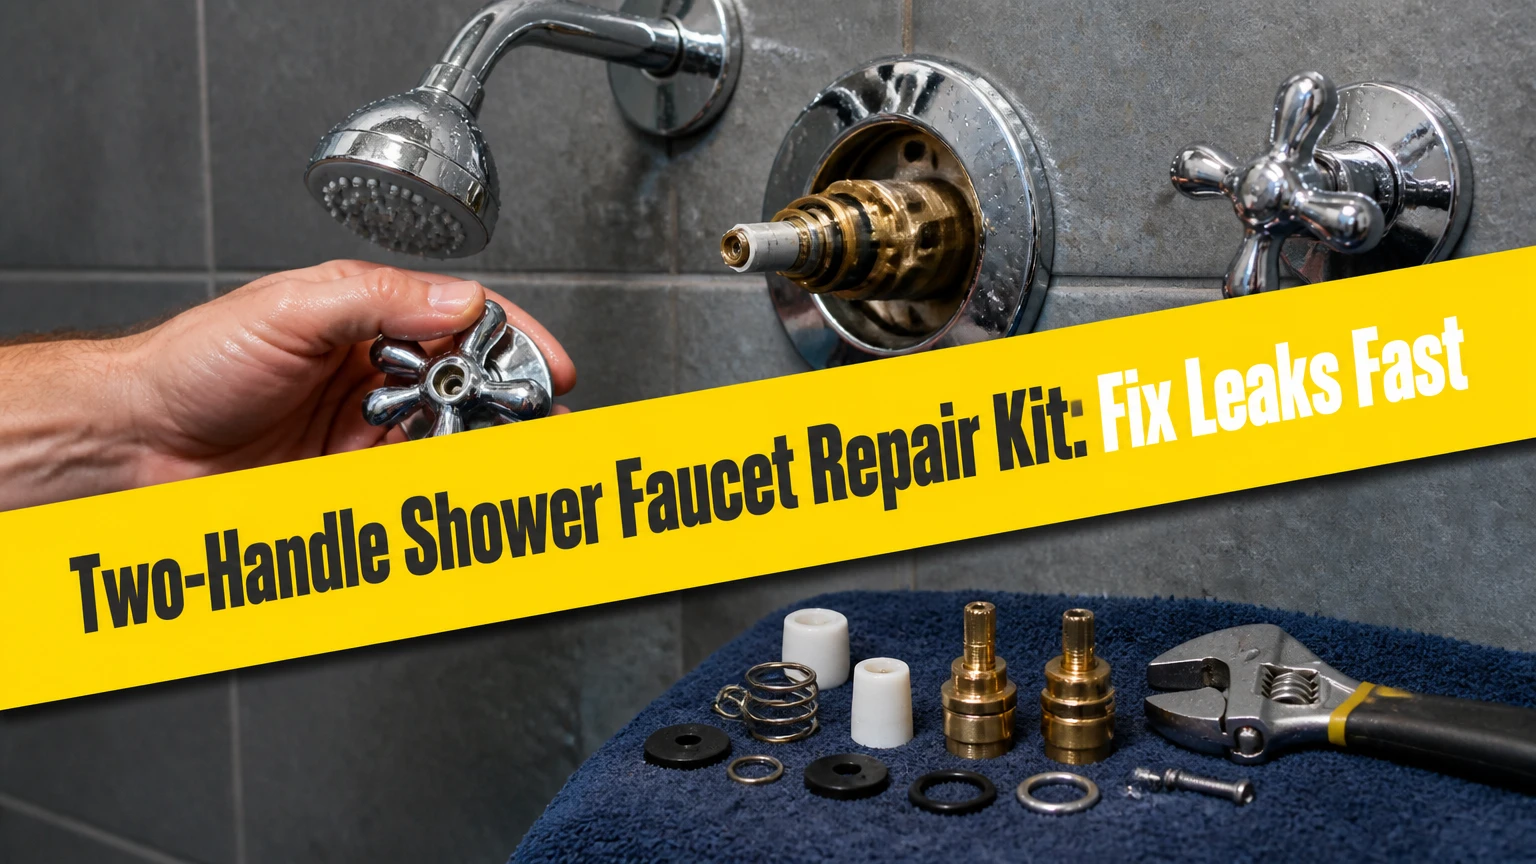
A two-handle shower faucet repair kit contains replacement stems, cartridges, washers, seats, springs, O-rings, or retaining parts for a shower with separate hot and cold controls. The correct kit depends on the valve’s brand, model, mechanism, dimensions, and leak location, not on the number of handles alone. Most repairs take 30-60 minutes after the water is isolated.
Key Facts at a Glance
- A two-handle shower faucet repair kit must match the valve mechanism and manufacturer model.
- Compression valves usually need stems, bibb washers, bibb screws, seats, and O-rings.
- Cartridge valves usually need one matching cartridge for each leaking side, although some kits cover both sides.
- Delta-style seat-and-spring kits use small rubber seats and tapered springs inside the valve body.
- Petroleum jelly can damage some faucet seals; use silicone-based plumber’s grease.
- A persistent drip after repair usually indicates a wrong part, damaged seat, poor alignment, or a valve body problem.
What Does a Two-Handle Shower Faucet Repair Kit Contain?
A two-handle shower faucet repair kit is a packaged set of internal plumbing parts for separate hot and cold controls. Typical contents range from two rubber washers and screws to complete replacement stems or cartridges with seals. The package may repair one side or both sides, so the item description must be checked before purchase.
The visible handles and escutcheons are trim. The repair kit normally addresses the working parts behind that trim. A leak from the showerhead or tub spout usually originates in the hot or cold valve, while water escaping around a handle may involve a stem O-ring, cartridge seal, bonnet nut, or packing.
The Environmental Protection Agency states that household leaks can waste more than 10,000 gallons of water annually in an average home. A small shower drip therefore deserves prompt diagnosis, although replacing internal parts without isolating the actual failure can create a second leak.
What Symptoms Can a Kit Repair?
| Symptom | Likely internal fault | Usual kit component |
|---|---|---|
| Showerhead drips after shutoff | Worn washer, seat, stem, or cartridge seal | Stem kit, washer kit, or cartridge |
| Tub spout drips with shower diverter off | Failed hot or cold valve | Washer, stem, or cartridge |
| Water leaks around handle | Stem packing, O-ring, or cartridge seal | O-ring, stem, or cartridge kit |
| Hot or cold flow is weak | Scale, damaged cartridge, blocked inlet | Cartridge or stem, plus valve cleaning |
| Handle turns but water remains on | Stripped stem or broken cartridge interface | Complete stem or cartridge |
A repair kit is not a cure for a cracked valve body, leaking solder joint, corroded pipe, or failed shower diverter. Those faults require a different repair scope.
How Does a Two-Handle Shower Valve Work?
A two-handle shower valve controls hot and cold water through two separate internal shutoff mechanisms. Compression valves close by pressing a washer onto a seat, while cartridge valves regulate flow through ports and seals as the handle rotates.
The mechanism determines the replacement part. Handle appearance does not reliably identify it because the same decorative trim can be installed over different valve bodies, and aftermarket handles can hide the original manufacturer.
Compression Stem Mechanism
A compression stem moves inward as the handle turns clockwise. A rubber bibb washer at the stem tip presses against a stationary metal seat, stopping water flow. Repeated tightening can deform the washer and score the seat, producing the familiar drip that worsens when the handle is forced.
Compression repairs commonly replace the washer, brass screw, stem O-rings, and seat. A removable seat is usually replaced rather than cleaned when its sealing edge feels grooved or catches a fingernail.
Cartridge Mechanism
A cartridge uses internal ports, ceramic or polymer surfaces, and elastomeric seals to control water. Turning the handle rotates or moves the cartridge so inlet openings align with the outlet passage. A cartridge can leak because its seals are worn, its body is cracked, mineral deposits obstruct movement, or the valve body is damaged.
Cartridge dimensions vary by brand and model. Length, spline count, broach pattern, tab position, inlet arrangement, and rotational orientation can all matter.
Seat-and-Spring Mechanism
Some Delta and Peerless two-handle designs use a rubber seat backed by a small tapered spring. The spring pushes the seat against the cartridge or stem interface. A seat-and-spring kit is inexpensive, but it only fits compatible valve designs and cannot replace a full cartridge when the cartridge itself is worn.
Which Repair Kit Type Fits the Valve?
The correct two-handle shower faucet repair kit depends first on the mechanism, then on the brand and model. A compression stem kit is appropriate for a screw-down washer valve, a cartridge kit is appropriate for a matching cartridge valve, and a seat-and-spring kit is appropriate only where the valve uses that arrangement.
| Kit type | Identifying feature | Typical contents | Typical retail price |
|---|---|---|---|
| Compression washer kit | Stem tip carries a washer screw | 2-6 washers, screws, O-rings | $4-$15 |
| Complete stem kit | Brass stem threads into valve body | Stem, washer, seat, packing | $12-$35 per side |
| Cartridge replacement kit | Smooth cartridge body with ports | Cartridge, seals, retaining clip | $20-$70 per cartridge |
| Seat-and-spring kit | Separate rubber cup and tapered spring | 2 seats, 2 springs | $5-$18 |
| Rebuild assortment | Mixed household faucet parts | Washers, screws, O-rings, grease | $10-$30 |
Compression Stem and Washer Kits
Compression kits suit many older two-handle bath and shower valves. Common washer sizes include 00, 1/4 inch, 3/8 inch, and 1/2 inch, but the nominal diameter does not confirm the correct profile. Flat, beveled, cone, and faucet-specific washers seal differently.
A complete stem kit is safer when the old stem threads, packing, or washer screw show corrosion. A washer-only repair costs less, but it leaves worn threads and a damaged stem in service.
Cartridge Replacement Kits
Cartridge kits suit valves that regulate water through a movable internal cartridge rather than a screw-down washer. The replacement must match the exact valve family. A cartridge that is close in length can still fail because its ports, stop tabs, or handle splines differ.
Some two-handle valves use distinct hot and cold cartridges. Others use identical cartridges installed in opposite orientations. Photograph the original position before extraction.
Seat-and-Spring Kits
Seat-and-spring kits are appropriate when the old valve contains a rubber seat seated over a spring. Install the spring narrow end into the valve recess when the manufacturer’s instructions specify that orientation. A missing or inverted spring can produce a drip even when the new rubber seat is undamaged.
OEM, Aftermarket, and Universal Kits
OEM parts offer the strongest model match and usually the clearest installation instructions. Aftermarket parts can reduce cost, but dimensions and rubber compound quality vary between manufacturers. Universal assortments are useful for common compression washers, not for model-specific cartridges.
How Do You Match a Kit to the Existing Valve?
Match a repair kit using the faucet brand, valve model, removed part, measurements, and handle interface. The most reliable method is to shut off water, remove the old internal component, photograph it from several angles, and compare the replacement against a manufacturer diagram or plumbing-supply cross-reference.
Look for a brand name on the handle cap, escutcheon, cartridge, stem, or valve trim. The trim brand may differ from the rough-in valve brand, particularly after a bathroom remodel. Manufacturer catalogs and parts diagrams are more reliable than a generic marketplace title.
Record these specifications:
- Overall stem or cartridge length, measured from the sealing shoulder.
- Thread type and diameter on a compression stem.
- Spline count and handle broach shape.
- Cartridge tabs, notches, pins, and rotational stops.
- Washer diameter, thickness, and profile.
- Seat thread size and seat depth.
- Hot-side or cold-side orientation.
Never rely on color alone. Red and blue handle markings identify temperature, not internal geometry.
| Identification detail | How to check it | Why it matters |
|---|---|---|
| Brand name | Inspect cap, plate, stem, and cartridge | Narrows compatible part families |
| Model number | Search trim and valve documentation | Confirms exact replacement |
| Cartridge length | Measure removed cartridge in millimeters or inches | Prevents incorrect sealing depth |
| Spline count | Count handle-stem ridges | Determines handle compatibility |
| Seat size | Compare threads and shoulder diameter | Prevents cross-threading |
| Orientation | Photograph ports and stop tabs | Prevents reversed temperature or flow |
A useful practitioner rule is to keep the old part until the repair has passed a pressure test. The removed component provides the best evidence if the package is wrong.
Before You Start the Repair
Plan 30-60 minutes for a straightforward repair, $5-$70 for parts, and an intermediate difficulty level if the handle or stem is corroded. The valve model and access to the water shutoff determine success more than the hand tools do.
Materials and tools:
- Correct stem, cartridge, washer, or seat-and-spring kit
- Phillips screwdriver and small flat screwdriver
- 1/8-inch to 1/4-inch hex keys, if the handle uses a set screw
- Adjustable wrench or correctly sized deep socket
- Cartridge puller for a seized cartridge
- Silicone plumber’s grease, approximately 1/8 teaspoon
- White vinegar and a nylon brush for mineral deposits
- Flashlight, towel, container, and replacement escutcheon screws
- Rag or drain cover to prevent dropped screws entering the drain
Close the main shutoff or local shower isolation valves before removing a retaining nut. Open both handles afterward to release trapped pressure. Do not assume a closed handle stops the supply.
How to Install the Replacement Parts
The following process applies to most two-handle shower faucet repairs, but the manufacturer’s instructions control when they differ. Work on one side at a time if the hot and cold parts look similar, because mixing orientation or components can reverse temperature control.
Step 1: Isolate Water and Protect the Work Area
Turn off the local isolation valves or the home’s main shutoff. Open the shower handles and allow the lines to drain for 30-60 seconds, then cover the drain and place a towel below the valve.
You will know the valve is depressurized when no water flows from the spout or showerhead after both handles are opened. A common mistake is removing the handle while line pressure remains, which can spray water into the wall cavity.
Step 2: Remove the Handle and Escutcheon
Pry out the hot or cold index cap with a thin flat screwdriver, remove the handle screw, and pull the handle straight outward. Remove the escutcheon screws or rotate the plate counterclockwise, depending on the trim design.
Protect polished finishes with a cloth under the wrench jaws. If the handle will not move, apply penetrating oil around the hub and wait 10-15 minutes. Do not lever against ceramic tile because a cracked tile can turn a parts repair into a wall repair.
Step 3: Identify and Extract the Valve Part
Remove the packing nut, bonnet nut, retaining clip, or sleeve with the correct wrench. For a compression stem, turn the stem counterclockwise until it leaves the valve body. For a cartridge, pull straight outward after removing the clip or retaining hardware.
A cartridge puller is preferable to pliers when the cartridge is seized. Twisting hard against the valve body can damage the brass bore or break a plastic cartridge, leaving fragments inside the wall.
Step 4: Inspect and Clean the Valve Body
Wipe the valve opening and inspect the sealing surfaces with a flashlight. Remove loose scale with a nylon brush and a small amount of white vinegar, then rinse or wipe the area dry.
You will know the valve is ready when the bore is smooth, the retaining threads are clean, and no old rubber fragments remain. Do not scrape brass with a hardened steel screwdriver because a deep scratch can create a permanent bypass path.
Step 5: Install the New Stem, Cartridge, or Seat
Apply a thin film of silicone plumber’s grease to O-rings and rubber seals. Install the spring and seat in the same order as the removed parts, then insert the stem or cartridge with its tabs, ports, and orientation aligned.
Tighten the retaining nut until firm, then add only the additional torque specified by the manufacturer. Overtightening can split a plastic cartridge, distort an O-ring, or crack a decorative nut.
Step 6: Reassemble and Test Gradually
Replace the escutcheon and handle, leaving the trim accessible until the valve passes its first test. Open the water supply slowly, then operate each handle through its full range while checking the spout, handle, and escutcheon.
You will know the repair worked when the water stops within several seconds after shutoff, the handle turns smoothly, and no moisture appears around the trim after five minutes. Check again after the first shower because thermal expansion can reveal marginal seals.
What Does the Repair Cost?
A typical DIY two-handle faucet repair costs $5-$70 for parts and takes 30-60 minutes. Professional service commonly costs $150-$450 in the United States before extensive wall access or valve replacement, with regional labor rates and emergency scheduling creating substantial variation.
| Repair situation | Typical parts cost | Typical labor time | Typical total professional cost |
|---|---|---|---|
| Two washer replacements | $5-$15 | 30-45 minutes | $150-$275 |
| One compression stem | $12-$35 | 45-75 minutes | $175-$325 |
| One cartridge | $20-$70 | 45-90 minutes | $200-$375 |
| Two cartridges or stems | $40-$140 | 60-120 minutes | $250-$450 |
| Wall-access valve replacement | $80-$250 | 3-6 hours | $500-$1,500 |
These are typical US planning ranges, not fixed prices. A plumber may charge a diagnostic or minimum service fee even when the replacement takes less than an hour.
Why Is the Shower Still Dripping?
A shower that still drips after a kit installation usually has a wrong replacement part, damaged seat, misaligned cartridge, trapped debris, or a second failed valve. Replacing a washer alone cannot seal against a deeply pitted seat, and replacing one side cannot stop a leak originating on the other side.
| Continuing problem | Likely cause | Corrective action |
|---|---|---|
| Drip continues from spout | Pitted seat or wrong washer profile | Replace seat and verify washer shape |
| Leak appears at handle | Damaged O-ring or loose packing nut | Replace seal and tighten moderately |
| Water leaks behind plate | Failed valve-body connection or bonnet seal | Shut off water and inspect access |
| Hot and cold are reversed | Cartridge rotated 180 degrees | Reinstall using orientation marks |
| Handle binds after repair | Dry seal, scale, or overtightened nut | Clean, grease, and loosen to specification |
| Flow remains weak | Debris in inlet or cartridge screen | Flush valve and inspect cartridge |
A counterintuitive failure occurs when a new cartridge exposes old valve-body damage. The new seal may sit on a different portion of the bore, revealing scratches that the worn cartridge had temporarily masked.
What Mistakes Cause Repeat Failures?
The most expensive mistake is buying by handle appearance instead of identifying the valve body. A polished two-handle trim set can conceal a compression stem, ceramic cartridge, or proprietary ceramic disc assembly, and the parts are not interchangeable.
Avoid these failures:
- Using petroleum jelly: Petroleum products can swell or degrade some rubber compounds. Use faucet-rated silicone grease.
- Replacing only a washer on a damaged seat: A sharp groove cuts the new washer and recreates the leak.
- Forcing a seized cartridge: Use a cartridge puller and protect the valve body from twisting.
- Overtightening the packing nut: Excessive compression can make the handle stiff and damage the seal.
- Discarding the old part too soon: The old component is the most useful physical comparison.
- Leaving debris in the bore: Loose rubber and scale can prevent the new seal from seating.
- Failing to test before final trim installation: A hidden leak can damage drywall or framing.
Plumber’s grease lubricates seals and assembly surfaces. It is not thread sealant. Use PTFE tape or pipe-joint compound only on threaded connections where the manufacturer permits it, never on a cartridge’s sealing surfaces.
When Is a Kit the Wrong Repair?
A repair kit is the wrong choice when the brass valve body is cracked, the supply pipe leaks inside the wall, the valve has no accessible shutoff and cannot be safely isolated, or compatible internal parts are obsolete. A complete valve replacement may be more economical when two different internal repairs have already failed.
Choose a full valve replacement when:
- The rough-in body is visibly cracked or severely corroded.
- The cartridge bore is scored beyond cleaning.
- The valve leaks from a soldered or threaded connection behind the wall.
- Replacement parts are unavailable after confirming the manufacturer and dimensions.
- The homeowner wants to convert an obsolete two-handle valve to pressure-balanced control.
- Wall access is already open for remodeling.
A two-handle repair does not automatically provide modern anti-scald protection. The U.S. Consumer Product Safety Commission and plumbing codes address scald prevention through temperature controls and pressure-balancing requirements, so local code should be checked before changing the valve configuration.
Which Alternative Is Better for Each Situation?
Select the least extensive repair that restores reliable shutoff and preserves the valve body. A washer kit is the economical choice for a sound compression valve, a complete cartridge is safer for a worn cartridge assembly, and full replacement is justified when the rough-in body or code compliance is the underlying issue.
| Situation | Recommended option | Avoid | Reason |
|---|---|---|---|
| Older valve with replaceable seat | Stem and seat kit | Washer-only assortment | New seat removes the worn sealing surface |
| Common Delta-style valve | Seat-and-spring kit or OEM cartridge | Generic cartridge | Spring geometry and stop features vary |
| Unknown modern valve | Remove and match old cartridge | Guessing from handle style | Trim does not prove valve compatibility |
| Repeated repairs in an open wall | Complete valve replacement | Another short-term rebuild | Access labor is already available |
| Minor drip with intact stem | Washer and O-ring kit | Full trim replacement | Internal sealing parts address the fault |
| Damaged brass body | New rough-in valve | Rebuild kit | A kit cannot repair structural damage |
FAQ
Can one kit repair both hot and cold handles?
Only when the package explicitly includes two compatible components. Many stem, cartridge, and seat kits are sold for one valve side, while some rebuild kits include matched hot and cold parts. Count the included stems, cartridges, washers, and springs before purchase, then verify whether hot and cold versions differ.
How long should a two-handle shower faucet repair last?
A correctly matched OEM stem, cartridge, or seat can commonly last 5-15 years in normal residential use, although water chemistry, usage, pressure, and part quality change the result. A washer-only repair may last much less if the valve seat or stem remains worn.
Can I replace only the leaking side?
Yes, replacing only the leaking hot or cold side is reasonable when the opposite side operates smoothly and the valve uses separate internal controls. Replace both sides when the parts have similar age, both handles show wear, or the kit is sold as a matched pair.
Why does the handle keep turning without shutting off water?
A handle that spins freely usually has a stripped handle interface, broken stem, or damaged cartridge stem. Remove the handle and inspect the stem before ordering parts. Replacing the decorative handle alone will not restore a failed internal shutoff mechanism.
Can vinegar clean a shower faucet cartridge?
White vinegar can remove light mineral deposits from accessible metal surfaces, but prolonged soaking can affect finishes, seals, or some cartridge materials. Use a nylon brush and brief contact, rinse thoroughly, and replace a cartridge whose sealing surfaces are scratched or distorted.
Is a universal two-handle repair kit worth buying?
A universal kit is worthwhile for common compression washers, screws, and O-rings when the original dimensions are measured first. Universal cartridge kits are risky because spline count, port layout, length, and orientation vary. Buy an exact OEM or cross-referenced replacement for modern cartridge valves.
The Bottom Line
A two-handle shower faucet repair kit is effective when the replacement matches the valve mechanism, model, dimensions, and leak location. Diagnose the valve before ordering, preserve the removed part for comparison, replace damaged seats as well as washers, lubricate seals with silicone grease, and test gradually before concealing the repair behind the escutcheon.