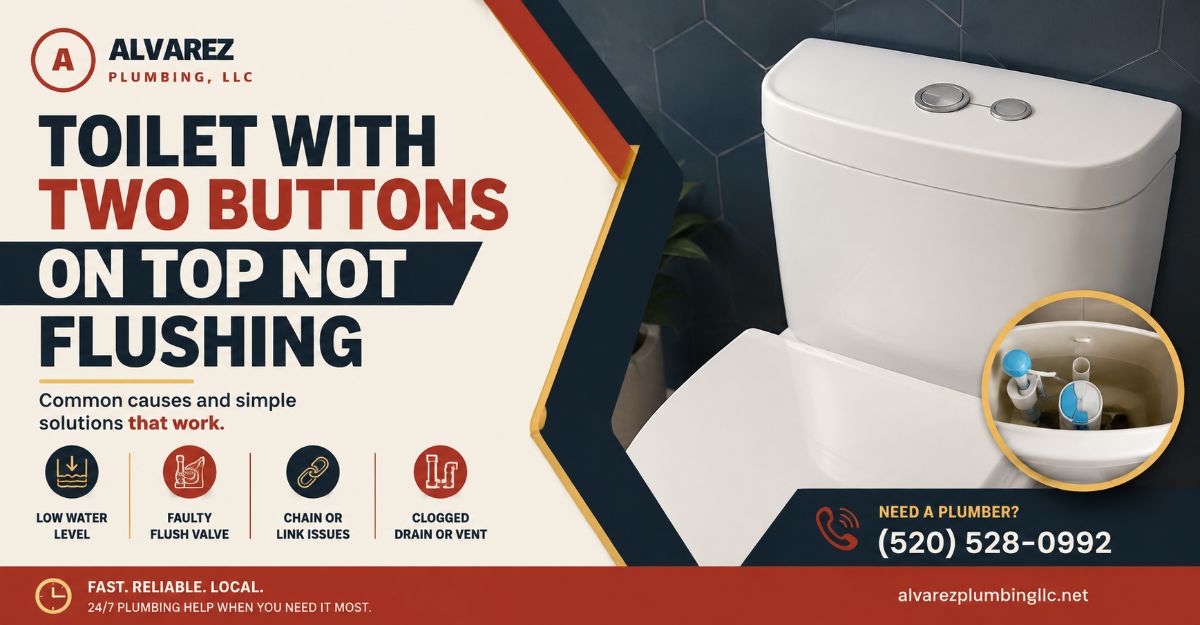
A toilet with two buttons on top not flushing typically suffers from disconnected push rods, misaligned button actuators, or a failed internal flush valve tower. Resolving a dual-flush toilet that will not flush requires carefully lifting the ceramic tank lid, adjusting the threaded plastic rod lengths to perfectly engage the valve levers below, and clearing any mineral deposits blocking the central tower mechanism.
Key Facts at a Glance
- Mechanism Type: Dual-flush systems use a central flush valve tower instead of a traditional chain and rubber flapper.
- Primary Failure Point: 80 percent of non-flushing issues stem from improper push rod lengths losing contact with the valve actuators.
- Repair Time: A standard push-rod adjustment takes under 5 minutes; replacing a complete tower valve takes 15 to 30 minutes.
- Component Lifespan: Plastic buttons and rods generally last 5 to 7 years, while the bottom rubber or silicone seal lasts 3 to 5 years.
- Water Savings: A functioning dual-flush mechanism saves an average of 25,000 liters of water annually for a family of four.
Before You Start Your Repair
Repairing a dual-flush toilet is a beginner-friendly plumbing task that rarely requires professional intervention. The internal components are primarily plastic and designed for tool-free adjustments.
- Estimated Time: 15 to 30 minutes.
- Difficulty Level: Beginner.
- Total Cost: $0 for adjustments; $15 to $35 USD for replacement parts.
- Tools Required: White vinegar (2 cups), an old toothbrush, a flathead screwdriver, and a replacement dual-flush valve tower (only if the current one is physically broken).
- Prerequisite: Locate the water supply shut-off valve behind the toilet bowl near the floor. You will only need to turn this off if you are fully replacing the valve tower.
Step 1: Remove the Tank Lid and Inspect the Mechanism
Safely removing the tank lid is the crucial first step to diagnose a toilet with two buttons on top not flushing. The lid houses the button assembly and connects directly to the internal flush tower.
Lift the toilet tank lid straight up with both hands. Most top-button lids sit freely on the tank and will lift away with no resistance. Place the heavy ceramic lid flat on a towel on the floor to prevent cracking. Look directly at the underside of the lid where the buttons sit. You will see two plastic rods extending downward. Check if these rods are present, unbroken, and firmly attached to the button housing. If your lid is physically tethered to the tank via a flexible steel cable, do not pull it forcefully. Carefully unclip the cable block from the top of the central flush valve tower before removing the lid completely.
Step 2: Adjust the Push Rod Lengths
Incorrect push rod length is the single most common reason a dual-flush toilet stops working. The push rods transfer the mechanical force from your finger directly to the flush valve.
Locate the threaded plastic rods on the underside of the button assembly. These rods act as screws. If a rod is loose or entirely detached, thread it back into the button housing by turning it clockwise. You must adjust the length of both rods so they sit exactly 1 to 2 millimeters above the flush valve levers when the lid is resting in its normal position.
You will know this step worked when you can feel slight resistance immediately upon pressing the buttons. If the rod is too short, the button will press down loosely and fail to actuate the valve. If the rod is too long, it will continuously press the valve open, causing water to run into the bowl endlessly.
Step 3: Test the Flush Valve Tower Manually
Testing the flush valve manually determines whether the problem lies with the top buttons or the internal water release mechanism. The flush valve is the large plastic cylinder sitting in the center of the tank.
Look inside the open water tank at the top of the central plastic tower. You will see two distinct colored levers, pads, or crescent-shaped buttons. Press these levers downward firmly with your fingers.
If the toilet flushes perfectly when you press the levers manually, your central flush valve is fully functional. The problem is exclusively related to the button and rod adjustment from Step 2. If pressing the internal levers does not trigger a flush, or if the levers are seized tight, your flush valve tower is jammed or broken. Proceed directly to Step 4.
Step 4: Clean Limescale and Mineral Deposits
Mineral deposits from hard water can cement the sliding sleeves of a flush valve tower together, preventing the toilet from flushing even when the buttons are pressed correctly.
Pour exactly 2 cups of white vinegar directly into the water inside the toilet tank. Allow the vinegar to sit and dissolve the calcium and limescale for exactly 2 hours. After the soaking period, press the internal valve levers repeatedly to work the acidic water into the sliding plastic joints. Use an old toothbrush to scrub away any visible white crust around the top actuators and the base seal.
You will know the cleaning is successful when the central plastic sleeve glides up and down smoothly without catching. A common mistake here is using industrial bleach instead of vinegar. Bleach will severely degrade the silicone seals at the bottom of the tower, causing massive water leaks within weeks.
Step 5: Replace the Dual-Flush Valve Assembly
Replacing the entire dual-flush valve tower is necessary when the plastic lifting mechanism snaps or when the internal seals permanently fail to hold water.
Turn off the water supply valve on the wall behind the toilet by turning it clockwise. Flush the toilet to empty the remaining water from the tank. Reach into the tank, grip the central valve tower, and twist the entire unit counter-clockwise. The tower will unclip from its mounting base and lift straight out. Take this old unit to a hardware store to match the specific base diameter (typically 2 inches or 3 inches). Snap the new matching dual-flush valve into the existing base by pressing down and twisting clockwise until it locks into place.
You will know the installation is correct when the tower feels rigid and does not wobble. Turn the water supply back on and perform a test flush to ensure the bottom seal holds the water pressure.
Common Mistakes and How to Fix Them
DIY plumbing repairs on modern toilets often fail due to three specific errors. Avoiding these ensures your dual-flush system remains watertight and reliable.
- Over-tightening the push rods: Screwing the plastic push rods too deep extends them too far. This keeps the flush valve permanently cracked open, wasting thousands of gallons of water. Fix this by backing the threaded rods out counter-clockwise until you have a 1-millimeter air gap between the rod tip and the valve lever.
- Using in-tank chemical cleaners: Drop-in bleach tablets destroy delicate silicone gaskets and plastic brackets within a dual-flush tower. Fix this by immediately removing any chemical tablets from the tank and flushing thoroughly to clear the chlorinated water.
- Installing a mismatched valve base: Forcing a universal 2-inch flush valve into a proprietary 3-inch base (common in TOTO or Kohler models) will crack the tank floor or cause catastrophic leaks. Fix this by always buying the exact manufacturer replacement part or replacing the entire base assembly, which requires completely removing the tank from the bowl.
How a Dual-Flush Toilet Mechanism Works
Unlike traditional single-flush toilets that rely on a rubber flapper pulled upward by a metal chain, a dual-flush system uses gravity and a central cylindrical tower.
Pressing a button on the lid pushes a rod downward. This downward force trips a mechanical lever situated on the top of the flush tower. The lever lifts a central plastic tube off a silicone seal at the bottom of the tank, allowing water to rush into the bowl.
The partial flush button (typically the smaller button) triggers a float that closes the valve early, releasing only 3.0 to 3.8 liters (0.8 to 1.0 gallons) of water. The full flush button (the larger button) lifts the main seal higher and bypasses the early-closing float, releasing 4.8 to 6.0 liters (1.28 to 1.6 gallons) to clear solid waste.
Main Types of Dual-Flush Configurations
Understanding your specific configuration dictates how you approach replacement parts.
- Top Double-Push Button: This is the most common residential configuration. Located directly on the tank lid, it uses mechanical plastic rods to actuate the valve below.
- Cable-Actuated Buttons: Often used when the flush button is placed on the side or front of the tank. A flexible braided steel cable connects the button housing directly to the top of the flush tower.
- Wall-Hung Actuator Plates: Found in high-end modern bathrooms with concealed in-wall tanks. The large square buttons use pneumatic air tubes or mechanical levers behind the wall plate to trigger the flush mechanism.
Comparison: Dual-Flush vs. Single-Flush Systems
Choosing to repair or entirely replace your flushing system requires understanding the fundamental differences in efficiency and maintenance.
| Feature | Dual-Flush (Two Buttons) | Single-Flush (Lever Handle) |
| Water Efficiency | Excellent (Saves up to 60 percent water) | Poor (Uses maximum volume every flush) |
| Clog Resistance | Moderate (Low liquid volume can cause trap scaling) | High (High water volume forcefully clears traps) |
| Repair Complexity | Higher (Tower mechanisms utilize complex linkages) | Simple (Basic chain, lever, and rubber flapper) |
| Component Lifespan | 5 to 7 years (Plastic linkages fatigue over time) | 10+ years (Brass and heavy rubber construction) |
| Initial Part Cost | Higher ($15 to $35 for tower valves) | Budget-friendly ($5 to $10 for flapper kits) |
Expert Recommendations for Replacement Parts
Plumbing professionals select replacement components based on local water hardness and user budget.
- For Budget-Conscious Users: Stick to standard top-button mechanical replacement kits from brands like Fluidmaster or Korky. These universal kits fit 90 percent of standard two-piece toilets, cost under $25, and do not require removing the tank to install.
- For High-End Modern Renovations: Choose pneumatic air-cable dual-flush setups or wall actuator plates manufactured by Geberit. Because they do not rely on rigid plastic push rods, they rarely fall out of alignment and offer superior longevity.
- For Hard-Water Geographies: If your municipal tap water has exceptionally high calcium and magnesium content, install a side-mount dual-flush handle conversion kit. The side handle leverages mechanical advantage that easily breaks through limescale accumulation, outperforming top-push buttons in mineral-heavy water.
Frequently Asked Questions
Why does my dual flush toilet have a loose and floppy button?
A loose or floppy dual-flush button occurs when the internal spring within the button housing snaps, or when the push rod underneath has completely unscrewed and fallen into the tank water. You must lift the lid and inspect the underside. If the rod is missing, retrieve it from the tank bottom and thread it back in. If the spring is broken, the entire chrome button housing must be replaced.
Can I fix a toilet with two buttons on top not flushing if water is constantly running?
Yes, constantly running water in a dual-flush toilet means the flush valve is stuck in the open position. This is primarily caused by push rods that are adjusted too long, constantly pressing the valve levers down. It can also be caused by a blistered silicone seal at the bottom of the tower. Adjust the rods first; if the running continues, replace the bottom seal.
How do I identify the brand of my dual-flush valve?
Identify your dual-flush valve brand by looking for a molded logo on the top of the central plastic tower or printed inside the ceramic tank walls. Common brands include TOTO, Kohler, Geberit, and Fluidmaster. If no brand is visible, measure the diameter of the flush hole at the bottom of the tank to purchase a correct universal replacement.
Should I replace my dual-flush toilet with a single-flush model?
You should keep your dual-flush toilet if water conservation and lower monthly utility bills are your primary goals. You should switch to a single-flush model only if you frequently experience plumbing clogs due to low water volume, or if you prefer a simpler mechanical system that requires less frequent precision adjustments.
Does a broken fill valve prevent a dual-flush toilet from flushing?
Yes, a broken fill valve completely prevents a dual-flush toilet from flushing. The dual-flush tower relies on a tank full of water to generate flushing pressure. If your inlet fill valve is broken and fails to fill the tank after the previous use, pressing the top buttons will result in no action, masking the fill valve issue as a flush valve failure.