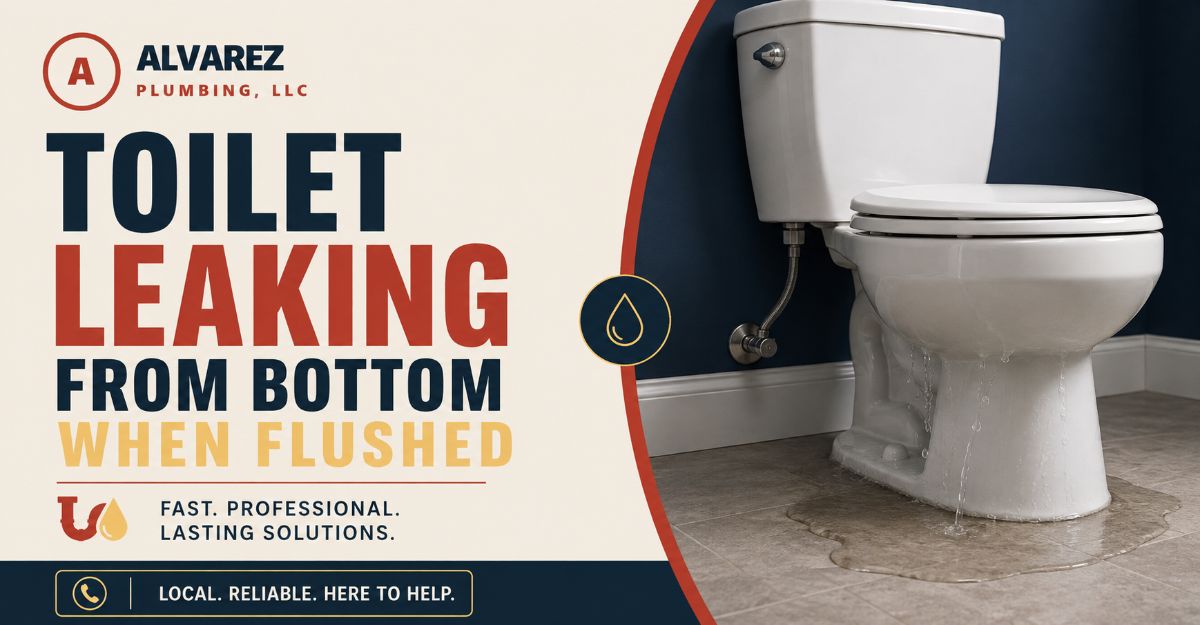
A toilet leaking from bottom when flushed means the watertight seal between the toilet horn and the floor flange has failed. Fixing this requires turning off the water supply, removing the fixture from the floor, scraping away the old seal, and installing a new wax or rubber ring before bolting the unit back into place.
Key Facts / At a Glance
- Primary cause: Compressed or degraded wax ring, loose floor bolts, or a broken closet flange.
- DIY repair timeframe: 1 to 3 hours for homeowners tackling the project for the first time.
- Professional plumber timeframe: 45 to 90 minutes.
- Material costs: $15 to $40 for a replacement seal, new brass closet bolts, and bathroom caulk.
- Risk factor: Ignoring this specific leak leads directly to subfloor rot, structural damage, and mold growth.
Before You Start Your Repair
Replacing a toilet base seal requires removing the entire fixture, replacing the watertight barrier, and securing it back to the floor. The single factor that most determines your success is ensuring the closet flange is completely clean and perfectly level before setting the new seal.
- Total Step Count: 5 primary steps.
- Total Time Required: 1 to 3 hours.
- Difficulty Level: Intermediate DIY.
- Total Cost: $15 to $40 for parts.
Tools and Materials Required:
- 1 new wax ring or wax-free rubber seal.
- 1 set of 5/16-inch solid brass closet bolts with nuts and washers.
- 1 adjustable wrench and 1 flathead screwdriver.
- 1 putty knife or stiff plastic scraper.
- 1 wet/dry shop vacuum or a sponge with a bucket.
- 1 tube of silicone bathroom caulk.
- 1 box of disposable nitrile gloves.
- 1 set of hard plastic toilet shims.
- Heavy-duty trash bags and old towels.
Why Is It Leaking From The Bottom When Flushed?
A bottom leak during a flush occurs because gravity forces a massive volume of water through the toilet trapway faster than the drainage pipe can immediately accept it. This temporary bottleneck creates positive hydrostatic pressure at the exact point where the toilet meets the floor.
To contain this pressure, a molded wax ring or rubber gasket sits directly between the bottom opening of the toilet and the closet flange connected to your home plumbing. The heavy weight of the porcelain compresses this seal to create an airtight and watertight barrier. When this seal degrades over time, shifts due to a rocking bowl, or suffers damage from plunging, the pressurized wastewater escapes onto the bathroom floor instead of flowing down the drain.
How Do I Verify The Base Seal Is The Problem?
You can verify the base seal is the problem by drying the exterior of the toilet completely and dusting the floor and lower porcelain with baby powder before flushing. The powder acts as a moisture indicator, showing exactly where the water originates.
Before removing the toilet, you must rule out higher leaks that simply travel down the porcelain and mimic a base leak. Condensation on a cold tank often drips down the back of the bowl and puddles on the floor. Tank-to-bowl bolts can loosen over time, sending a steady drip down the rear structural ribs of the toilet. The water supply line connecting the wall valve to the fill valve can also develop a slow weep. If the baby powder turns damp at the very bottom edge of the floor line while the upper porcelain remains completely dry, the floor seal has definitively failed.
Step-By-Step Guide To Replacing The Base Seal
Step 1: Drain And Disconnect The Water Supply
Turn off the water supply valve located behind the toilet by turning it clockwise, flush the handle to empty the tank, and disconnect the flexible supply hose.
Begin by shutting off the water. If you have a push-pull valve, pull the handle straight out. If you have a quarter-turn or multi-turn valve, rotate it clockwise until it stops. Depress the flush lever and hold it down to release as much water as possible into the bowl. Use a wet/dry shop vacuum to extract the remaining standing water from both the tank and the bottom of the bowl. Alternatively, press a large sponge into the residual water and wring it into a bucket until the porcelain is entirely dry. Finally, use an adjustable wrench to loosen the metal or plastic nut connecting the flexible supply line to the threaded shank at the bottom of the tank.
- Success Checkpoint: You will know this step is complete when the tank and bowl are bone dry and the toilet is completely physically disconnected from the wall plumbing.
- Common Mistake: Attempting to remove the toilet with water still in the trapway. When you tip the bowl later, this trapped dirty water will spill out of the bottom horn and ruin your bathroom floor.
Step 2: Unbolt And Remove The Toilet Bowl
Pry off the plastic caps covering the floor bolts, remove the metal nuts using an adjustable wrench, and lift the toilet straight up to break the old seal.
Use a flathead screwdriver to pop open the plastic bolt caps at the base of the toilet. Use an adjustable wrench to turn the nuts counter-clockwise. Older steel bolts frequently rust into place and spin freely when you turn the nut. If the bolt spins, grip the top of the threaded shaft tightly with locking pliers while turning the nut with your wrench. If the nut is completely seized, you must cut it off horizontally using a mini hacksaw or an oscillating multi-tool. Once the nuts are off, straddle the toilet, grip the inside rim of the bowl, and lift straight up. Set the toilet on its side on a thick towel or a piece of cardboard in another room.
- Success Checkpoint: You will know this step is complete when the toilet is safely moved out of your workspace without scratching your floor tiles.
- Common Mistake: Lifting the toilet by the tank. The tank is held to the bowl by two fragile brass bolts. Lifting by the tank will bend these bolts, crack the tank porcelain, and create a secondary leak.
Step 3: Clean And Inspect The Closet Flange
Stuff an old rag into the open drain pipe to block sewer gases, then use a putty knife to scrape all old wax off the toilet horn and the floor flange.
The open drain pipe will immediately begin venting methane and hydrogen sulfide gases into your home. Plugging the hole with a rag stops this hazard and prevents you from accidentally dropping a bolt down the sewer line. Take your putty knife and scrape the sticky remnants of the old wax ring off the closet flange on the floor. Wipe the flange clean with paper towels. Turn your attention to the bottom of the toilet and scrape off any wax stuck to the porcelain horn. Inspect the floor flange closely. It should sit approximately one-quarter inch above the finished floor surface. Look for hairline cracks in the plastic or rusted-out slots in the cast iron where the bolts slide in.
- Success Checkpoint: You will know this step is complete when you are looking at bare plastic, metal, or PVC on the floor and bare porcelain on the toilet.
- Common Mistake: Leaving a thin layer of old wax behind. A new wax ring cannot form a reliable chemical bond with dirty, oxidized old wax.
Step 4: Install The New Seal And Re-Seat
Insert the new brass closet bolts into the flange slots, press the new wax ring directly onto the closet flange, and lower the toilet straight down over the bolts.
Remove the safety rag from the drain pipe. Slide the flat heads of your new brass closet bolts into the horizontal slots on the side of the floor flange, positioning them so they point straight upward. Secure them in place using the thin plastic retainer washers included in your kit. Take your new wax ring and press it firmly into the center of the floor flange. Lift the toilet, stand directly over the flange, and look down through the mounting holes on the base of the toilet. Align these holes perfectly with the upright closet bolts and lower the toilet straight down. Once the porcelain contacts the wax, press your body weight into the center of the bowl to compress the seal.
- Success Checkpoint: You will know this step is complete when the toilet base rests firmly and completely flat against the bathroom floor.
- Common Mistake: Rocking the toilet side to side to compress the wax. Rocking creates permanent air gaps in the wax, destroying the waterproof barrier before you even turn the water back on.
Step 5: Secure, Shim, And Reconnect
Thread the metal washers and nuts onto the closet bolts, tighten them in an alternating pattern, and reconnect the water supply line to test for leaks.
Place the nylon washer, the metal washer, and the metal nut onto each bolt. Tighten the left nut one full turn, then tighten the right nut one full turn. Alternating sides pulls the toilet down perfectly level. Stop tightening the moment the wrench meets firm resistance. If the toilet rocks when you apply pressure to the rim, slide a hard plastic toilet shim under the gap to stabilize it. Reconnect your flexible water supply line to the tank and turn the wall valve counter-clockwise to fill the tank. Flush the toilet three times while holding dry toilet paper around the base to check for any escaping moisture.
- Success Checkpoint: You will know this step is complete when the toilet flushes multiple times with zero moisture appearing on the floor.
- Common Mistake: Over-tightening the floor nuts. Porcelain is brittle and lacks flexibility. Tightening the nuts past snug will cause the entire base of the toilet to shatter with a loud crack.
Wax vs. Rubber Seals: Which Should You Choose?
Choosing between a wax ring and a modern rubber seal depends on your subfloor condition, your comfort level with plumbing, and whether you have heated floors. The plumbing industry uses both extensively, but each material serves different structural scenarios.
1. Traditional Wax Rings
Traditional rings consist of molded petroleum wax and have been the plumbing standard for over a century. They are available in standard thicknesses and extra-thick variations.
- Pros: They are inexpensive, hold their seal for decades if left undisturbed, and conform perfectly to heavily pitted, irregular cast-iron flanges found in older homes.
- Cons: They are strictly single-use. If you accidentally lower the toilet onto the bolts slightly crooked and have to lift it back up, the wax is permanently deformed and goes into the trash. They are also incredibly messy to remove.
2. Modern Wax-Free Rubber Seals
Wax-free seals utilize engineered foam, silicone, or rubber, and most feature a built-in plastic funnel that guides wastewater directly past the flange lip.
- Pros: They are entirely reusable during installation. You can drop the toilet, realize you missed the bolts, lift it up, and try again without ruining the product. They leave no sticky residue and perform excellently over radiant heated floors where wax might soften excessively.
- Cons: They are more expensive than wax. Furthermore, thick rubber gaskets sometimes struggle to compress fully on flanges that sit too high above the floor, causing the toilet to rock.
Which Should You Pick?
- Choose wax if: You have an old home with an ancient, uneven cast-iron flange. Raw wax molds perfectly to imperfect metal.
- Choose a rubber seal if: You are a first-time DIYer nervous about aligning a heavy toilet perfectly on the first try. The repositionable nature of rubber removes the installation anxiety.
- Choose an extra-thick wax ring if: Your bathroom floor was recently tiled and the flange now sits completely below the level of the finished ceramic tile.
What Happens If The Floor Flange Is Broken?
If the floor flange is broken, cracked, or completely rusted out, a new wax ring will not stop the leak because the closet bolts have nothing structural to anchor against. The flange serves two vital purposes: it connects the toilet to the drain pipe, and it anchors the toilet firmly to the subfloor.
If the plastic outer ring of a PVC flange is snapped, you do not need to replace the entire plumbing pipe. You can install a metal spanner flange, also known as a repair ring. This semi-circular piece of heavy-duty steel slides directly under the broken plastic lip and screws solidly into the wooden subfloor, providing a fresh, indestructible slot for your closet bolts. If the flange sits lower than one-quarter inch below the floor surface, you must install hard plastic flange extenders. These stackable rings screw directly on top of the existing recessed flange, raising the mounting surface up to the correct height so the wax ring can compress properly.
Common Mistakes And How To Fix Them
Using Pliers Instead of a Proper Wrench
Attempting to tighten closet flange nuts with slip-joint pliers almost guarantees failure. Pliers slip off the small nuts, scrape the porcelain, and fail to provide the exact tactile feedback necessary to know when the nut is perfectly snug. Always use an adjustable wrench or a dedicated open-ended box wrench.
Caulking The Entire Base
Applying a bead of silicone caulk around the base of the toilet is standard practice to prevent mop water from seeping under the bowl, but sealing it 100 percent is a critical error. Always leave a two-inch gap in the caulk at the very back of the toilet facing the wall. If the base seal ever fails in the future, water will escape through this rear gap and alert you to the problem. If you seal the entire base, a future leak will remain trapped under the toilet, quietly rotting your subfloor and floor joists for months before you notice.
Double-Stacking Wax Rings Incorrectly
When a flange sits too low, homeowners often stack two wax rings on top of each other. If you must stack rings, the bottom ring must be a standard wax ring without a plastic funnel insert. The top ring should have the plastic funnel insert. If you put a funnel ring on the bottom, the funnel restricts the water flow and causes the top ring to blow out under pressure.
Ignoring A Rocking Toilet
A toilet that rocks even slightly when you sit down will eventually destroy its base seal. Wax does not bounce back. When the toilet rocks upward, it pulls away from the wax, creating a void that water will exploit during the next flush. If your floor is uneven, you must tap hard plastic toilet shims under the base until the fixture is completely rigid before tightening the bolts.
Frequently Asked Questions
Can you caulk around a leaking toilet to stop the leak?
No, you cannot fix a leaking base seal by caulking the outside of the toilet. The leak originates from the pressurized trapway underneath the fixture. Caulking the exterior base simply traps the escaping wastewater beneath the porcelain, forcing it downward into your subfloor where it will cause catastrophic wood rot and mold.
How long does a toilet wax ring last?
A standard petroleum wax ring will easily last 20 to 30 years under normal conditions. Wax does not degrade, dry out, or shrink over time. A wax ring only fails if the toilet becomes loose and rocks on the floor, or if aggressive mechanical plunging creates enough pressure to blow out the side of the seal.
Is toilet leak water a health hazard?
Yes, water leaking from the base of a toilet during a flush is considered black water. It contains untreated human waste, bacteria, and potential pathogens. You must wear disposable gloves during cleanup, sanitize the hard floor surfaces with a bleach solution, and thoroughly wash your hands after completing the repair.
Will homeowner’s insurance cover water damage from a toilet?
Homeowner’s insurance typically covers sudden and accidental water damage, such as a pipe bursting or a toilet unexpectedly overflowing. However, they almost universally deny claims caused by gradual seepage over time, which is exactly what a slow base seal leak produces. Fixing this leak immediately is the only way to protect your finances.
How tight should toilet floor bolts be?
Toilet floor bolts should only be tightened until they are firmly snug against the porcelain. You should tighten them using one hand on a small wrench. The moment the wrench stops turning easily, stop applying pressure. Applying heavy torque will instantly crack the brittle porcelain base, requiring you to purchase an entirely new toilet.
The Bottom Line On A Toilet Leaking From Bottom When Flushed
Fixing a toilet leaking from bottom when flushed is an accessible DIY project that requires patience rather than advanced plumbing skills. By properly diagnosing the leak, taking the time to thoroughly clean the floor flange, and strictly avoiding the urge to over-tighten the floor bolts, you can restore the watertight seal in a single afternoon. Always ensure the toilet is perfectly stable and free of any rocking motion before finishing the job, as a rigid, unmoving fixture is the only guarantee that your new seal will last for decades.